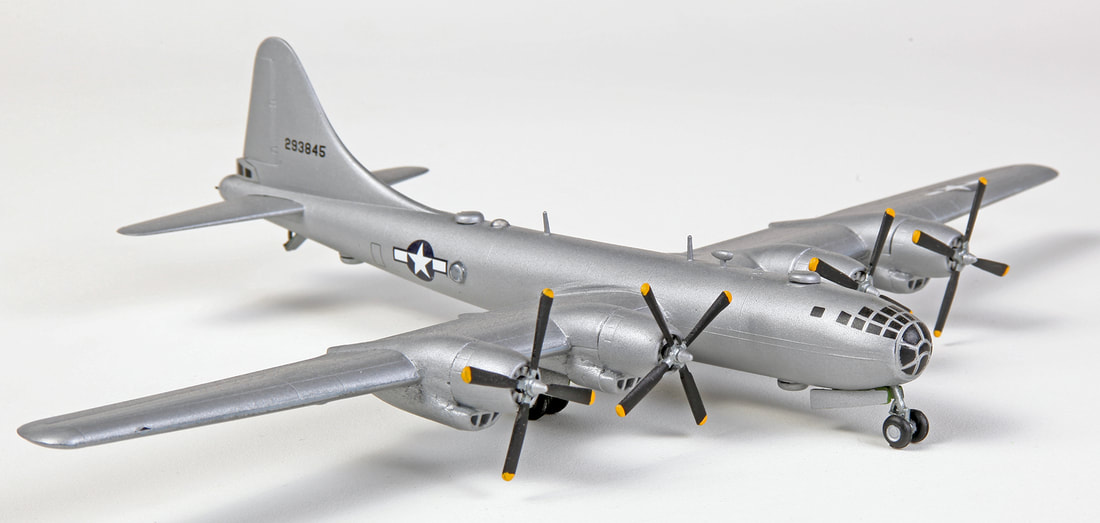
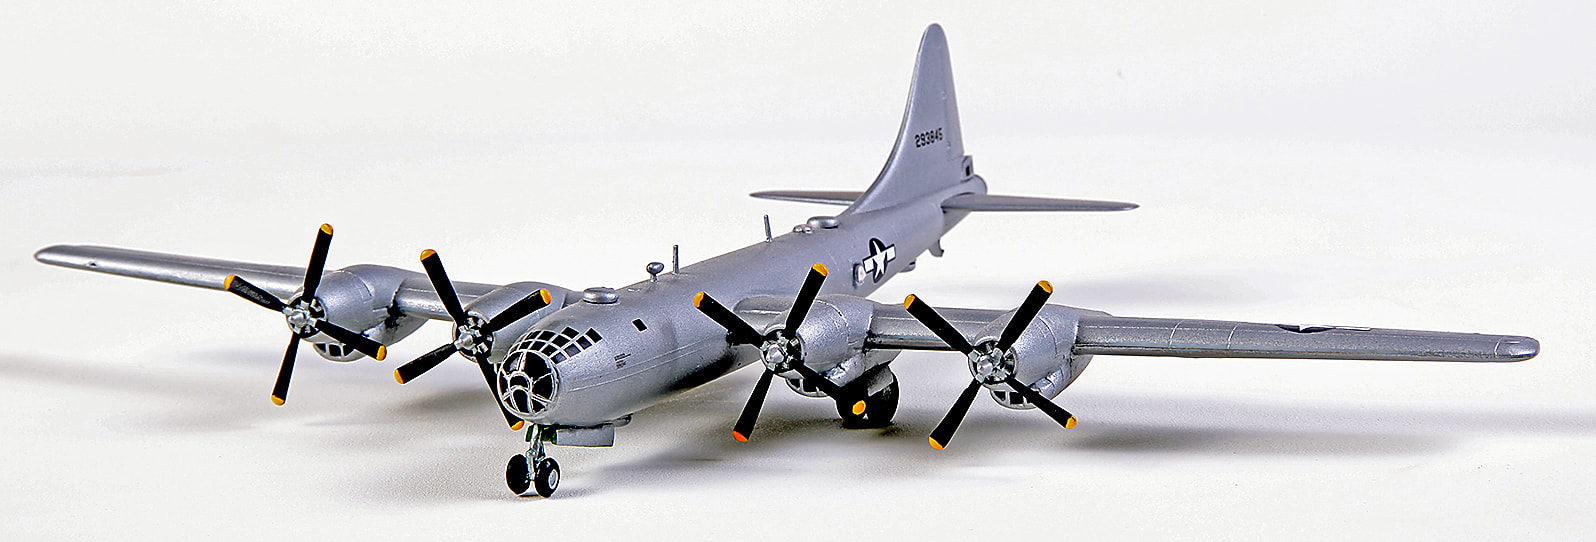
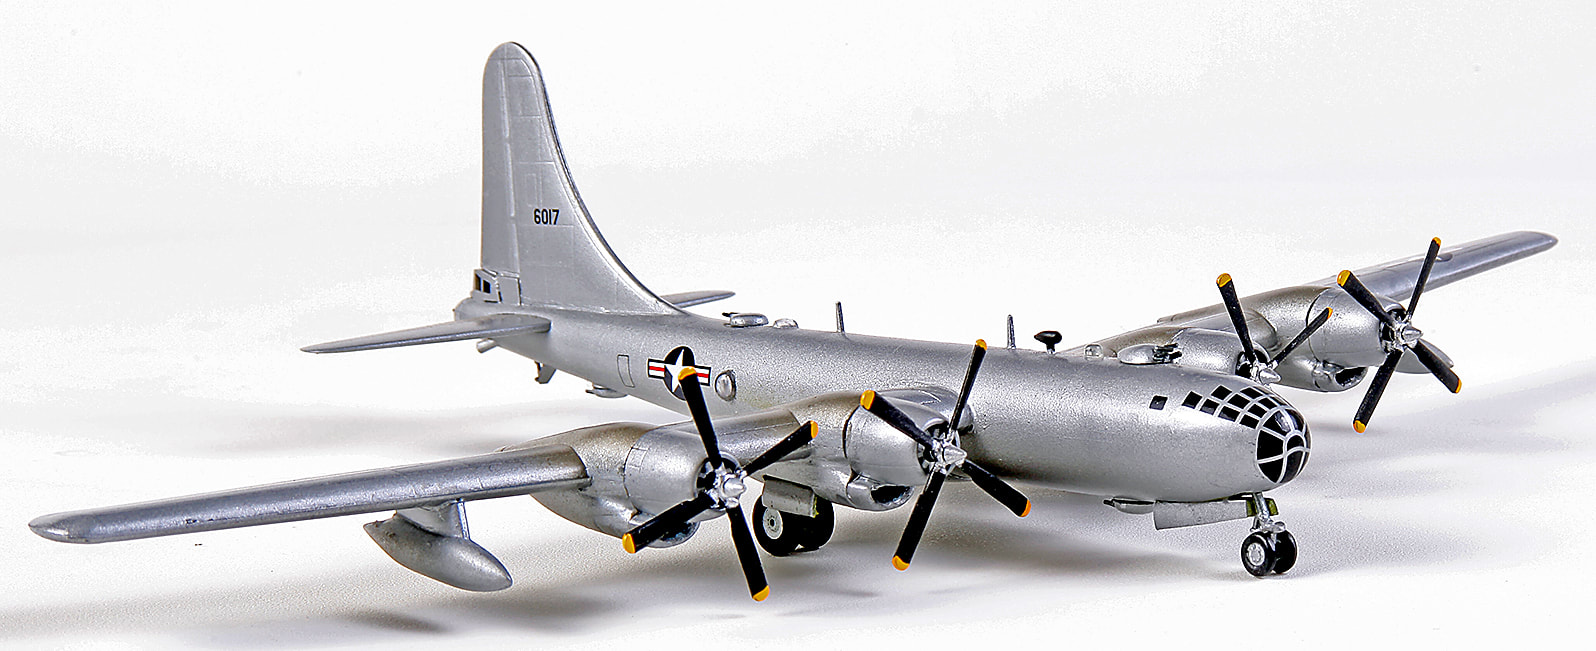
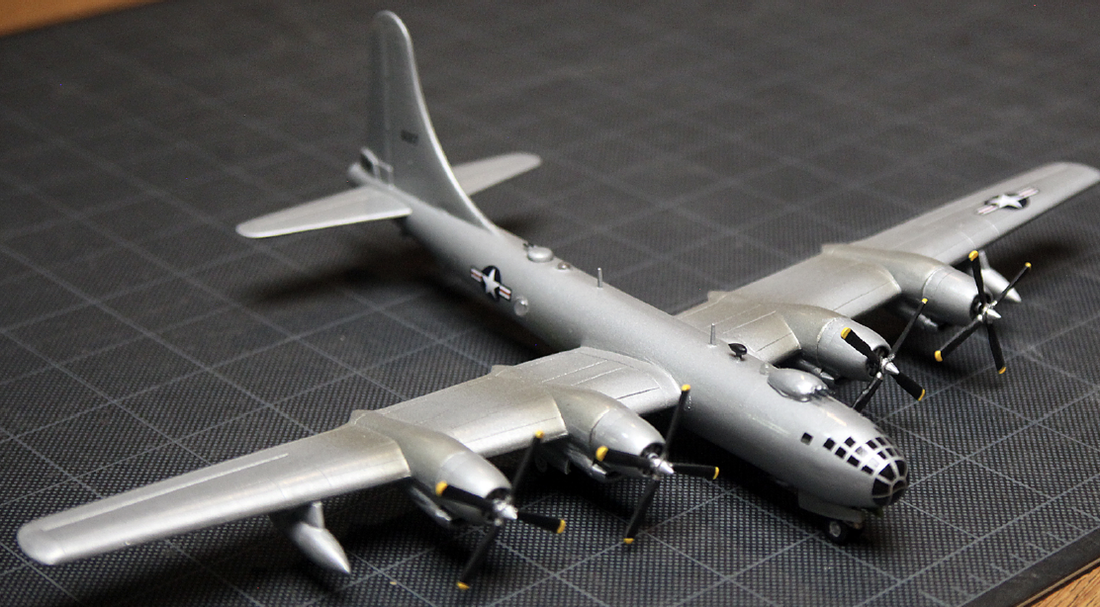
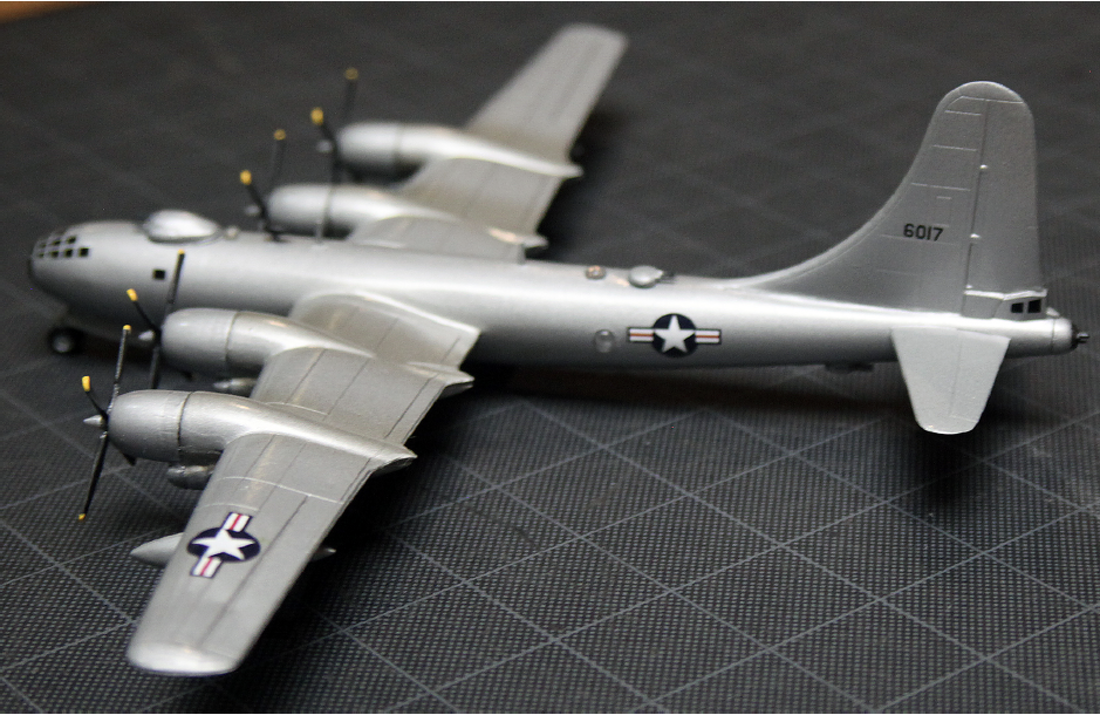
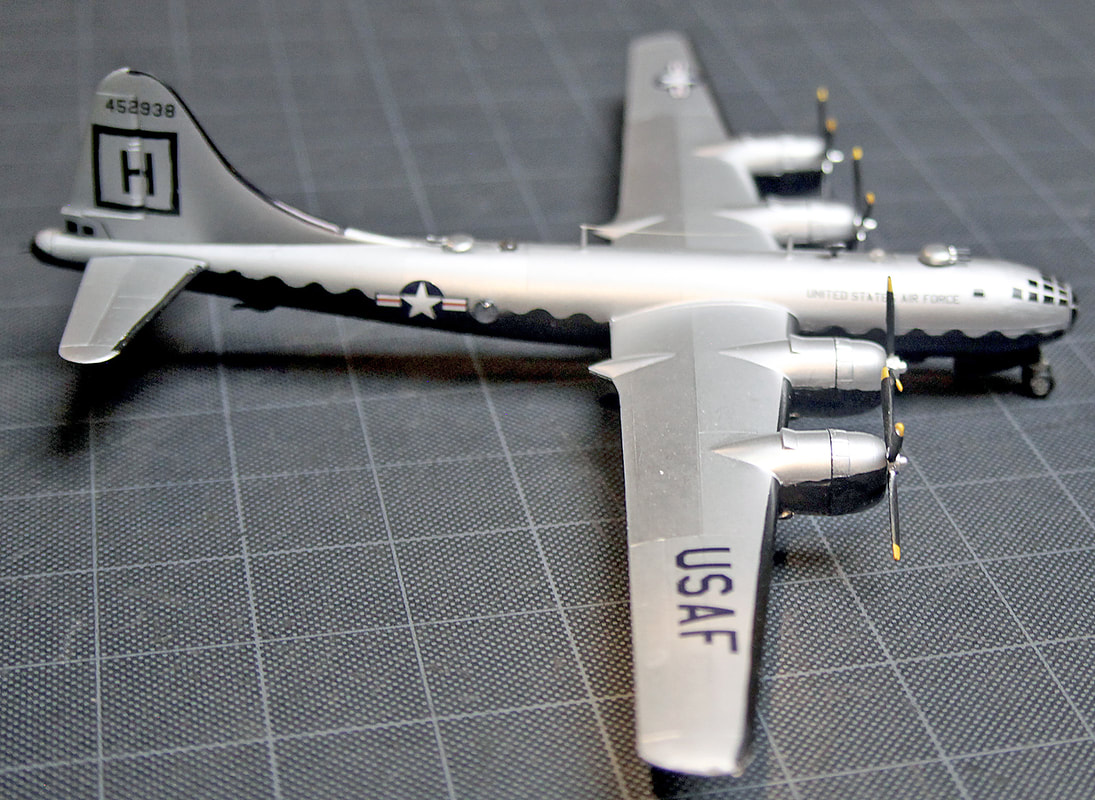
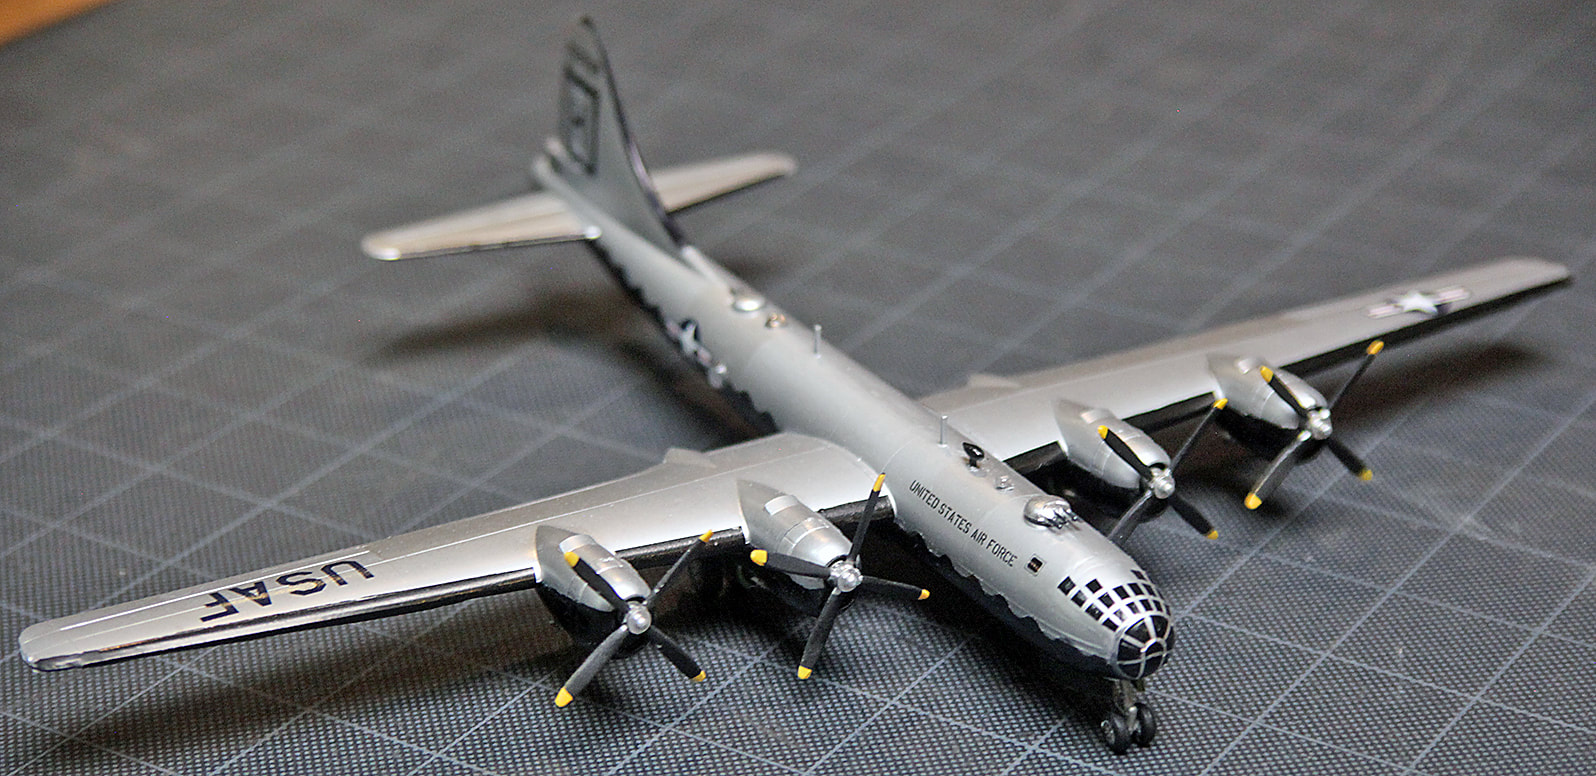
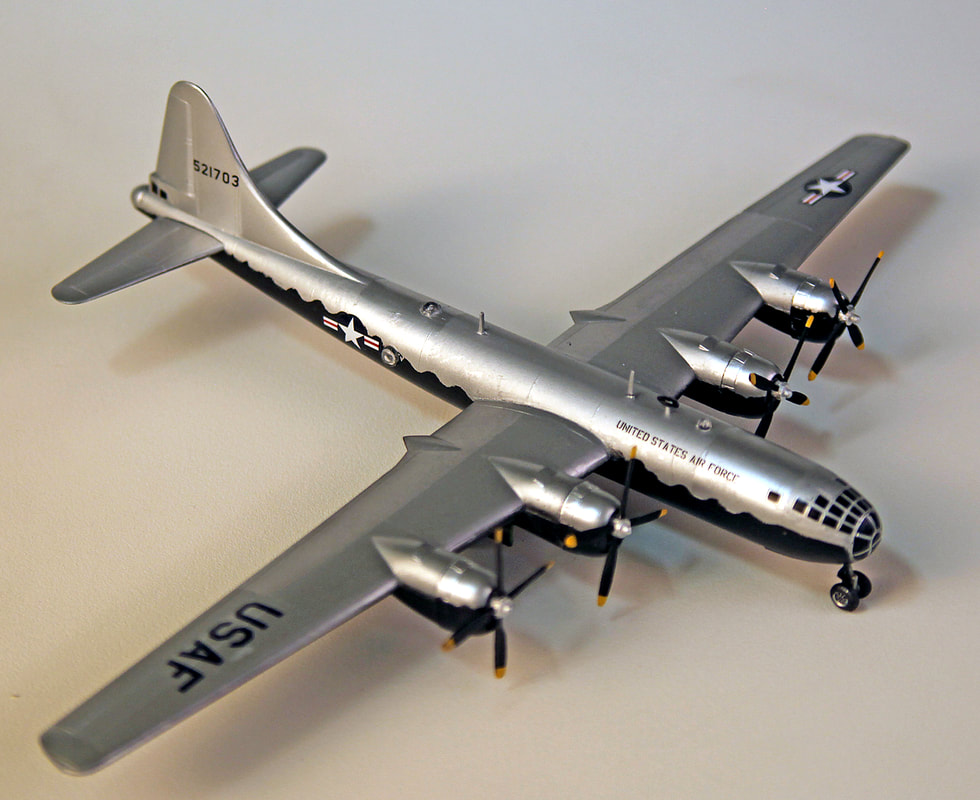
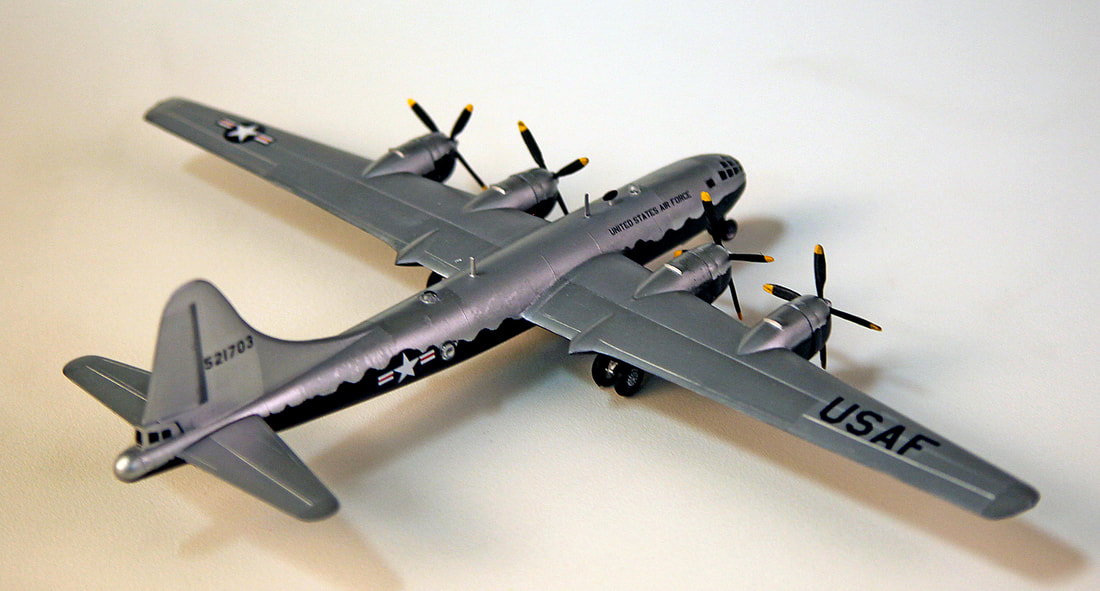
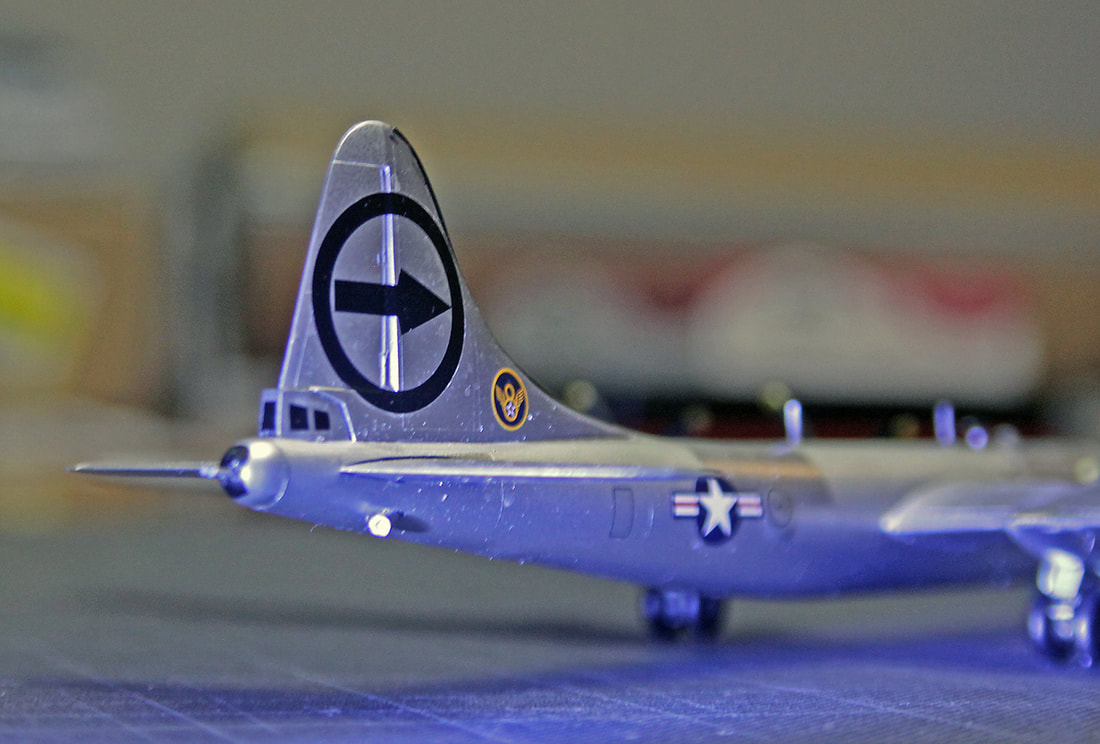
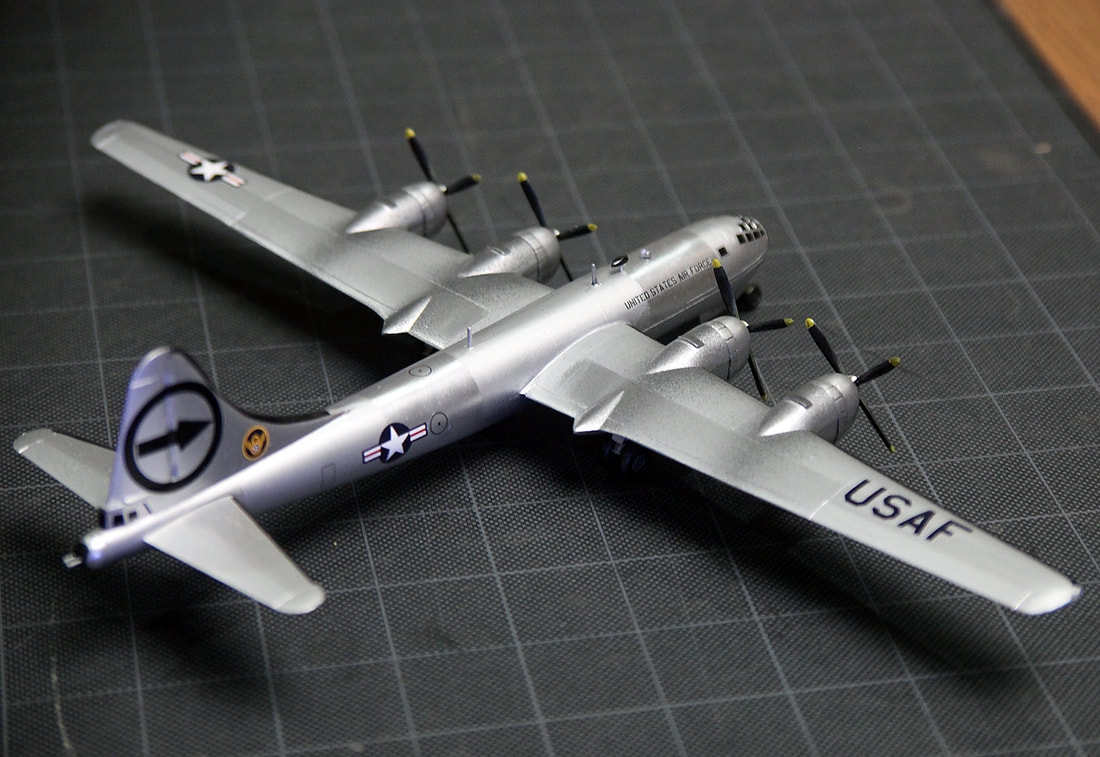
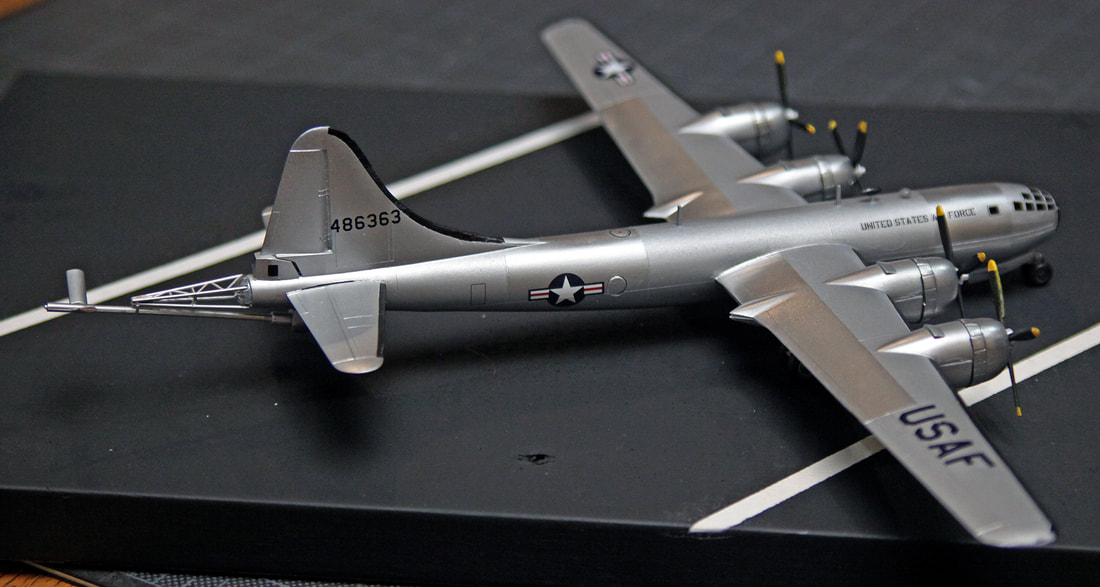
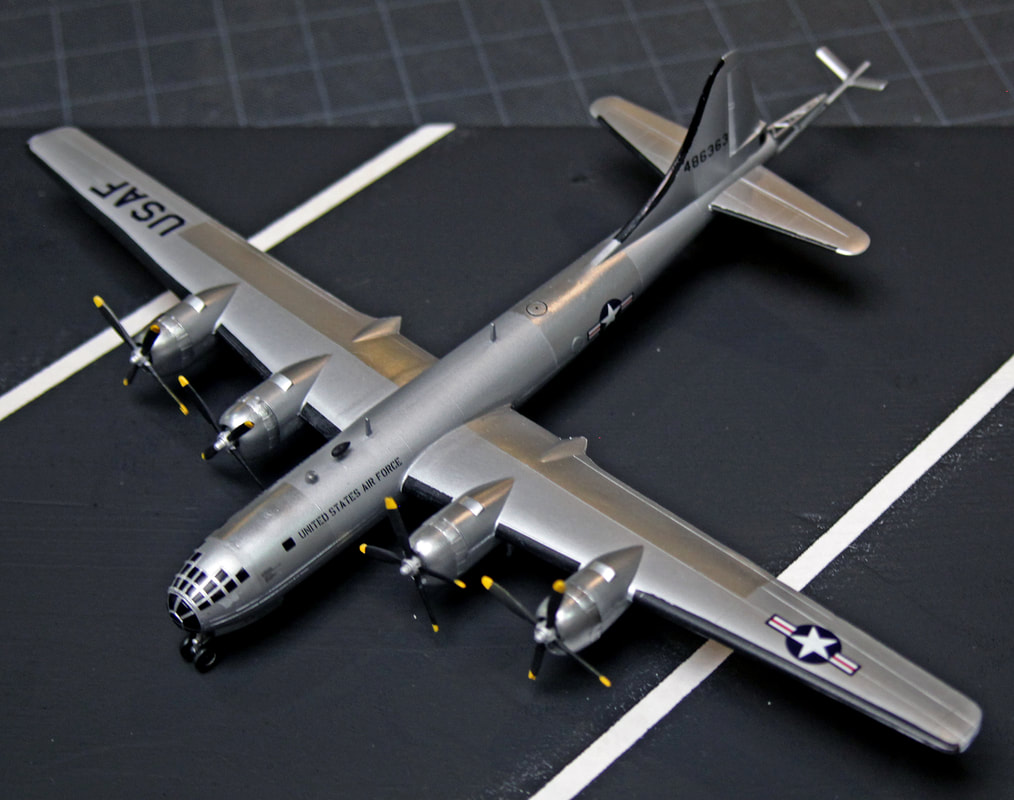
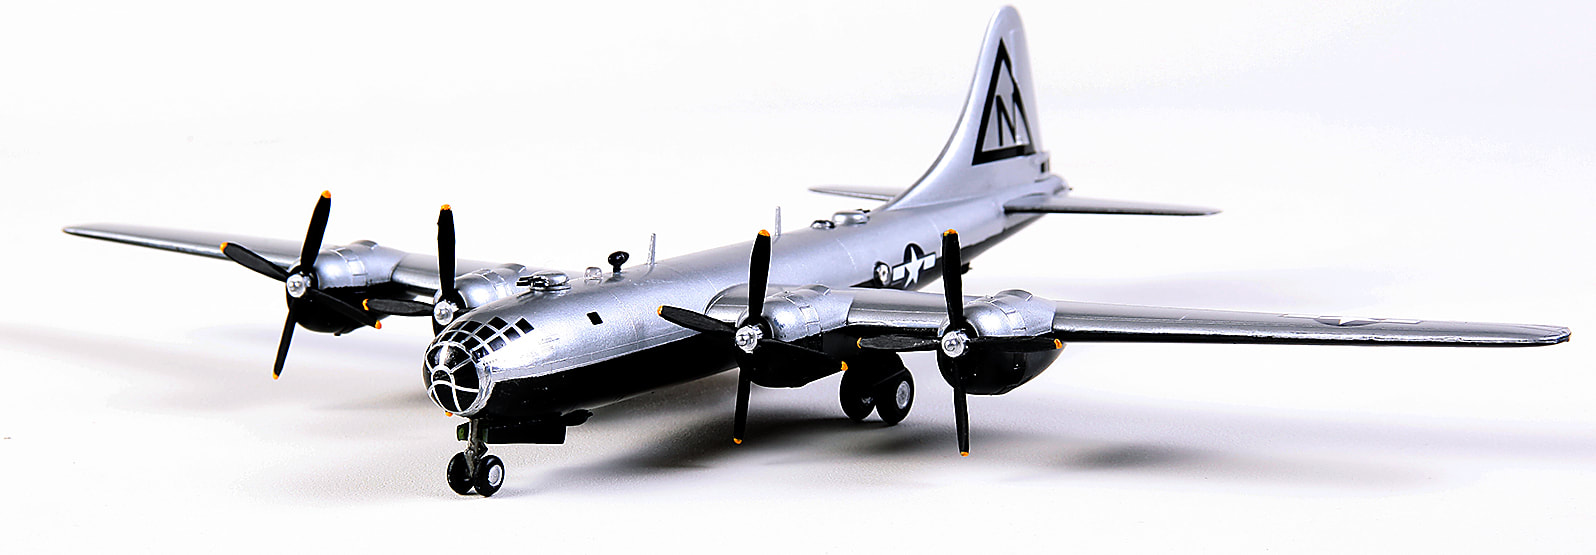
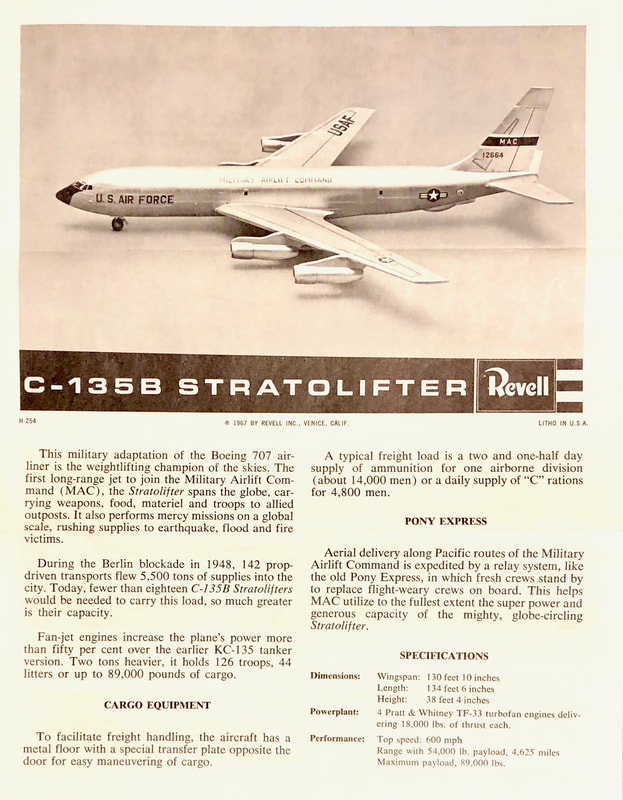
The Boeing B-29 is an iconic heavy bomber from WWII. It is perhaps best known as the aircraft type used to drop two atomic bombs on Japan, ending that war. Post-war, it was developed into the B-50 and C-97/377 transport. Boeing’s Dash-80, the prototype to the 707 airliner, retained the cross-section of the KC-97. Of course, that changed when the KC-135 and 707 designs were finalized, but the 707 strongly influenced every Boeing airliner thereafter. It could be argued that there is a lot of B-29 DNA in any Boeing airliner. So, the type has had an undeniable influence on modern commercial aviation and the B-29 has always been a favorite of aircraft model builders.
|
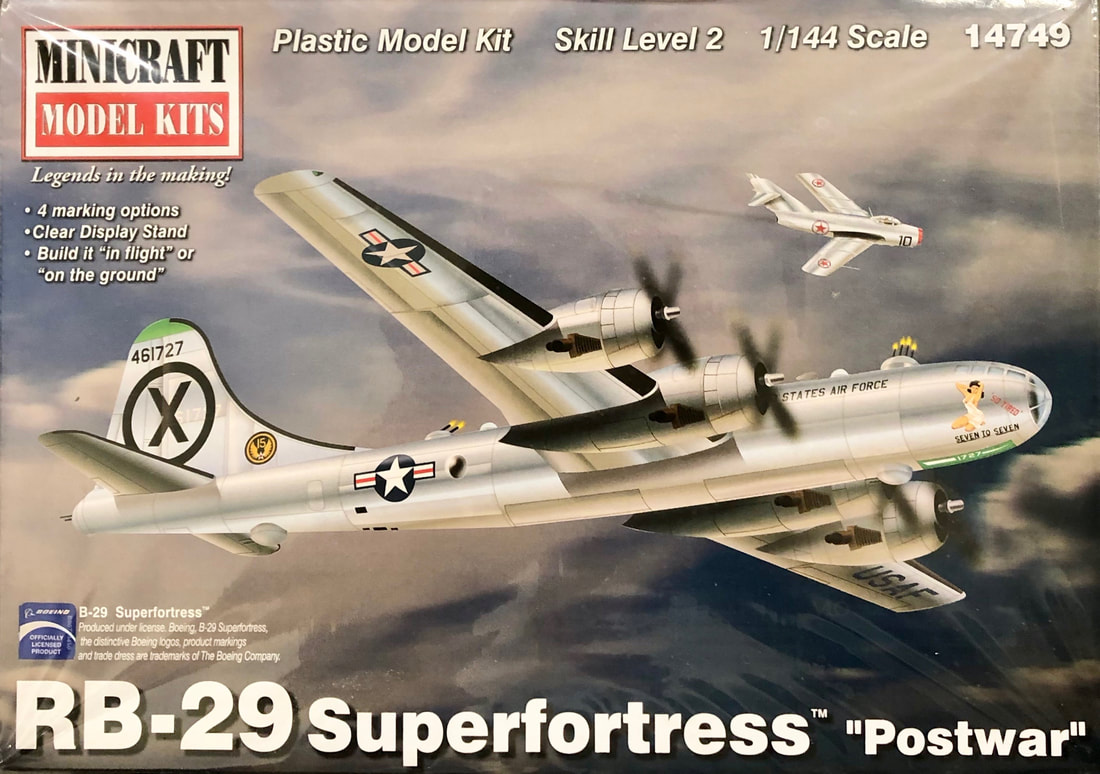
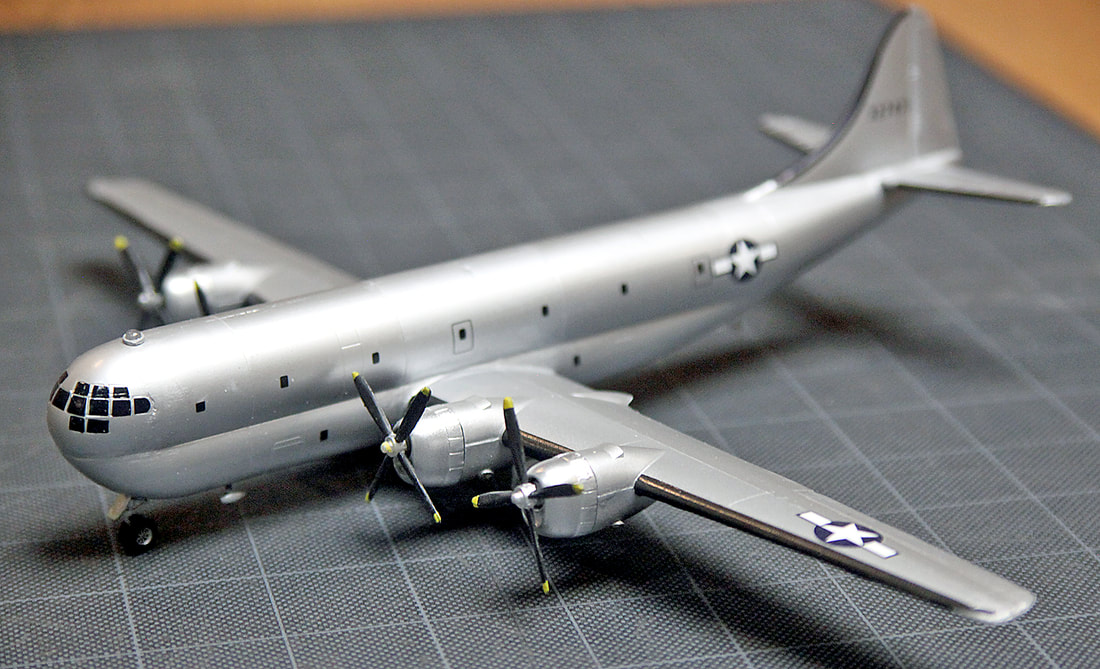
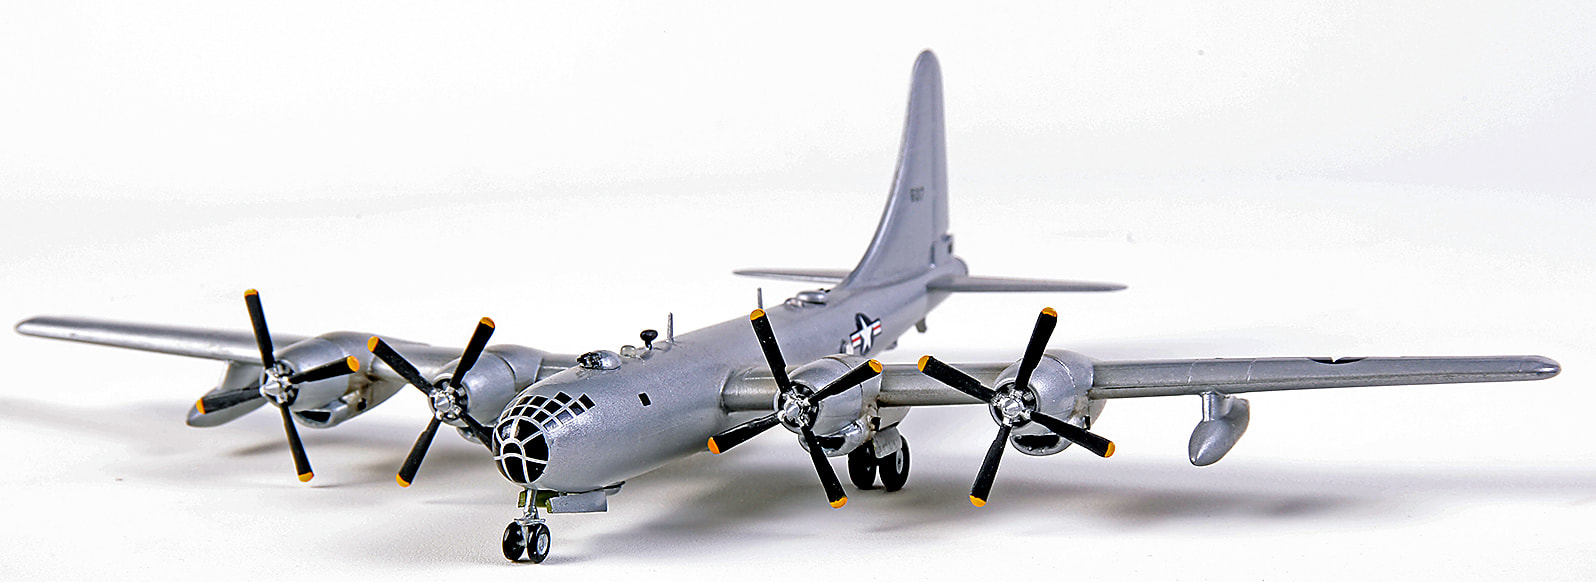
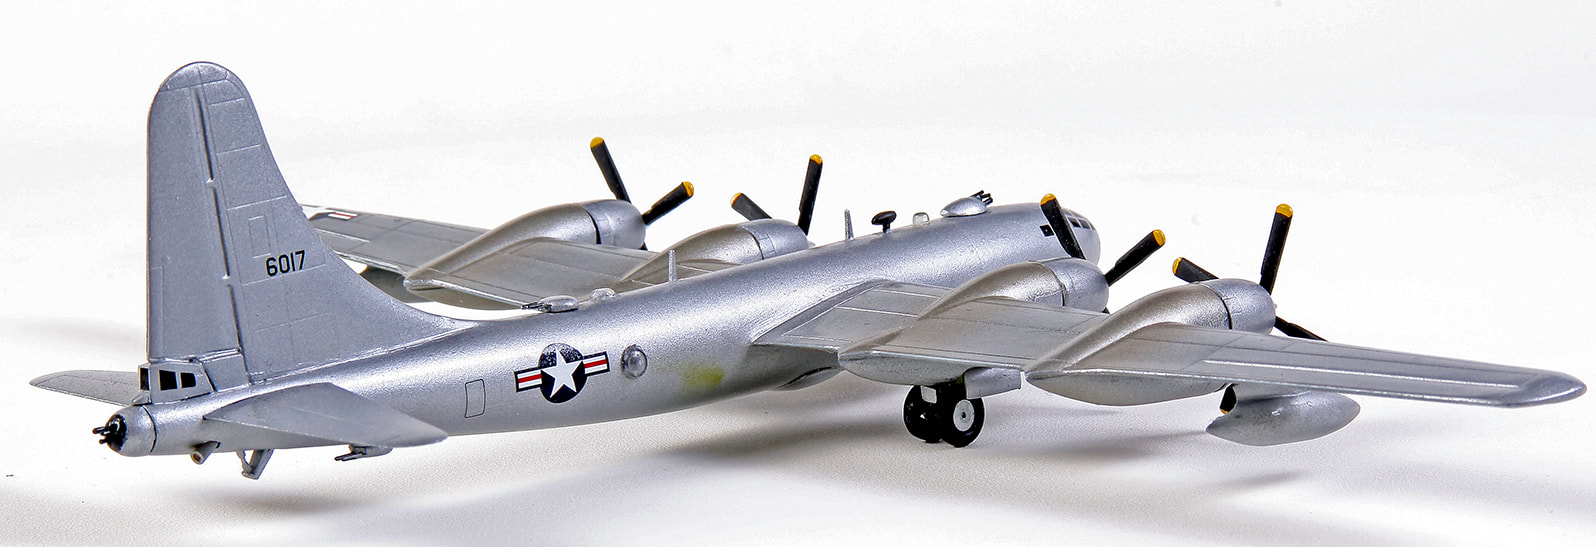
Box art for "Seven to Seven" portrays the aircraft during the Korean War. A need for additional forward defensive firepower necessitated the development of a quad gun turret, portrayed for the first time in this new Minicraft release.
|
During the early years of plastic modeling, box-scale B-29 kits were produced by Revell and Aurora. In 1966, Airfix released a B-29 in 1/72 scale. This was a big model at 16.5” in length with a nearly 24” wingspan. Monogram went even bigger in 1977 with a B-29 in 1/48 scale. Until the debut of their 1/72 B-36, this B-29 was hailed as the largest injection molded aircraft kit sold. At two feet in length with a nearly three-foot wingspan, this kit would demand a lot of effort on the part of the modeler to get built (nearly the entirety of the interior was depicted in the model), and of course, display space would be a major thing to consider. And let’s not get started about pricing.
|
A perfect alternative for an easygoing, economical build is the B-29 kit in 1/144 scale by Minicraft Models. With a 12” wingspan and 8.5” length, it’s still plenty of model with a low MSRP of $19.99.
|
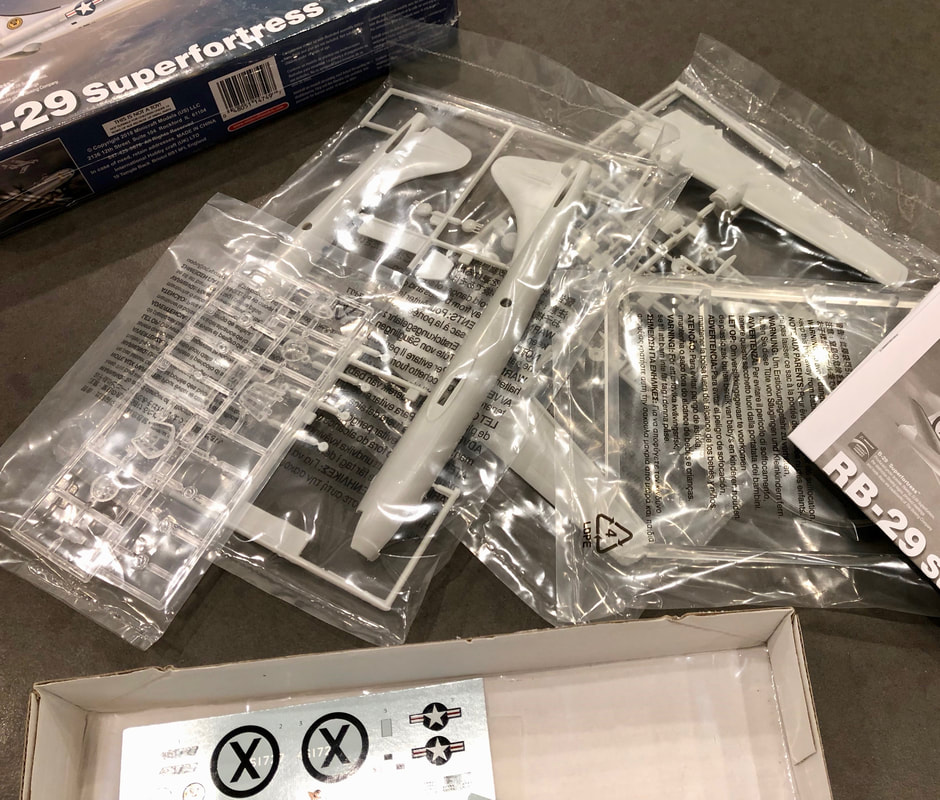
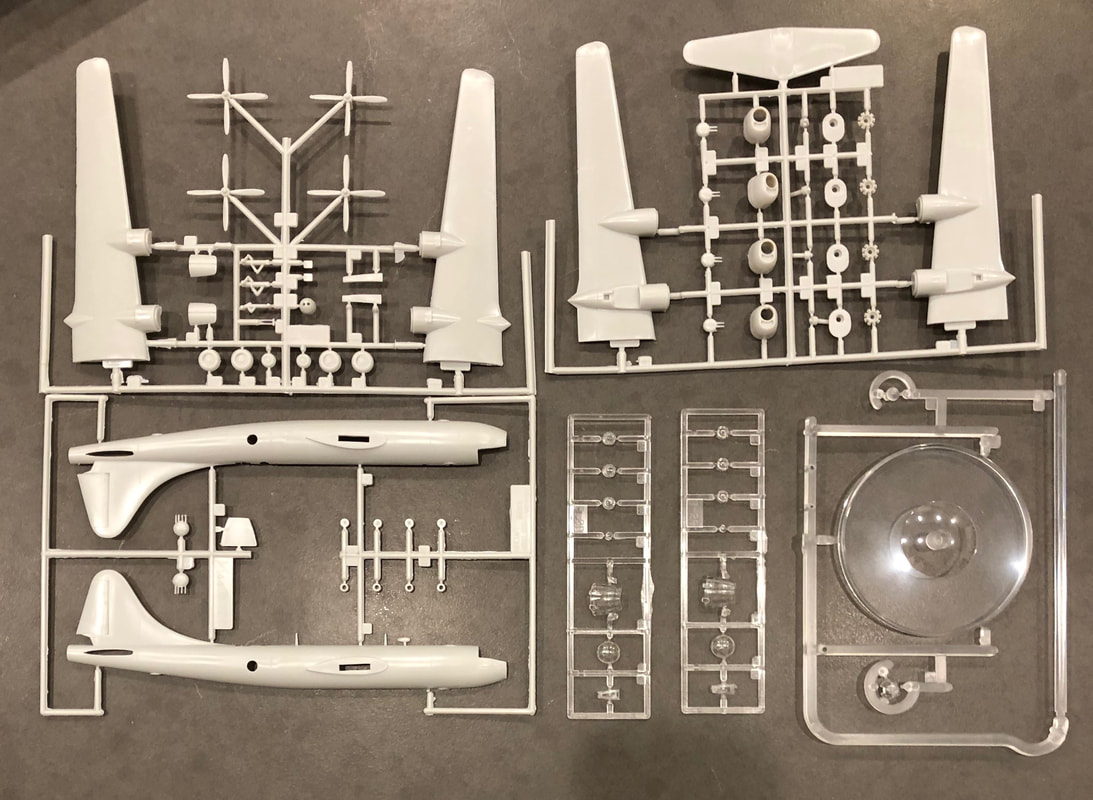
Minicraft meets your high expectations for things you like to see in a top-quality model kit. To protect the parts, the sprues are separately bagged, and the box is extra-sturdy. There's a lot of extras crammed in there!
|
Quite a few of the classic Minicraft 1/144 kits have nice little surprises, being ahead of their time when originally tooled. It’s one of many reasons they are still in demand after decades on the market. The 1/144 B-29 has very nice engines for the scale, accurately depicted with eighteen cylinders! Cowl flaps are also beautifully done and general fit of the engines is exceptional. Normally, building a four-engine prop plane is a challenge, but not with this kit—the engines basically fall together.
Minicraft Models has “plussed” a number of their 1/144 scale kits by adding improved parts in recent years. The classic Minicraft 1/144 B-29 kit came with four .50 caliber twin-gun turrets. Later B-29’s had quad-gun turrets. New tooling in the Minicraft kit provides a pair of quad-gun turrets! The headliner of this release (“Seven to Seven”) uses one of them in the top-front gun position. The regular twin-50’s are still there—all four turrets! Whichever version you decide to build will provide you with parts left over for other projects. |
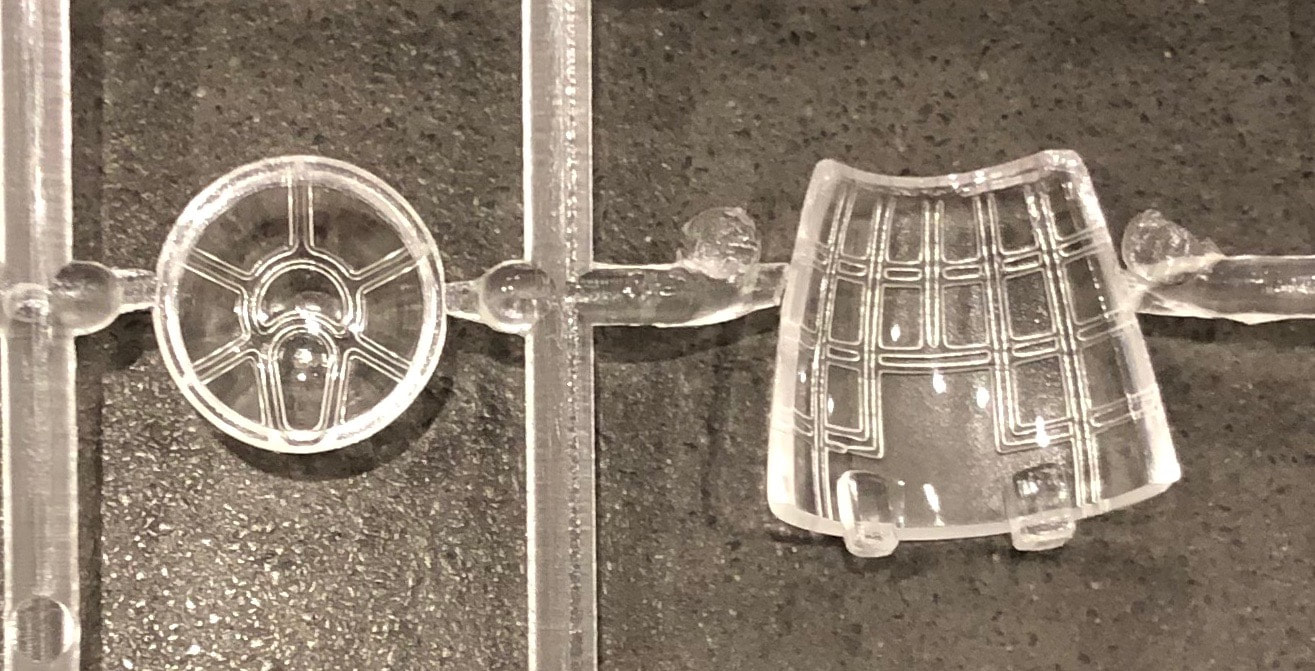
The biggest improvement to the plastic is the addition of new clear plastic parts. A new canopy and nose Plexiglas feature nicely engraved framing.
|
When I initially opened the kit, I thought there were two sets of clear parts included by mistake, but one set has the fuselage plugs needed to delete gun positions for the R&D versions or future re-releases of the Silverplate bombers such as the Enola Gay and Bock’s Car. You can use the other clear parts set to improve older 1/144 B-29 kits if you have them.
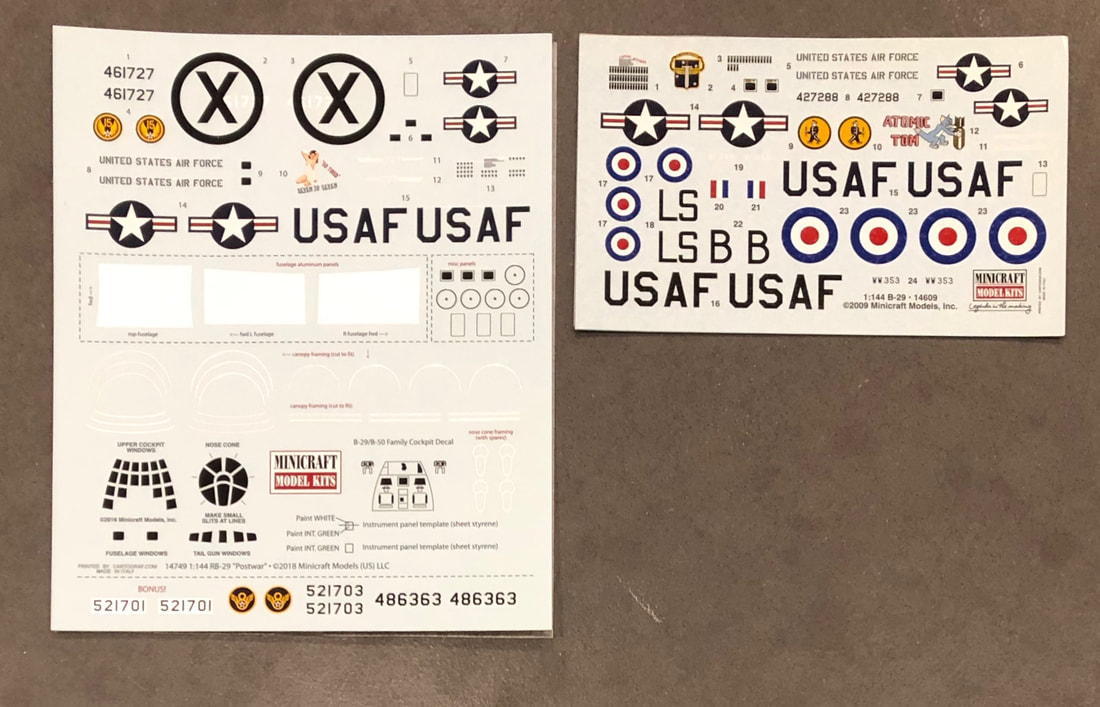
Markings include two complete decal sheets! The entire sheet from previous release 14609, “Atomic Tom” is included, and a new, larger sheet featuring “Seven to Seven,” a Korean War-era RB-29, has been created for #14749. This provides you with the option of doing any one of four different airplanes. Both sheets are printed for Minicraft by Cartograf, meaning the artwork is rendered with ultrafine resolution and in perfect register. Cartograf decals are also well known for being easy to apply and settling over curves and detail with little or no fuss. |
Minicraft didn't send you two sets of clear parts by mistake! Each clear parts sprue is a little different! Plus, it's nice to know you have a spare windscreen in case you make a mistake while installing it!
|
Even with the new-improved clear windows, some modelers may prefer decal windows instead, and a full set of black decal “windows” are now included for those modelers who prefer to paint over the clear parts.
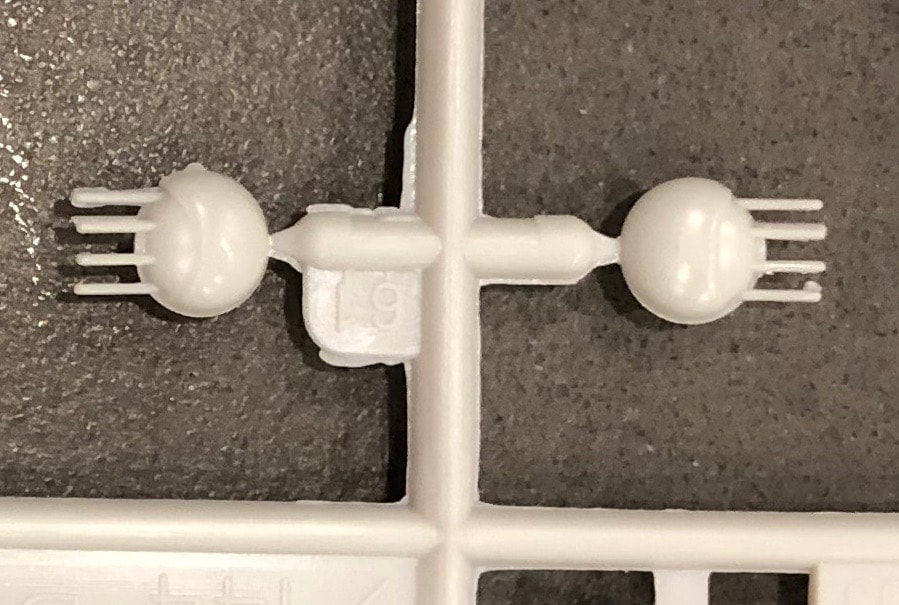
As if these new extras aren’t enough, the kit also includes one the new Minicraft pedestal stands made entirely of clear plastic. The alternate set of four “in-flight” prop hubs are still there if you want to build your B-29 in flying condition.
If you don’t choose to use the stand for the B-29, it could be used for any other “in-flight” project. The post on the stand can easily be cut to vary the height of the model. It’s another nice bonus that adds to the value of the kit.
Each of the four marking options is good enough to make you want four kits! At the low price, you'll be tempted.
Regarding the kit’s “manners,” parts fit is very good. Flight surfaces have nicely engraved lines, and panel lines are finely raised. The need for parts cleanup is minimal. There are a few round ejector pin marks in non-visible places and some minor sinkholes. Only contest modelers will probably care about these, and they’ll be easy to fill with your favorite modeling putty.
The Minicraft kit is inexpensive at only twenty bucks list-price and easy to find. Parts fit is great and the kit goes together quickly and easily as it always has. As a bargain, you can buy multiples of the kit to finish all the cool decal schemes that Minicraft has provided, or you can do any number of conversions.
|
A common modeler’s refrain when it comes to buying a re-release of a beloved kit is, “I already have it.” Minicraft has provided enough enhancements to this perennial favorite that you will definitely want to add this one to your collection even if you’ve got one or more of the older kits. Don’t forget that the new kit comes with TWO of the new windshield sets! You can use the spare to enhance the older kit that you may already have. There will be leftover decals (including insignias) that you can use on other 1/144 B-29 projects, especially when using those pre-1990’s kits that had lesser quality decals in the first place. And for those keeping track of different kit variants, the four-gun turrets provide a brand-new version to add to your collection.
|
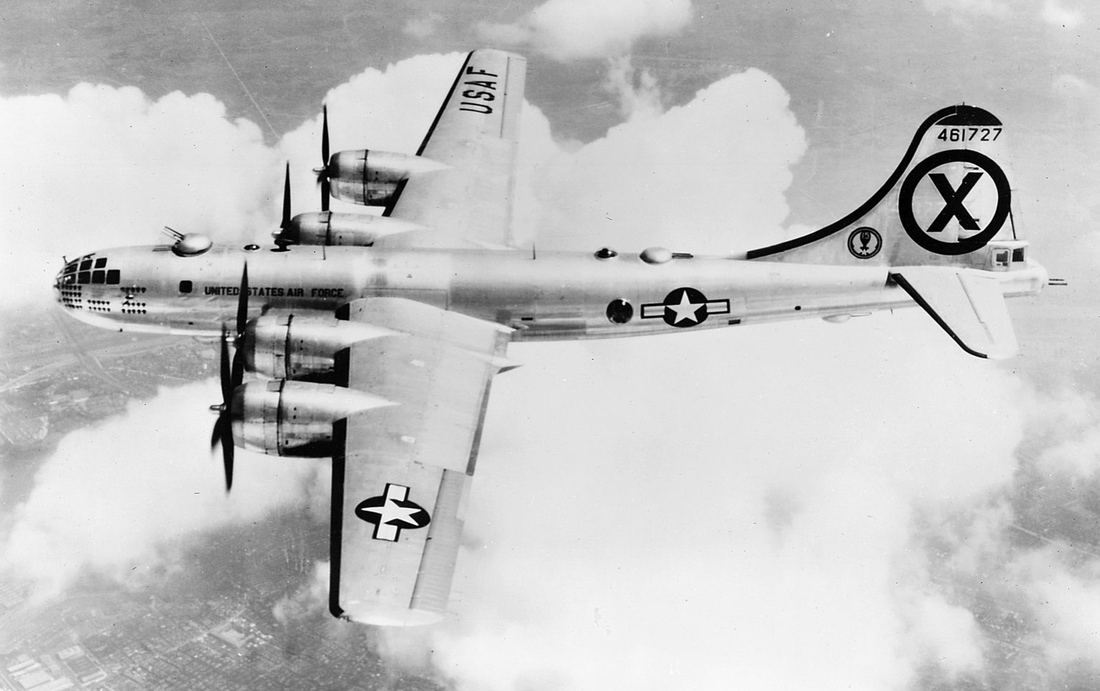
A Wikipedia photo of "Seven to Seven" in flight. Note that the forward quad-gun turret is larger than the rear turret. Minicraft got this detail right with the new parts.
|
Dem Brudders are very excited about what Minicraft is doing with this kit and many others from their substantial 1/144 scale line. They’re worth a closer look! We give the new RB-29 an enthusiastic four thumbs up!
SPECIAL THANKS TO MINICRAFT MODELS FOR PROVIDING THIS KIT FOR US TO REVIEW! CHECK OUT THE ENTIRE LINE OF MINICRAFT MODELS AT MINICRAFTMODELS.COM
SPECIAL THANKS TO MINICRAFT MODELS FOR PROVIDING THIS KIT FOR US TO REVIEW! CHECK OUT THE ENTIRE LINE OF MINICRAFT MODELS AT MINICRAFTMODELS.COM
(SPONSOR LINKS)
BONUS SECTION - ADDITIONAL CONTENT RELATED TO MINICRAFT'S RB-29 KIT
15 SEPT 2020 UPDATE: WE'VE ADDED ADDITIONAL PICTURES OF LEWIS NACE'S B-50 CONVERSION!
ANSWER TO DEM BRUDDERS TRIVIA EXPLAIN-THE-DECALS CHALLENGE:
We didn't have a clue about the bonus decals, but Lewis Nace, president of Minicraft Models, was kind enough to explain that he couldn't resist including a few tantalizing extras with this release that can be used with your other 1/144 models. The model kit's decal scheme represents a 15th Air Force plane, but also included in the Bonus Corner is the extra pair of 8th Air Force decals, which has many possibilities for portraying aircraft from the "Mighty Eighth" (not just B-29's). However, the B-29 on display at Barksdale AFB has that logo.
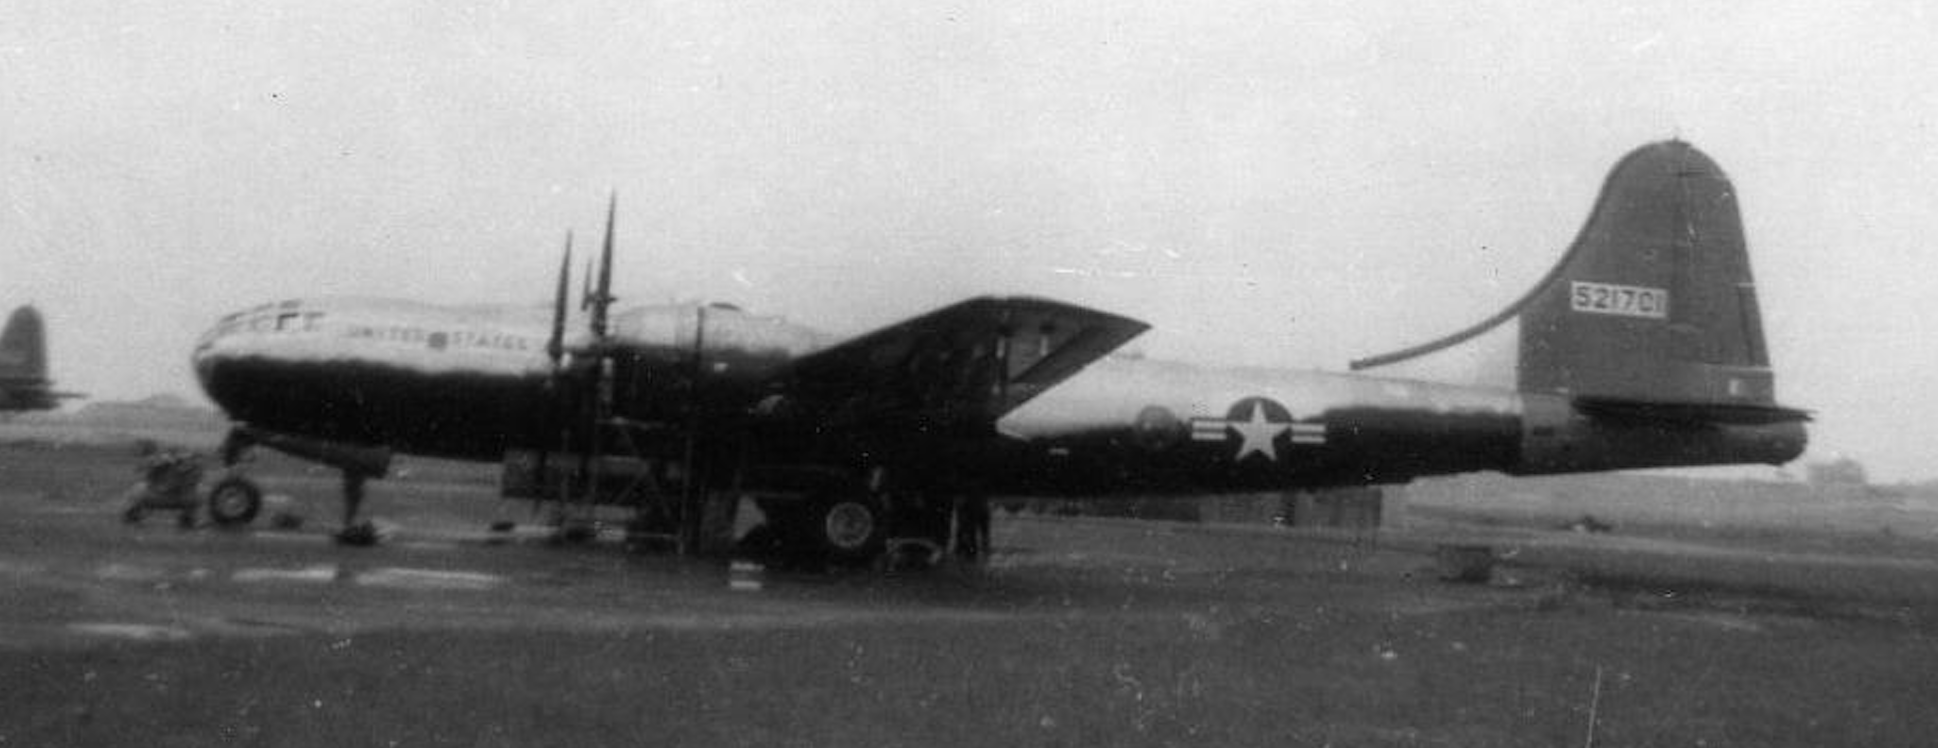
The 52701 serial is for a B/29/KB-29M that could be used on a post-war KB-29 with high-visibility Arctic markings (bright-red stripe on tail and outer wing panels). This is why the numbers have a silver background; they go over that bright-red tail! This would be a striking model.
|
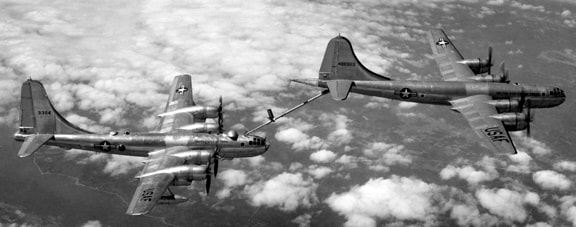
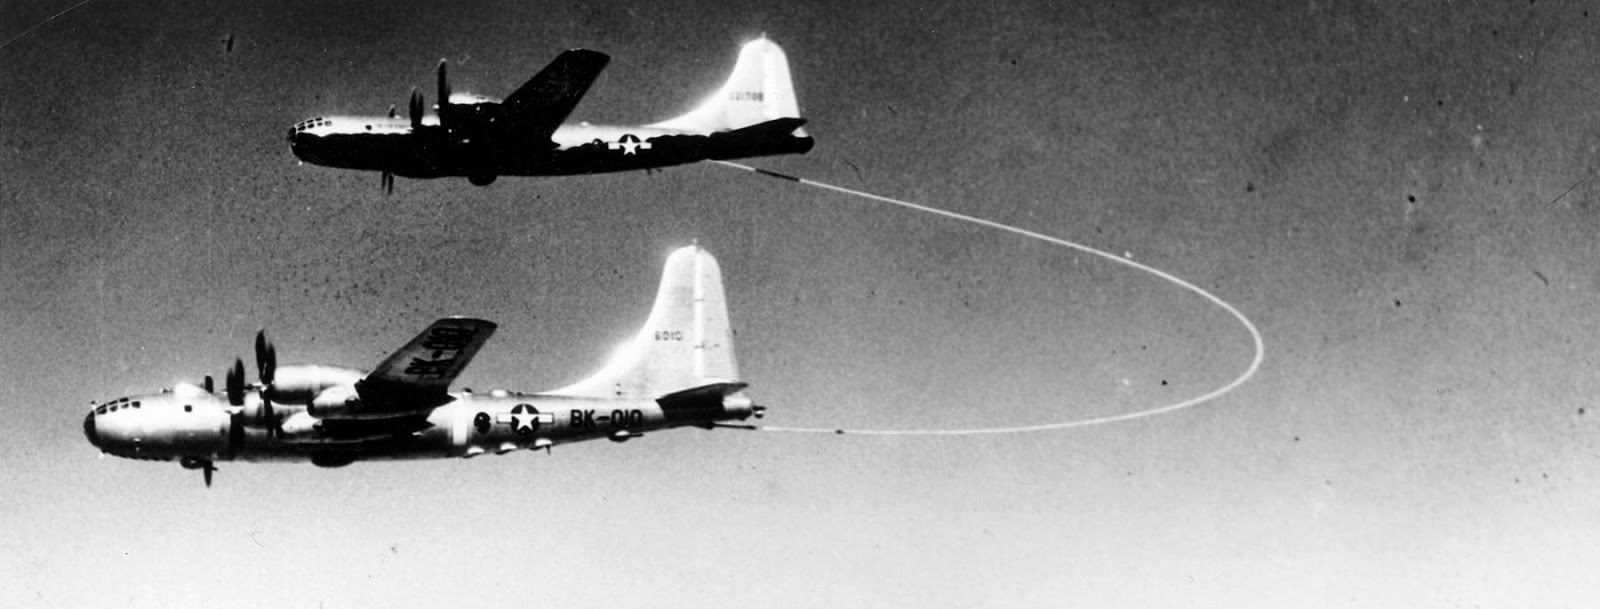
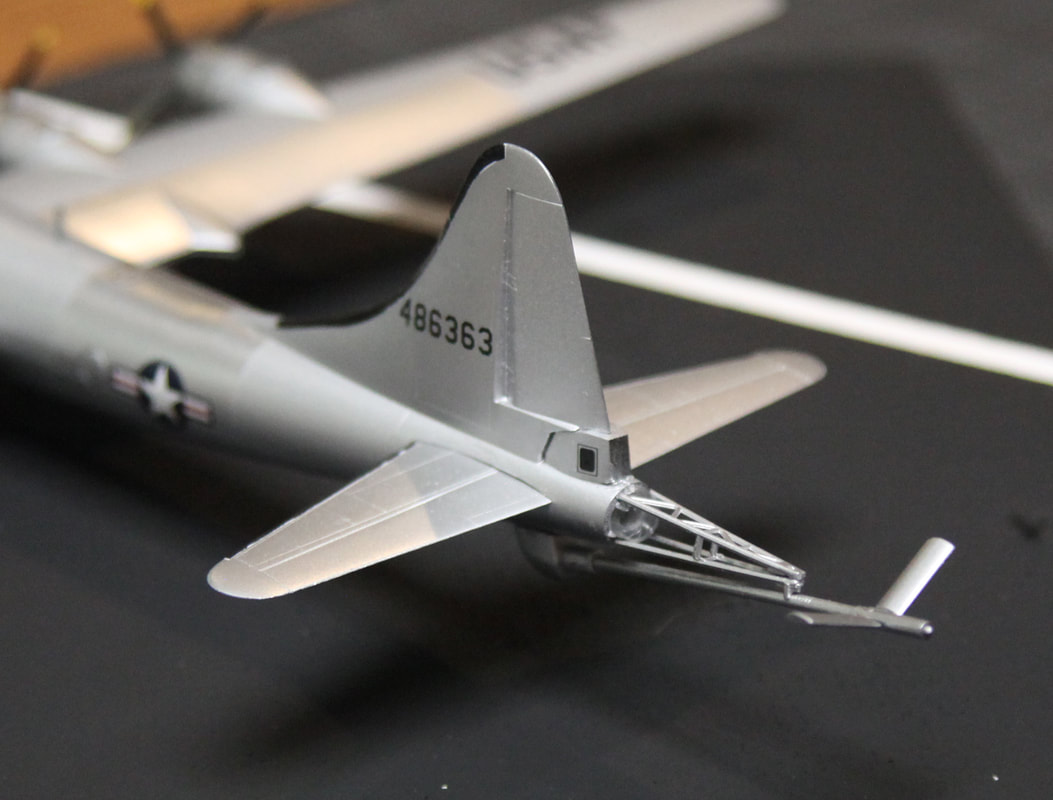
Lewis also explains that serial 52703 is for a B-29/KB-29M (used the old-style "hauling line,") and 486363 is a KB-29P boom tanker (later KB-29 tanker, which included a flying boom). The hauling-line versions are easier conversions than the boom versions, so that high-vis KB-29M would be a pretty easy build. Scratchbuilding a flying boom shouldn't be that big a deal and with these decals, Minicraft makes it that much easier to add a refueling variant to your B-29 collection.
|
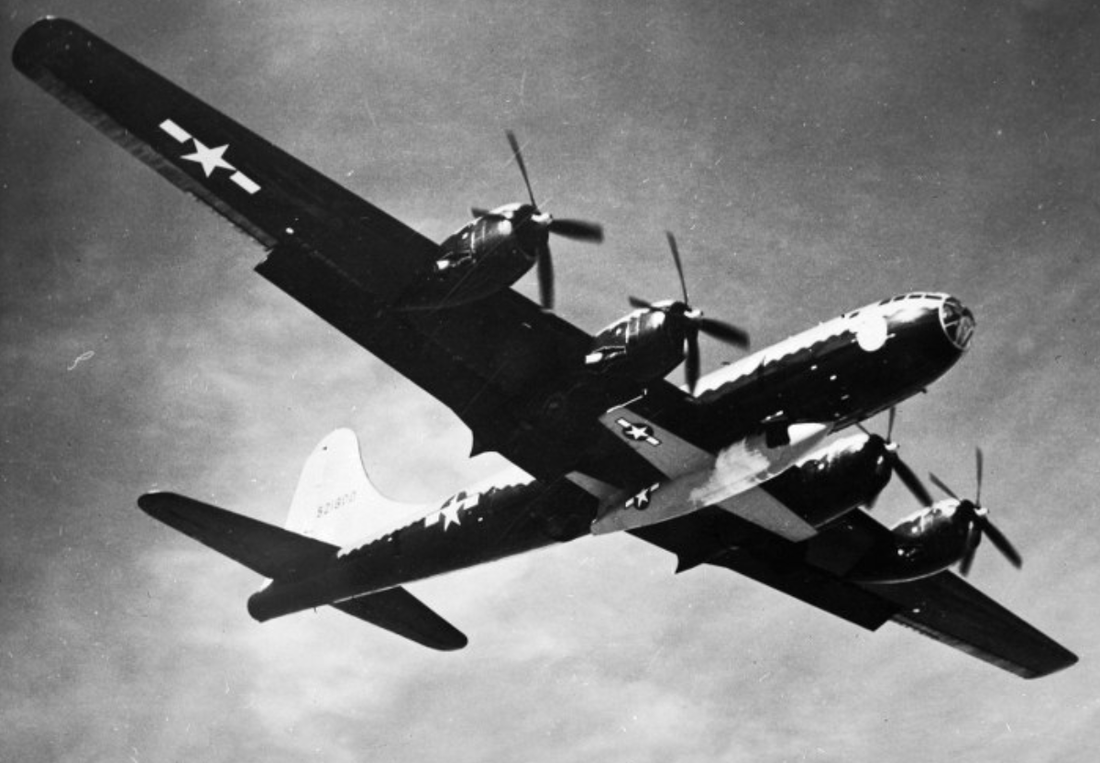
KB-29M, tail# 52703 uses the early "hauling line" refueling method that was abandoned when the flying boom was proved more effective. Photo courtesy of Lewis Nace.
|
Technically, you can make the case that kit #14749 includes decals for at least seven planes, not just four!
We have it on good authority that some additional recent releases of Minicraft kits include bonus decals! Stay tuned to Dembrudders.com for additional Minicraft kit reviews where we'll examine these extra markings!
We have it on good authority that some additional recent releases of Minicraft kits include bonus decals! Stay tuned to Dembrudders.com for additional Minicraft kit reviews where we'll examine these extra markings!
SPECIAL GUEST MODELER GALLERY: LEWIS NACE, PRESIDENT OF MINICRAFT MODELS
Dem Brudders are thrilled to have Minicraft Models as our first sponsor! You probably won't find it surprising that Lewis Nace, president of the company, is a modeler. He has built a number of customized B-29's from Minicraft kits, and we're delighted to be able to share with you some of the photos he's given us. While many Minicraft 1/144 kits have been favorites for years, Lewis has actively been improving the line with innovative features mentioned in this and other reviews of Minicraft kits on this website. This gallery provides a great example of what you can do out-of-the-box with these kits, or if you're feeling a little adventurous, the conversion possibilities to capture in miniature the variety of different B-29's that appeared during the 1940's and 1950's.
Lewis would probably like me to mention that the photography for the Minicraft-provided photos was done by Carl Thurow, who also works for Minicraft. You already know Carl. He was at Testors for many years during the heyday of their kit production. Testors reboxed many kits from Italeri, Fujimi, Hasegawa, and others, but what we remember most is their packaging. I recall six-sided boxes full of gorgeous photography. As you remember, those boxes had many close-ups of built models so you could see what you were getting inside. Testors continued with lavish photo-spreads for box art; Carl was responsible for this and many of the built-up models used. I, for one, was sad when Testors discontinued producing kits.
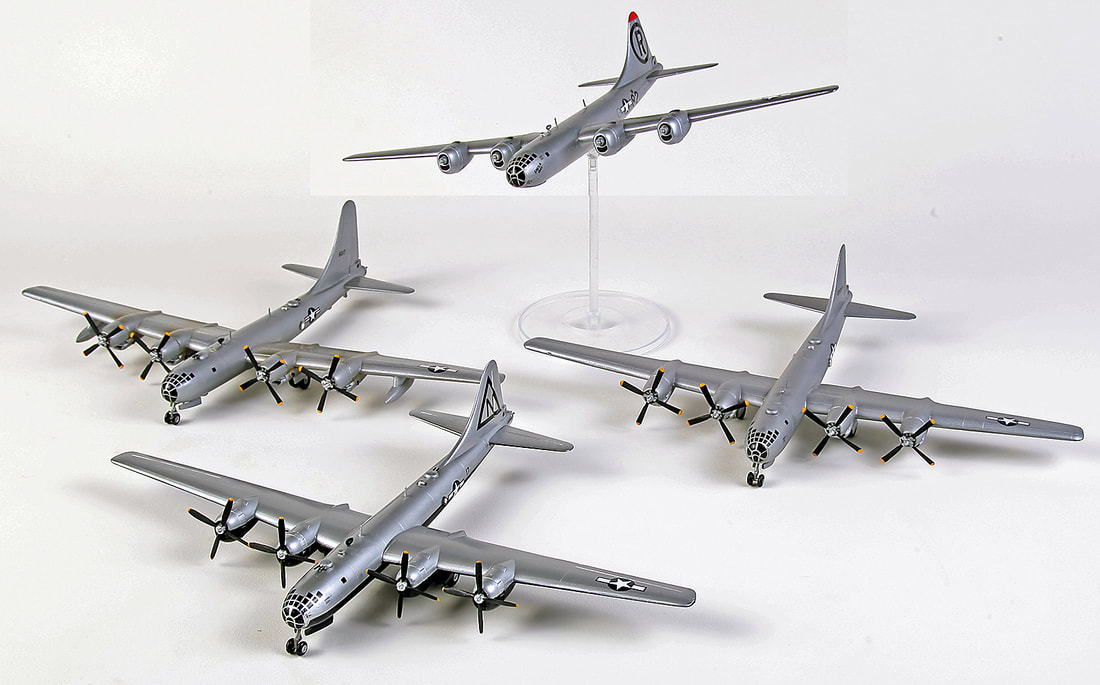
The model at left-center is a B-50 conversion! Read on; Lewis will demonstrate how you can kitbash parts from a Minicraft B-29 and any of Minicraft's C-97, KC-97, or Boeing 377 Stratocruiser kits to make a B-50, and a XC-97. In front is an unmodified B-29. The model on the Minicraft Stand at top center is the Enola Gay. Newly tooled parts make the minor conversion work much easier than it was with previous releases. The aircraft at center-right is an XB-44 that Lewis converted similarly to the B-50. The XB-44 did not have the tall tail like the B-50, but it used the same Wasp Major engines as the production C-97. Note that each of these models use decals for the windows.
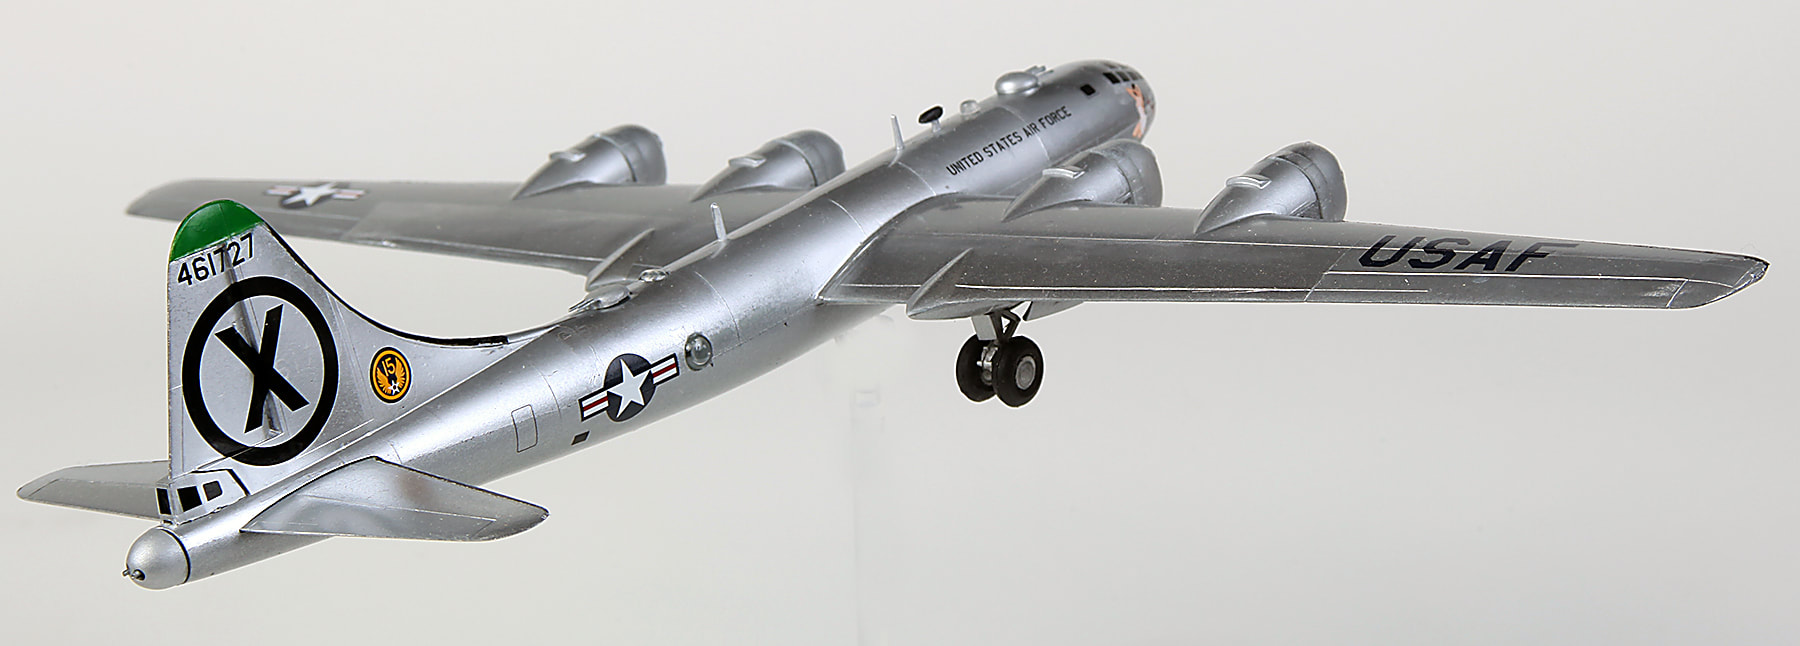
This is the RB-29, built by Lewis Nace right out of the box from Kit #14749, the subject of this review. The "in-flight" props and gear down suggest that it is on taxi, with flaps pulled in/clean. This represents a B-29 that would have been seen in the 1950's. It has the four-gun forward turret.
Again, the kit gives you the choice of clear parts or decals for the windows. "Seven To Seven" was a 15th Air Force plane; note the tail emblem.
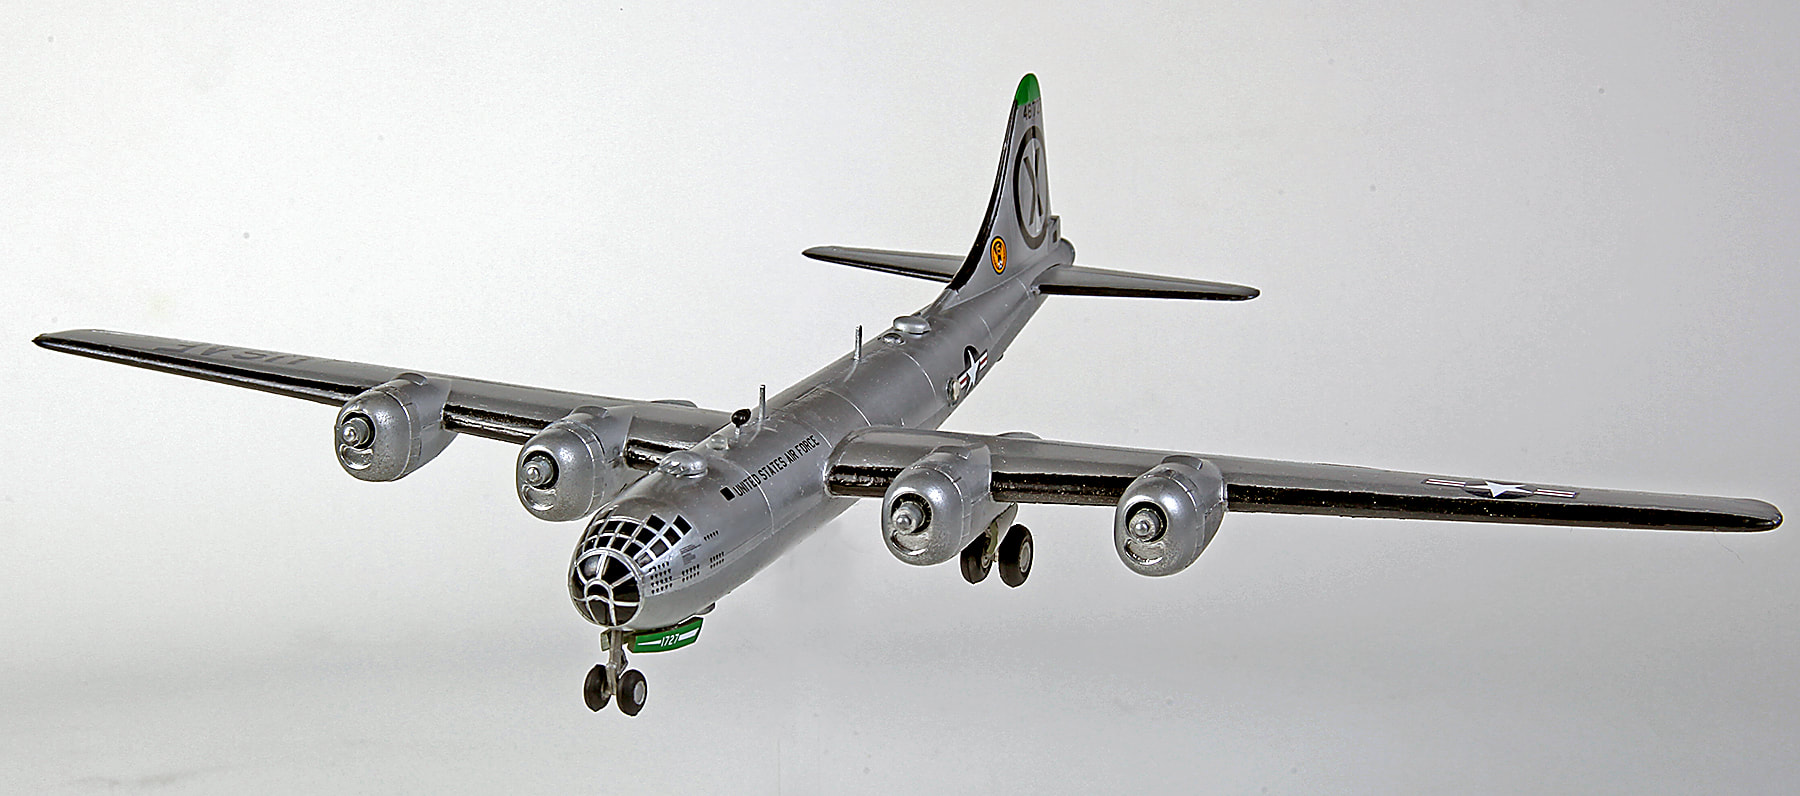
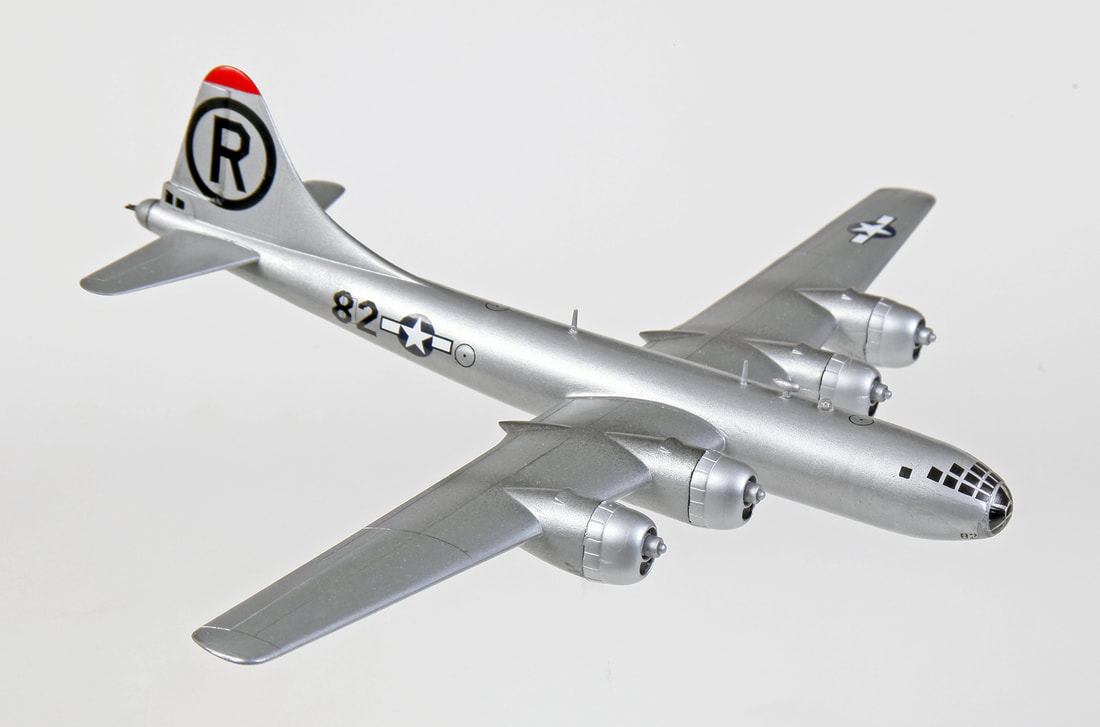
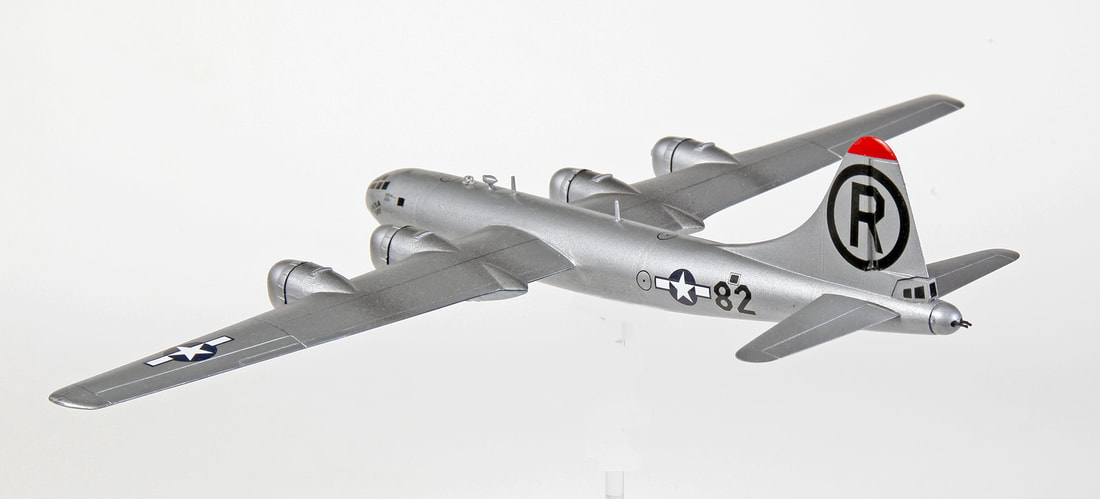
Enola Gay, built by Lewis from Minicraft Kit #14727, also available. With its more streamlined appearance than the regular B-29, this model looks great with the in-flight prop option and the clear Minicraft Stand.
|
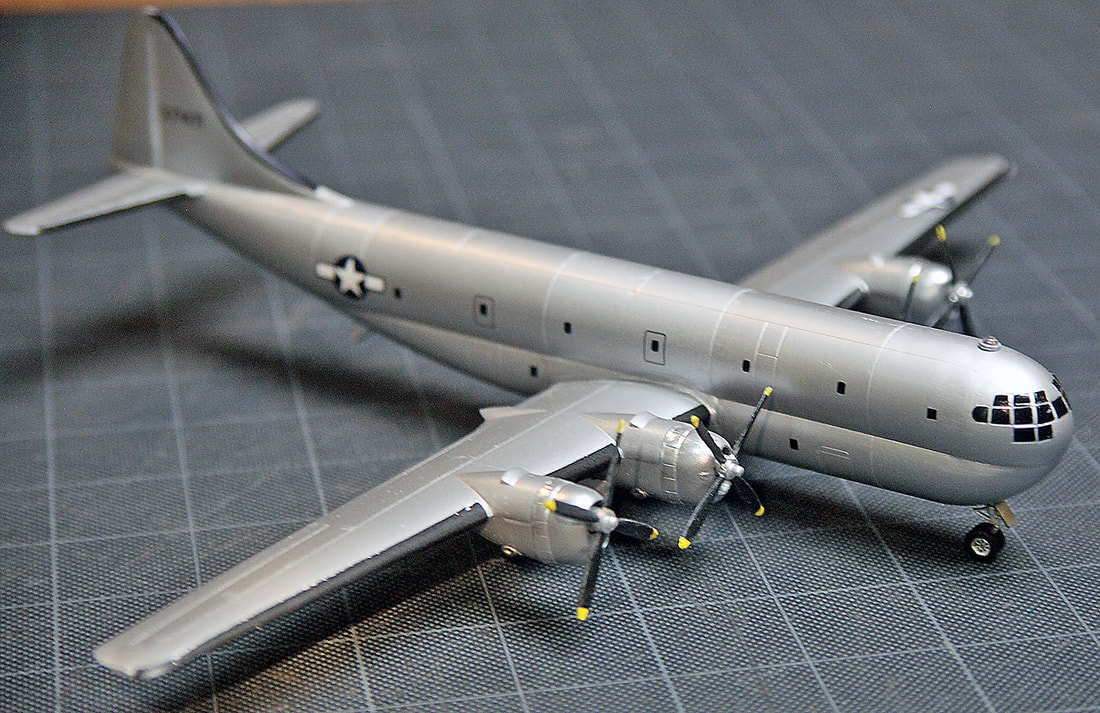
Lewis' finished XC-97. Keep reading to see exactly how Lewis did this conversion. Note that he masked off different silver panels as he applied the final finish. The differing metallic shades add interest and realism to the completed model.
|
An XB-44. This design study applied Wasp Major engines to the B-29. In the end, the B-50 was developed, which used the taller tail of the C-97. This conversion was done similarly to the B-50.
|
Enjoy a couple more shots of Lewis' XB-44.
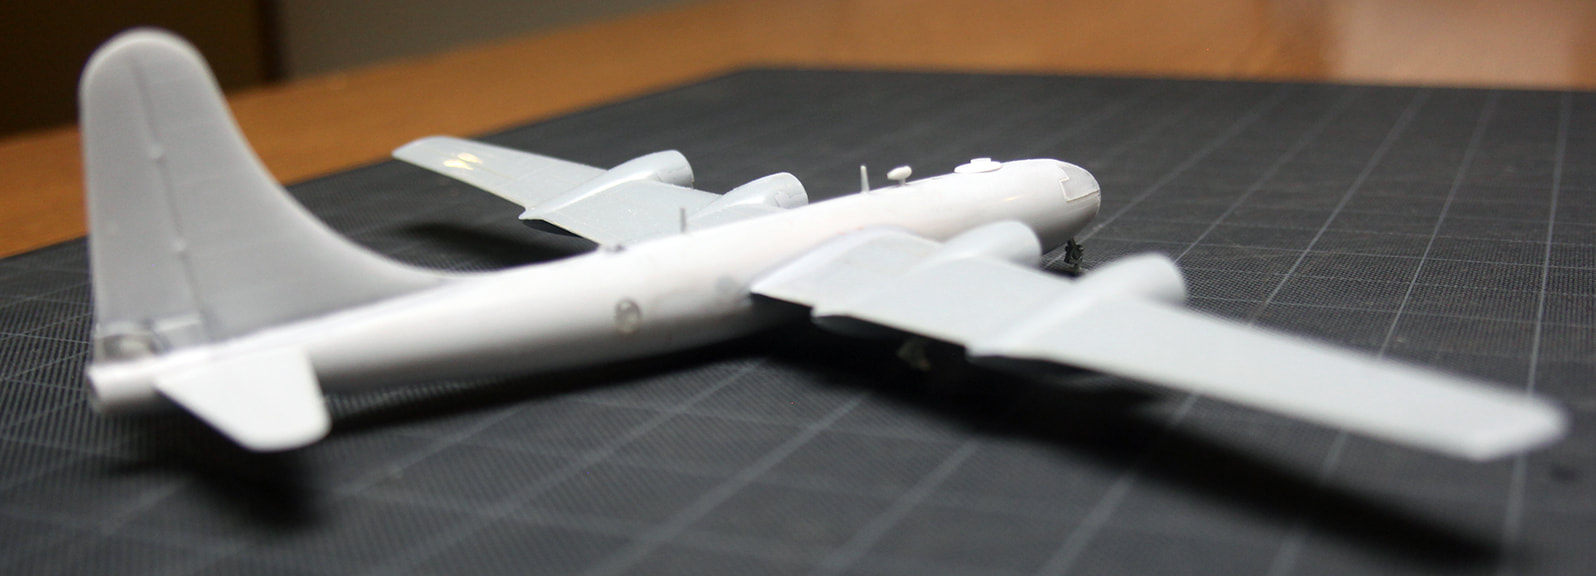
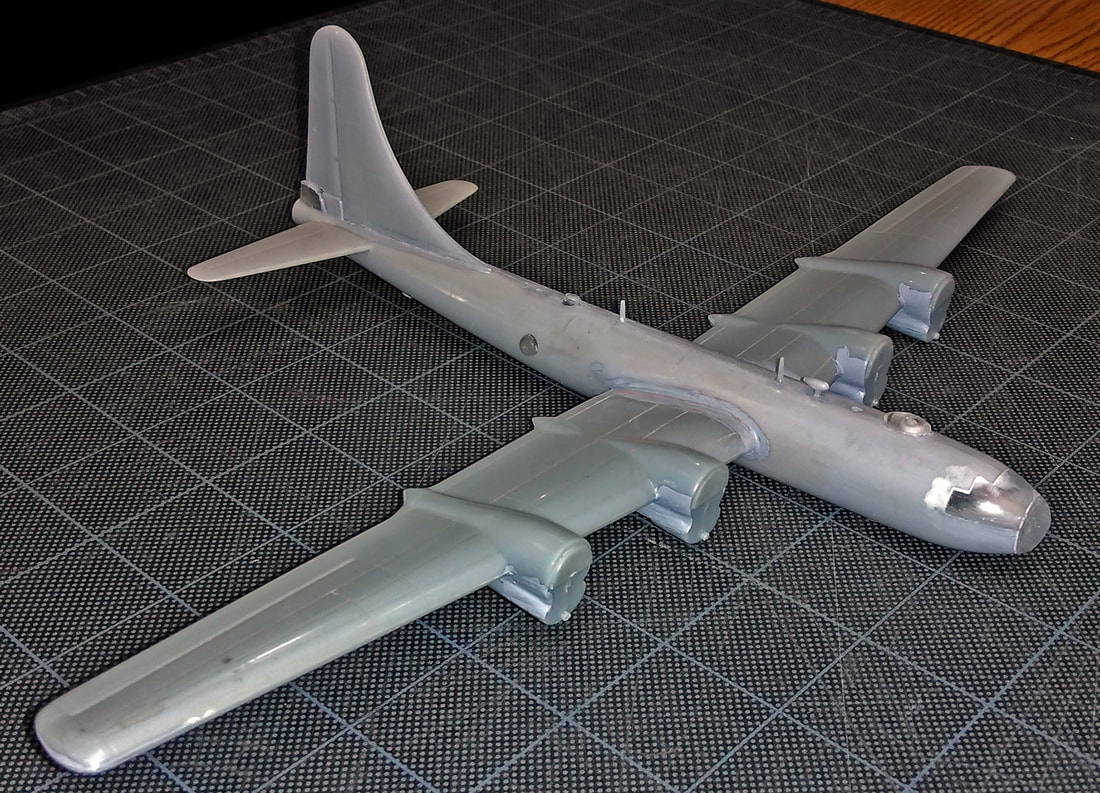
Lewis Nace's B-50 prior to forward top turret modifications.
September, 2020: Note the top turret in this head-on view. Lewis' additional work has yielded a new, scratchbuilt, teardrop-shaped gun turret appropriate to the B-50.
Lewis says that this B-50 conversion is still a work-in-progress and he'll probably do some additional work on the turret. We think it's coming along nicely!
This late B-29 by Lewis Nace also has multi-metallic shades. A similar scheme can be found as an option in Minicraft #14749, reviewed above.
Lewis also built this KB-29M!
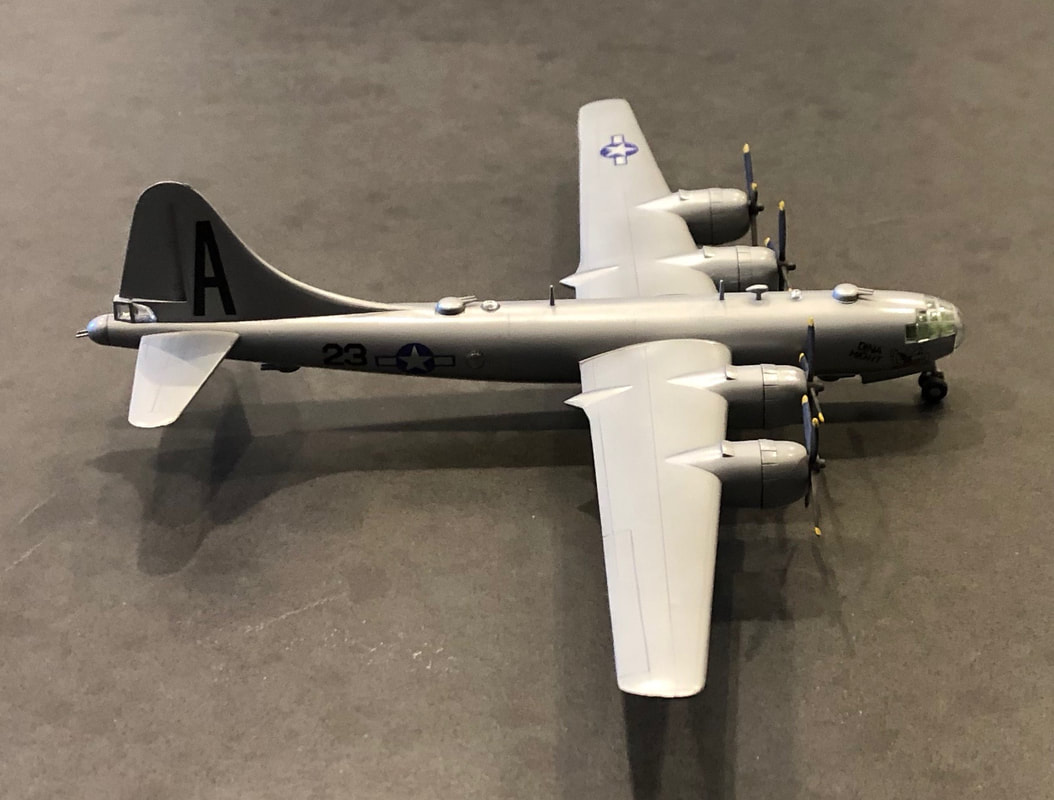
A KB-29MR as built by Lewis Nace. This is an easier conversion than the flying boom tanker, the KB-29P. Note usage of that 8th Air Force bonus decal that comes with Minicraft #14749
One more for the road! This is a WWII-era B-29.
ENHANCE IT
Minicraft's RB-29 #14749 is great if built as-is right out of the box. But here are some suggestions for a few fairly simple additions you can try that will “make it your own.” Changing up what comes in the kit box always adds a little spice to your modeling, and experimenting with new techniques will improve your skills.
1) TWEAK THE TAIL
|
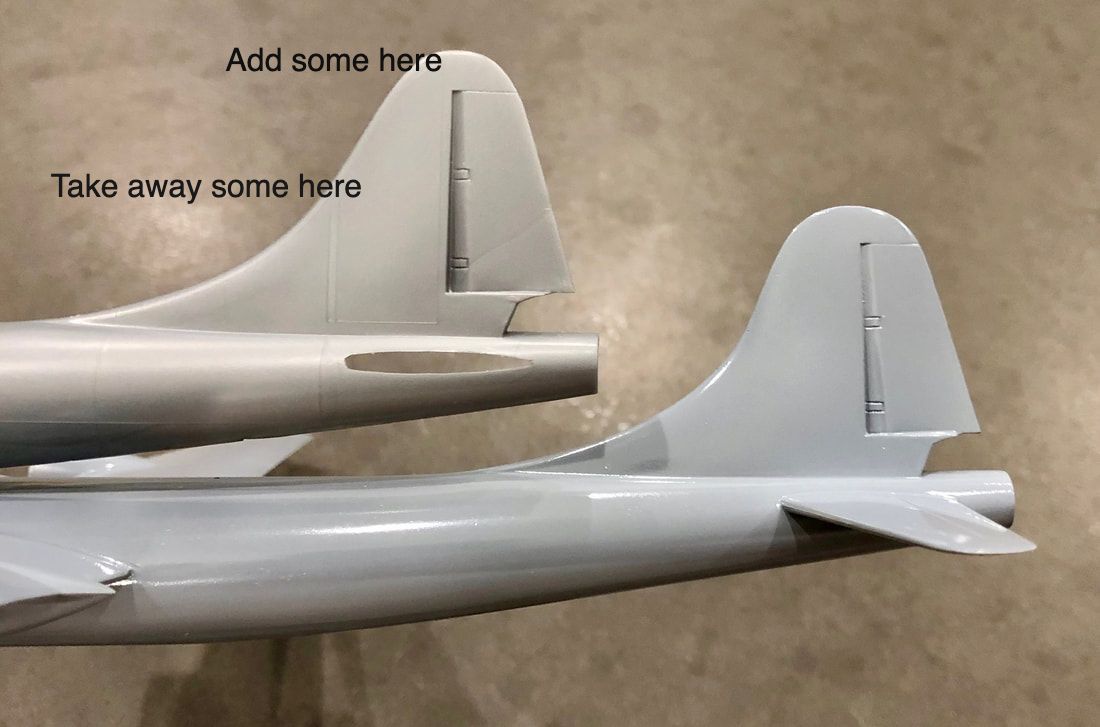
The shape of the tail out-of-box is quite acceptable, but if you’re a hopeless B-29 geek like me, you might want to tweak the “S-curve” of the tail slightly. In years past, one could print copies of drawings and reduce or enlarge them by percents while printing to get a drawing that is the same size as the kit parts to use as a guide. Since everybody has laptops or mobile devices these days, doing this is even easier and a piece of paper isn’t even required! Simply Google-up a good B-29 profile drawing from the Internet (there are plenty to choose from). Most laptops or mobile devices have a screen zoom-feature; simply increase the size of the drawing and lay a fuselage half over it on your screen until kit part and drawing are the same size. On a laptop, you can tweak the zoom until the size of the drawing fits the fuselage half from nose to tail. You can probably do the same with a tablet. Once the drawing is the right size, you can take a screen-shot to duplicate it at the size you selected. This way, you don’t have to keep zooming if you have to refer to the drawing later.
|
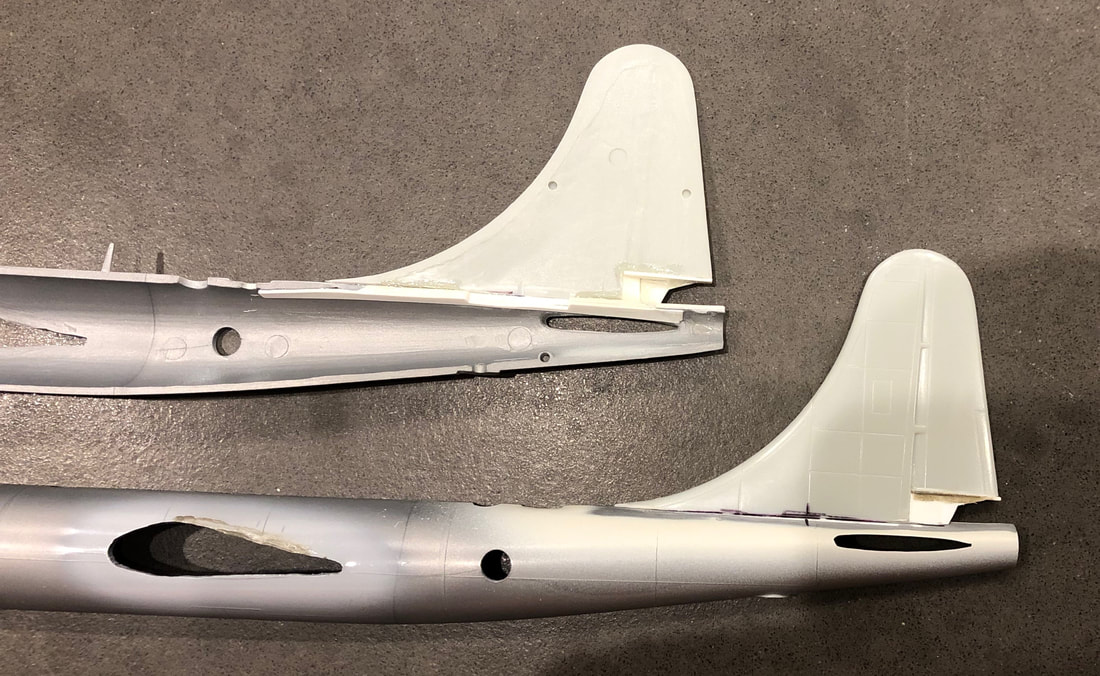
Stock Minicraft B-29 tail at top. Bottom assembly has been modified (it will be an Enola Gay; guns and observation blisters have been filled). When I assembled the fuselage halves, I trapped a thin piece of plastic at the front-top of the tail to add material there (I shaved the inside surface of the tail parts to compensate for the extra thickness). The plastic showing after assembly was filled with putty, and sanded, and the middle of the leading edge was trimmed down a little to increase the curvature a tad there.
|
Overlaying the fuselage half on the drawing will indicate an area where the tail can use a small shave, and the area where a small amount of material such as modeling putty can be added to more closely duplicate the nice Boeing S-curve of the tail’s leading edge. Once the putty has cured, sand it smooth, and shoot a quick primer coat to check that your corrections can’t be detected under a coat of paint. If you see irregularities, add a little more putty or smooth the section where you removed material. Simply repeat the putty-sand-paint-inspect cycle until it’s perfect.
2) MODIFY THE PROP HUBS
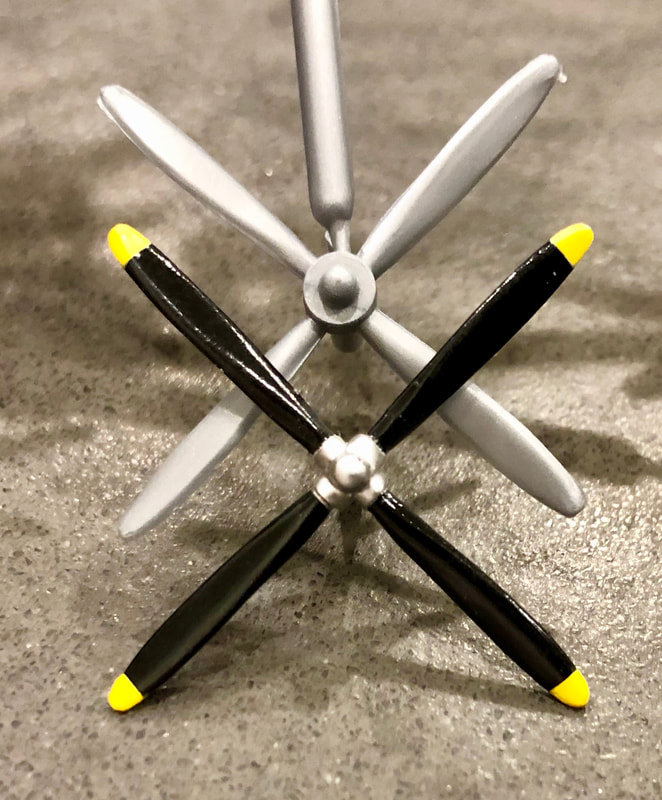
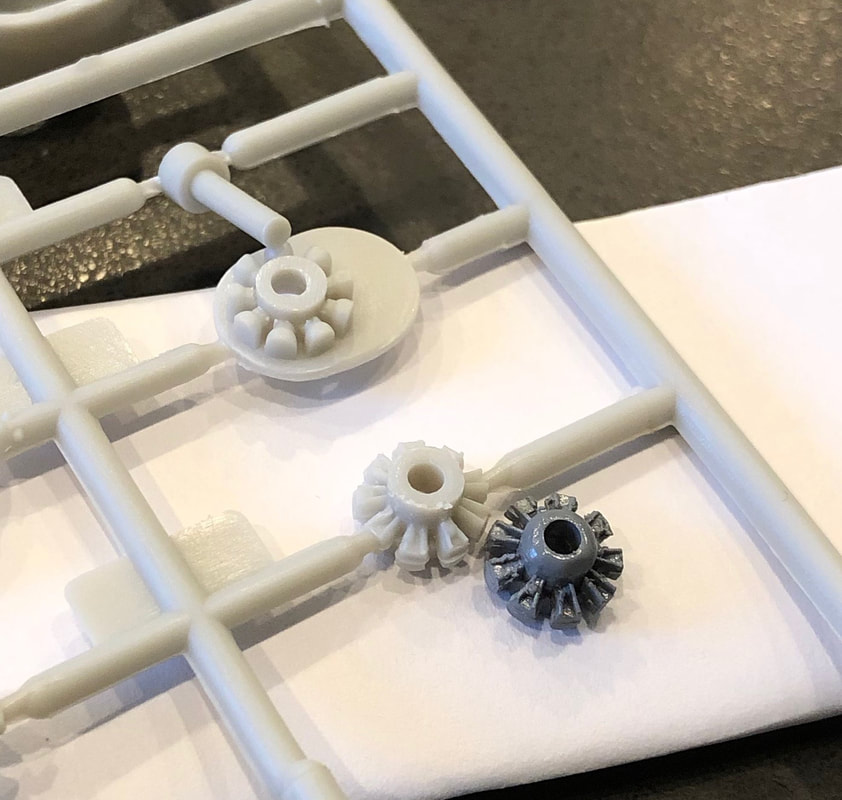
Another tweak that may be easier than you’d think is to improve the prop hubs with a little carving. The in-flight hubs are very realistic to portray a spinning prop. To make the original molds, there were simply two sets of spinners engraved in the tooling, and prop blades were added to one set to provide the full props. It isn’t too difficult to carve those central hubs to provide a more accurate look by forming some simulated blade retention housings on the hub.
|
If building your model in-flight using the Minicraft clear stand, you won't need to bother with this since those in-flight hubs duplicate the real thing pretty well. The "tuna can" look isn't that noticeable either for props where that part of the hub is painted black on the real airplane.
|
The biggest secret to fine-detail work is to be able to see what you’re doing. A set of reading glasses with a 2.75 diopter number are the strongest you can commonly buy, and for me, they allow some pretty close-up viewing. Such a pair of readers is easy to find and inexpensive; dollar stores sell them for a buck and you can get better-quality pairs at Costco for a little more.
The prop blades on the Minicraft B-29 kit are pretty robust, and you can handle them quite a bit without breakage as you shape the hubs. Cut some square notches between prop blades as shown. Cut corners at 45-degree angles next. Carefully shave the sharp edges off these, and then go around these with some sandpaper, about 320 or 400 grit wet-sanding variety (use a little water to keep the grit clean). Scrub the blades off under warm water with some dish soap and an old toothbrush, rinse, let dry, and hit the hubs with a coat of primer. Inspect closely (with those glasses) to see if you need to keep removing material. If you have removed a little too much, use some putty to replace it. Repeat the sand-paint-inspect cycle until it looks right. If you mess up, all is not lost—you can always use the in-flight hubs. |
3) THREE-BLADE PROPS
Another suggestion is to carve up the in-flight spinners using the same technique described above, except make a hub with three blade retention housings, not four. Scratchbuild some prop blades. If you don’t have some sheet plastic, you can always shave down kit sprue to make new blades. use the kit props as a guide, only make the blades a millimeter or so longer. Drill small holes in the newly carved hub blade retention housings using a pin vise, and open up the holes and/or trim the blades until they fit in the holes. With three-blade props, you can build an XB-29! If you don’t want to go to the trouble of carving new blade retention housings, you can simply drill holes for new blades at 120-degree intervals in the spinners as they are.
4) MORE ENGINE FUN
As mentioned previously, the engines in this kit are nicely detailed with two cylinder banks of nine cylinders each. Whether or not you want to try carving the prop hubs as mentioned above, another tweak that’s a little easier is to round off the propshaft gearbox housing.
|
From top: "in-flight" hub, bulkhead/rear cylinder bank, and the stock front bank and front bank that has been "shaved."
|
Simply shave off the hard edge to make it a little more dome-shaped. Sand it smooth, and use a quick primer coat to see how much more sanding/smoothing is necessary, if any. In the picture, I shaved it, sanded it, and primed it once, and I might give all four front banks another round of sanding and call it good. This modification will allow a better view of the engines. The gearbox housing is medium gray.
To help see the detail of those engines, they can be painted a steel-color, and dry-brushed with a bright silver. The valve lifter rods are supposed to be black, but the bright silver highlight will help them show up better inside the cowlings. Another interesting possibility thanks to those nice engines is a diorama featuring a B-29 undergoing engine maintenance. You could depict a cowling opened up with those nice engines exposed. It’s easy to find 1/144 figures in various poses. |
5) CONVERT IT!
I thought I was brilliant coming up with the idea to take two different Minicraft kits, intermix parts, and come out with two models of two completely different aircraft from where I started. I was humbled when I learned that another modeler, Lewis Nace, had done the same thing, did it better, and took the idea another step further by actually finishing the models (mine are still under construction).
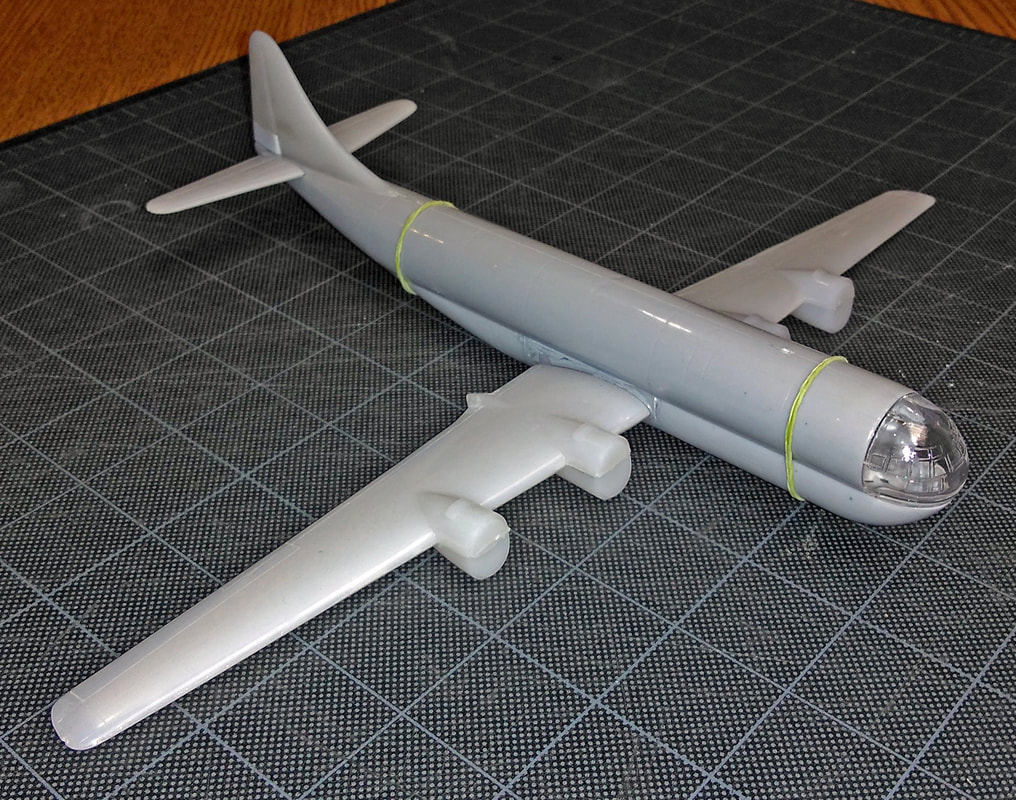
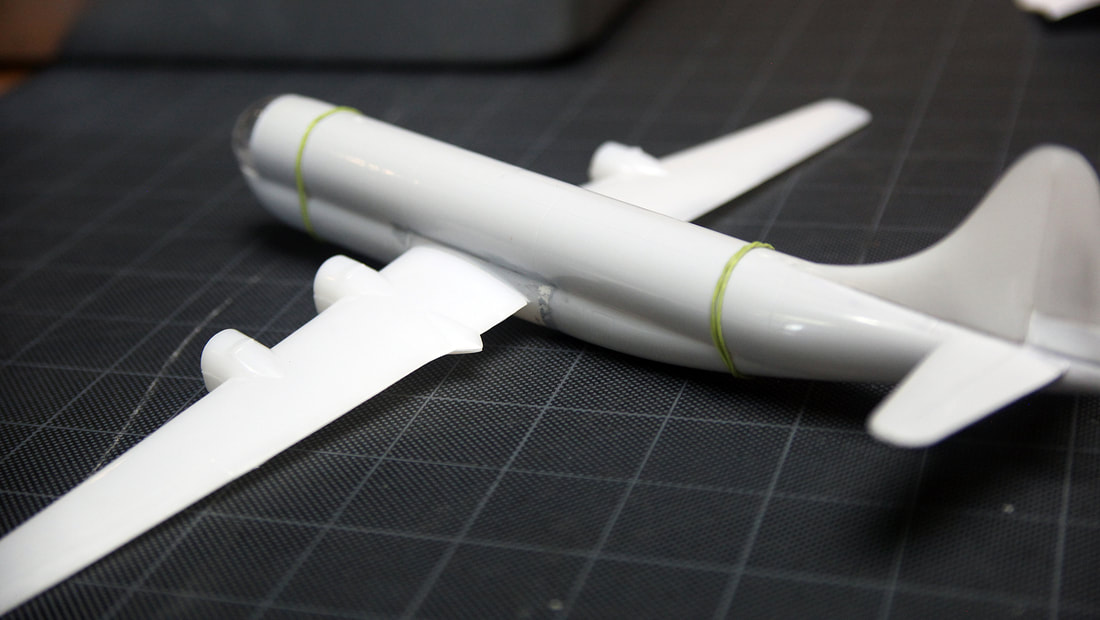
Of course a bit of cutting and splicing is needed for this double-conversion, and you’ll need to have at least intermediate skills to do this since swapping tails and wings between two kits will require a fair bit of "plastic surgery." Below, we'll show three ways to do this.
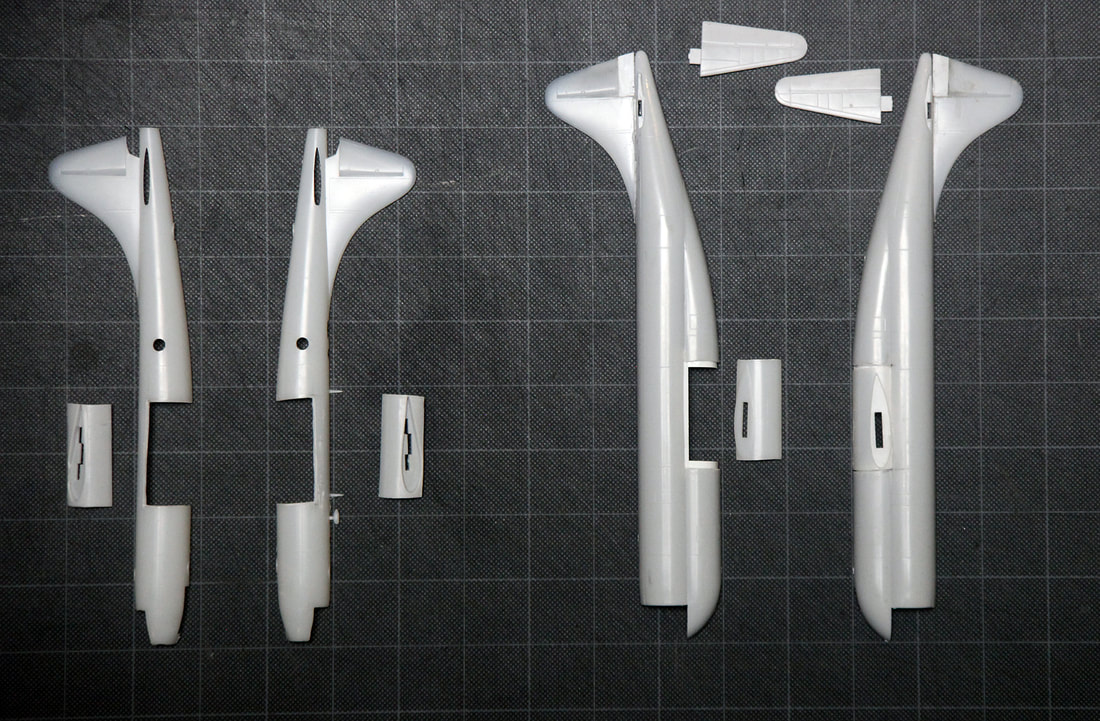
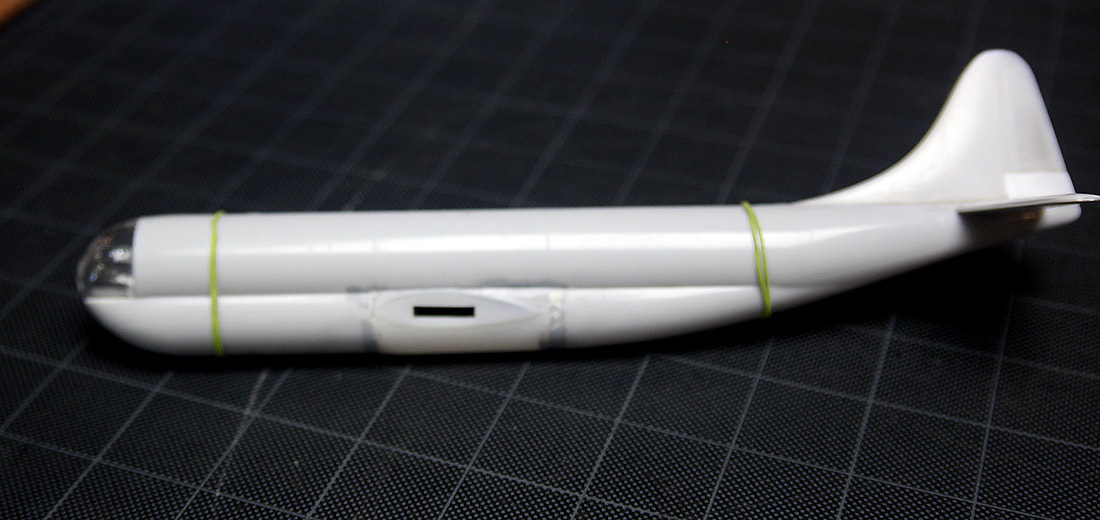
This is how Brudder Bill started his B-29/C-97 dance to end up with a B-50 and XC-97. I call it hack-a-hole. Two issues are a) you have to be careful to be sure the wingspan ends up correct and b) getting a good wing-fuselage joint is tricky.
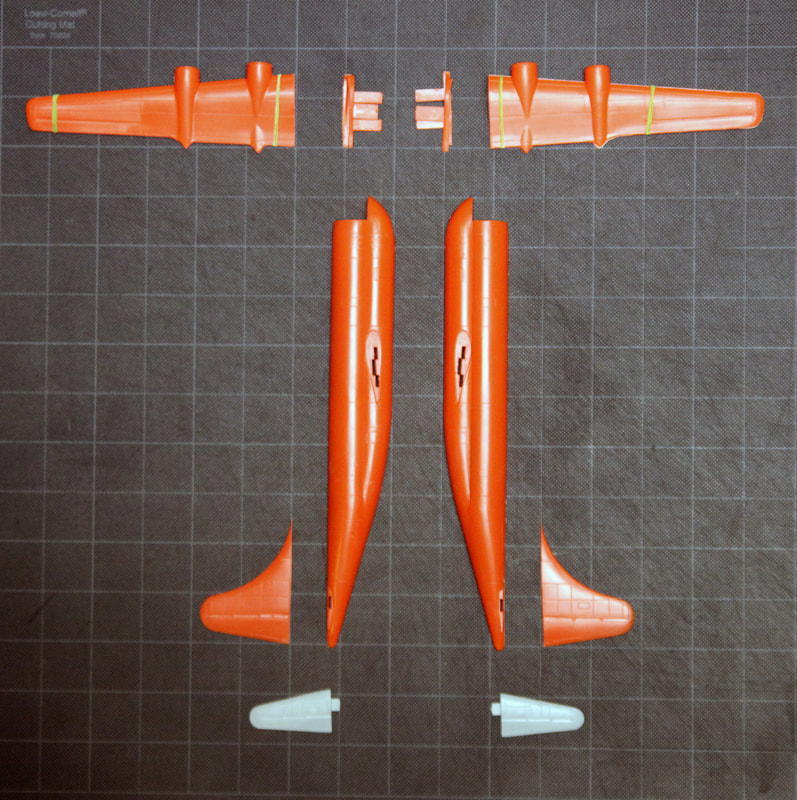
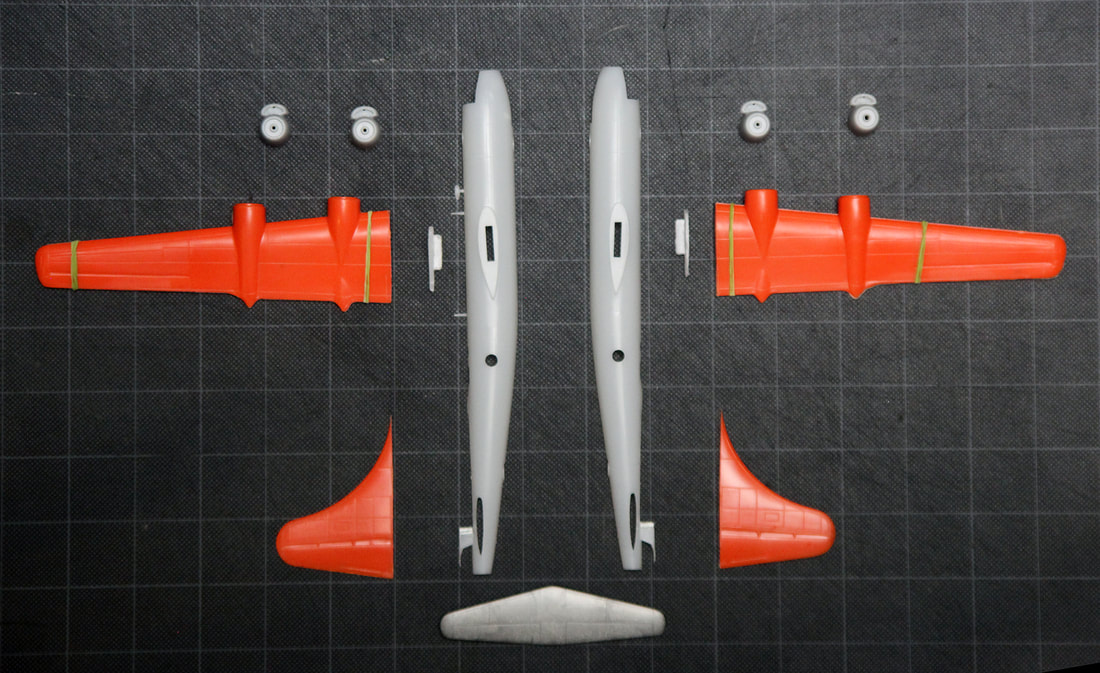
The second method was done by Lewis Nace; his models and Carl Thurow's photography are shown here. at left, the red parts represent the cuts that need to be made to the C-97 kit's parts. Note the cuts at the wing roots and the tall tail has been cut from the fuselage. At right, the C-97 parts are laid out with the B-29 kit parts; this model will become the B-50. Note that the wing root tabs have been cut off the B-29 wings. The engines at top of the photo are the Wasp Majors that come with the C-97 kit; they will easily fit on the C-97 wings (red in this picture).
Here's the third, and probably the best method to swap wings between the B-29 and C-97 kits, the wing-root-graft method. The secret is to get your graft-sections as closely as possible to the same size between both kits. Look closely at the XC-97 fuselage in the photo at left; Lewis used some sheet styrene to back the grafted-in parts. This will reinforce the joint, important when handling and completing the model. Note also how Lewis filled the gunner's station in what was formerly the B-29 tail.
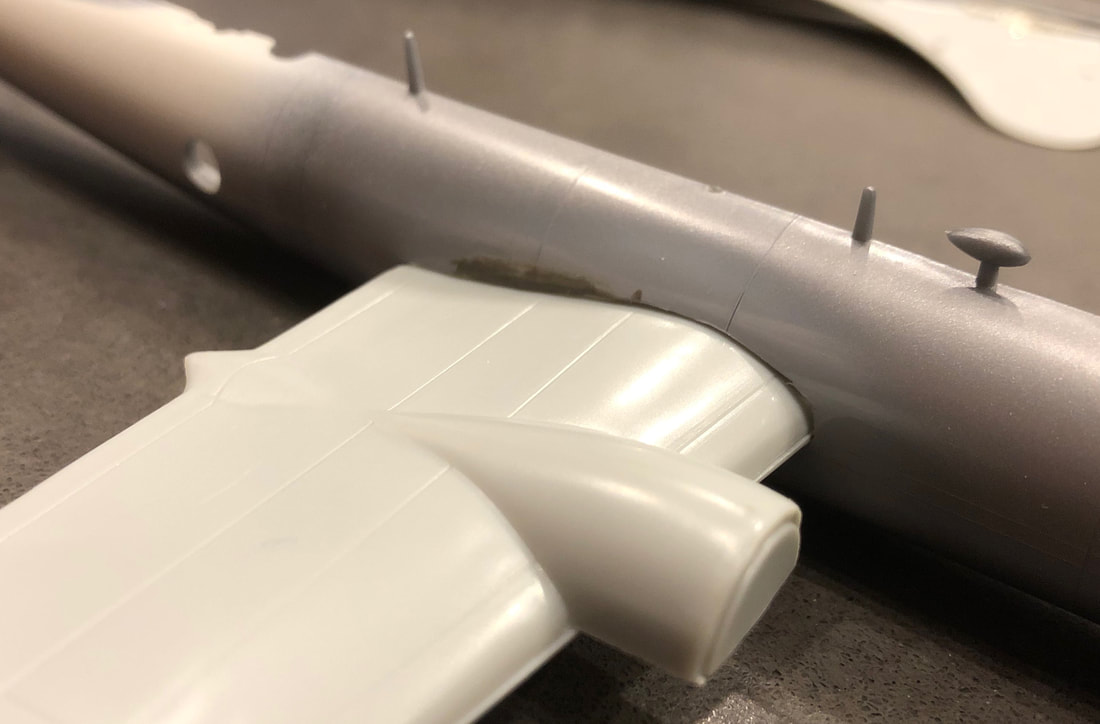
Grafting the wing roots makes it very easy to glue the wings on the models, your wing joint is just like the stock kit, and the wingspans will be correct. Simply sand and fill the joints at the graft, and you're good to go to finish the model.
The B-50 has a gangly appearance thanks to the tall tail on the thin B-29 fuselage. Lewis' model-in-progress captures that look.
|
Lewis' completed XB-44 conversion. Note that the standard B-29 tail was retained. In the end, the B-50, utilizing the tall tail and Wasp Major engines from the C-97, was produced as the successor to the B-29A.
|
Another view of Lewis' completed XC-97. Boeing built three of these prototypes. Build yours from Minicraft kits!
|
A Boeing B-50 built by Lewis Nace, president of Minicraft Models as a conversion/kitbash from a 1/144 scale B-29 and any variant of Minicraft's C-97 kit, also 1/144 scale.
LEARN MORE ABOUT THE KIT
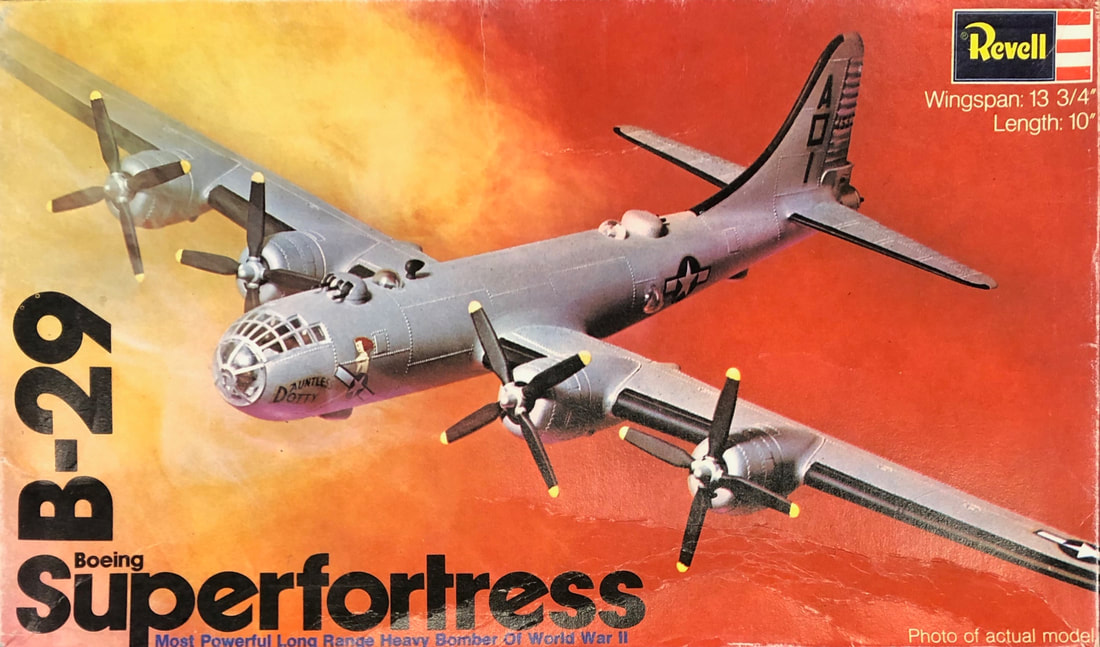
The B-29 was a popular request of modelers in the early days of plastic models. The Aurora 1/76 kit from 1954 is hard to find. Revell’s 1/130 kit was more accurate. First debuting in 1954, it was one of Revell’s most popular kits from the 1950’s-70’s. The odd-scale comes from its fit-the-standard-box origins. Like its box-scale brethren from the time such as the B-52, B-36, and B-47, it had no landing gear.
The B-29 was a popular request of modelers in the early days of plastic models. The Aurora 1/76 kit from 1954 is hard to find. Revell’s 1/130 kit was more accurate. First debuting in 1954, it was one of Revell’s most popular kits from the 1950’s-70’s. The odd-scale comes from its fit-the-standard-box origins. Like its box-scale brethren from the time such as the B-52, B-36, and B-47, it had no landing gear.
|
I recall building and enjoying this kit in the 1970’s, but was bummed at the time that it had no landing gear. I wanted to display it with my 1/144 scale Boeing airliners, which were depicted “on the ground” and was willing to live with the fact that the 1/133 scale B-29 was a tad big,
The Revell kit decal scheme from 1965 onward was “Dauntless Dotty,” known for flying the first bombing mission over Tokyo since the Doolittle Raid. Dauntless Dotty was also piloted during some missions by Robert K. Morgan, better known for flying the B-17 known as Memphis Belle in Europe. |
The Revell Riveteer was at work here, but not nearly as much of some of Revell's other early kits.
|
Revell discontinued their 1/130 B-29 in the early 1980’s. Taking its place in Revell’s catalog was another B-29 kit that had a completely different origin.
|
In the 1970’s, Japanese model kit company Crown Models released a line of 1/144 model kits comprising subjects from WWII through then-modern era. Important bomber designs from were included such as the B-17, B-24, B-25, B-26, and British Lancaster. In 1976, Crown debuted their B-29 kit.
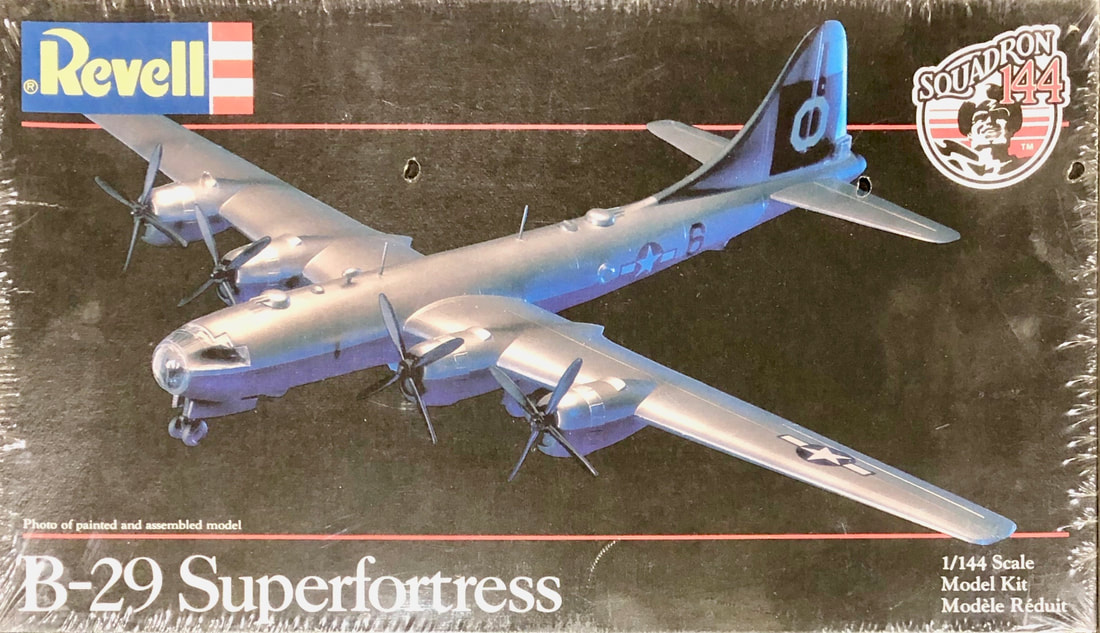
These kits didn’t get wide distribution in the United States upon initial release. In 1982, Revell released their Squadron 144 line of kits, which brought many (but not all) of the original 1/144 kits to modelers in the USA. A notable absence was the Lancaster kit. |
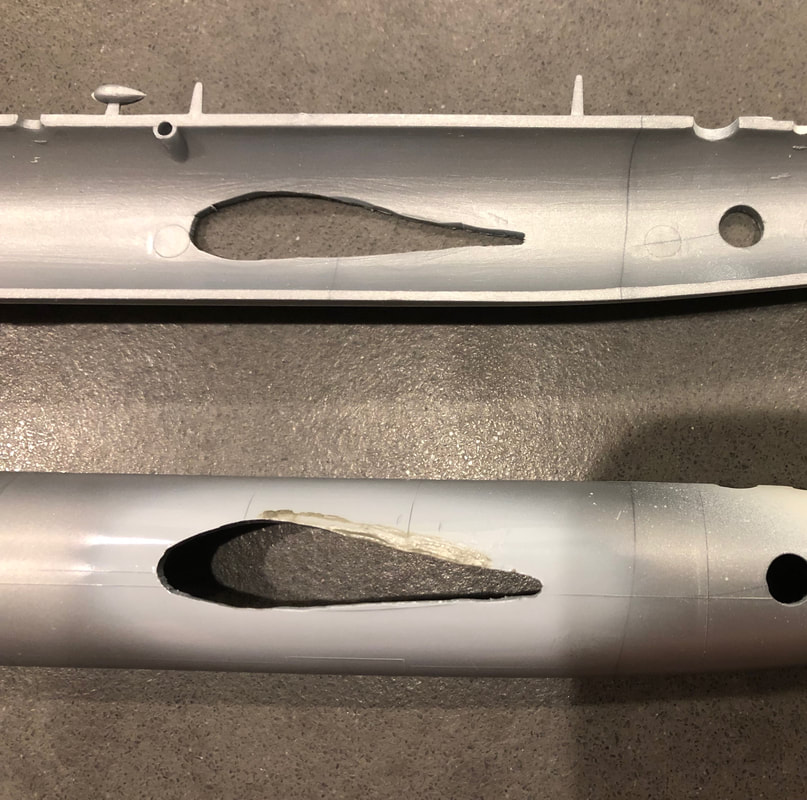
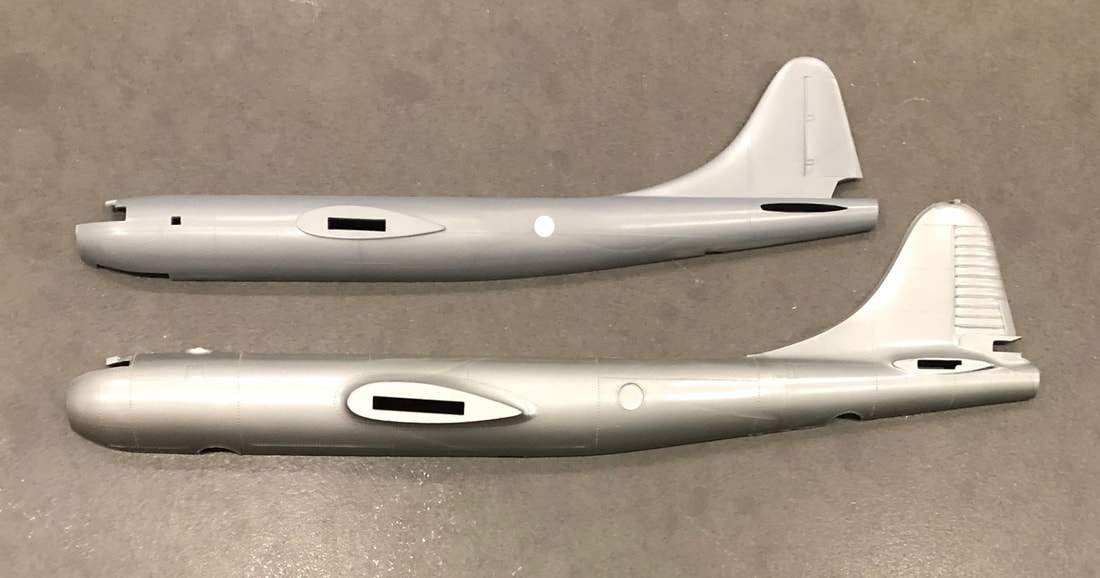
Compare fuselage halves from Crown/Minicraft kit, at top, with the Revell kit at bottom. Size difference is apparent. In my opinion, the Crown/Minicraft kit has a better-executed canopy. Also note the exaggerated fabric scallops on the tail stabilizer of the Revell version.
|
The ex-Crown B-29 was the largest of the lot. The most significant difference between the old Revell kit and the Crown/Revell kit was that the new 1/144 version had landing gear. For the Squadron 144 series, Revell made attempts to provide decals for “real” aircraft; the B-29 I found in the box was—you guessed it—Dauntless Dotty, the same scheme used for the last version of their box-scale B-29. The decals for the 1/144 kit were reduced in size.
|
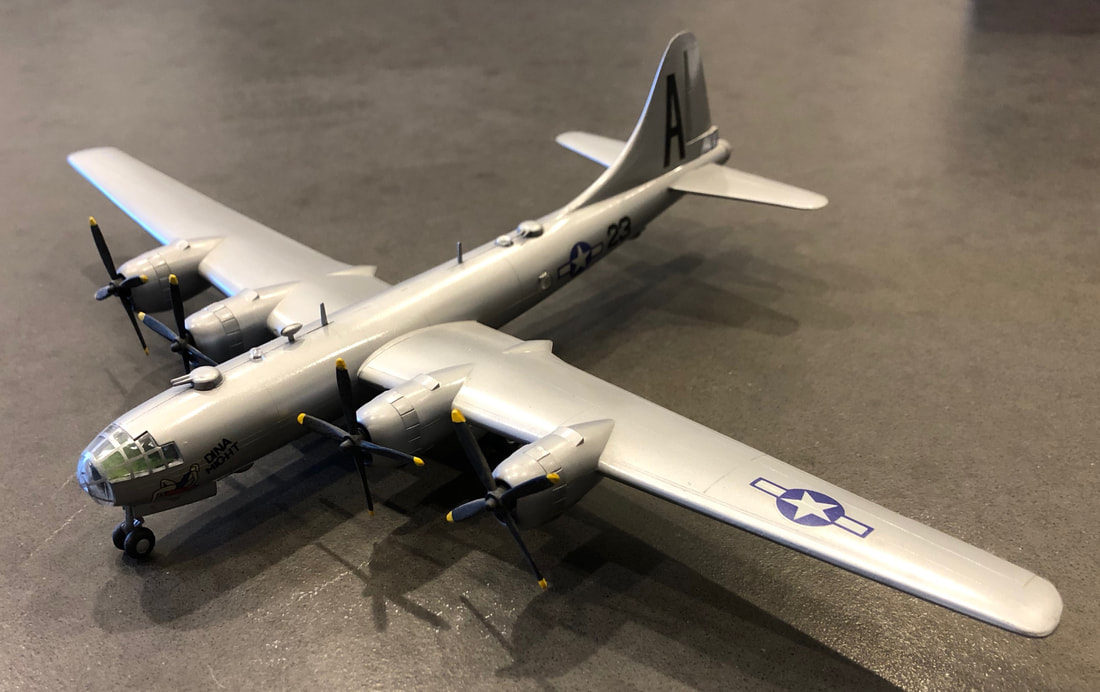
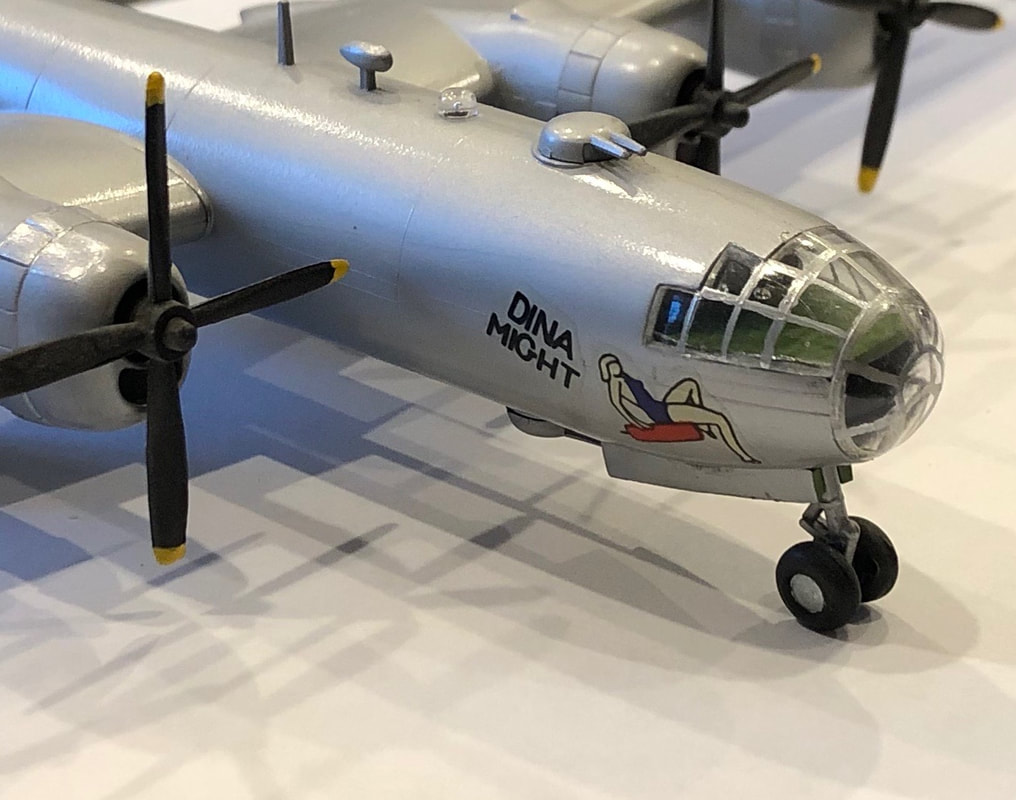
If memory serves, Dina Might decals were included with the Squadron 144 version differing from what's on the box. I don't recall if they were an optional scheme.
|
I recall this being a pleasant, fast build back in the day. One thing to remember is that you need quite a bit of weight in the nose to avoid a tail-sitter!
|
The Revell Squadron 144 kits were a lot of fun, but unfortunately, the line turned out to be a one-off, not remaining in their catalog long, and it became hard to find these kits again. In the early 1990's, after the demise of Crown, Minicraft Models came to the rescue, acquiring the tooling for these 1/144 kits including the B-29. Fans and builders of 1/144 scale rejoiced when Minicraft released their substantial line of kits including the B-29 and others (Lancaster!) that were hard to find previously in the USA. Quality of the decals was better than the previous releases and has only gotten better over time as premiere decal printer Cartograf was increasingly utilized for subsequent releases.
Minicraft has owned this series for most of its history, and they have made the B-29 available to modelers consistently during that time. They’ve added a number of their own new-tool kits since the mid-1990’s providing modelers the best selection of 1/144 kits that there is.
COLLECT IT
While the B-29 was only produced in one major letter-variant (B-29), there were some interesting adaptations of this airframe to other tasks and enhancements. The low price of the kits allows easy acquisition of multiples for such conversions.
|
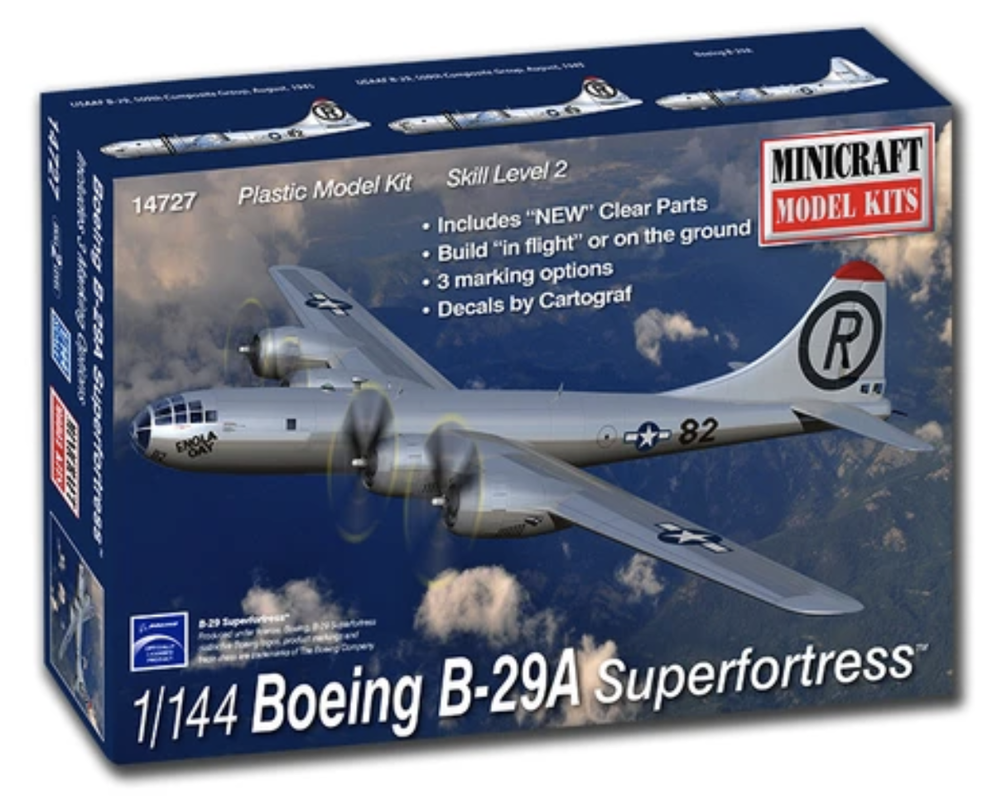
Minicraft #14727 is currently available, and includes decals for BOTH Enola Gay and Bocks Car!
|
In the early 2000’s, Minicraft first offered modelers the B-29 kit with separate boxings containing decals for the “Silverplate” B-29’s, Enola Gay and Bockscar. These models had the builder fill the gun ports and observation blisters to depict these atomic bombers. Minicraft has re-released the Silverplate bombers, and these models are now available with kit# 14727, and you can again build Enola Gay and Bockscar, and the kits come with the new clear parts!
Minicraft has announced a future B-50 kit. We're not yet exactly sure when that kit will show up in hobby stores, but you can dazzle your friends with a B-50 before that happens. The B-29 and C-97/KC-97/377 Stratoliner mashup to build a B-50 and XC-97 is mentioned above. The great thing about this conversion is that you don’t need to sacrifice one kit as you do with many kitbashes. |
|
The refueling variants mentioned above are additional conversion ideas, and of course Minicraft has made it that much easier with the aforementioned bonus decals included with RB-29 Postwar.
The XB-44 is similar to the B-50 with the same engines, but the regular B-29 tail. You can use the Minicraft Stratoliner/C-97 for this one as well. I’ve mentioned my XB-29 conversion, with the three-blade props detailed above. |
Markings won't be a problem with this conversion since Minicraft includes them as bonus decals with the RB-29 Postwar kit. Parts for the boom can be scratchbuilt from stretched sprue.
|
There are also the test plane launcher versions of the B-29. Perhaps the most famous example of this is the X-1 launcher; it was the B-29 which launched the first aircraft to break the sound barrier in 1947. This one doesn’t have to be hard at all as more than one company has released an X-1 in 1/144 scale. Some cutting will be needed to the bomb bay, but this one should be easier to pull off than the B-50/XC-97.
|
The X-1 rides into history--under the belly of a B-29
No cutting of plastic necessary. Don't forget to paint the wheel hubs green.
|
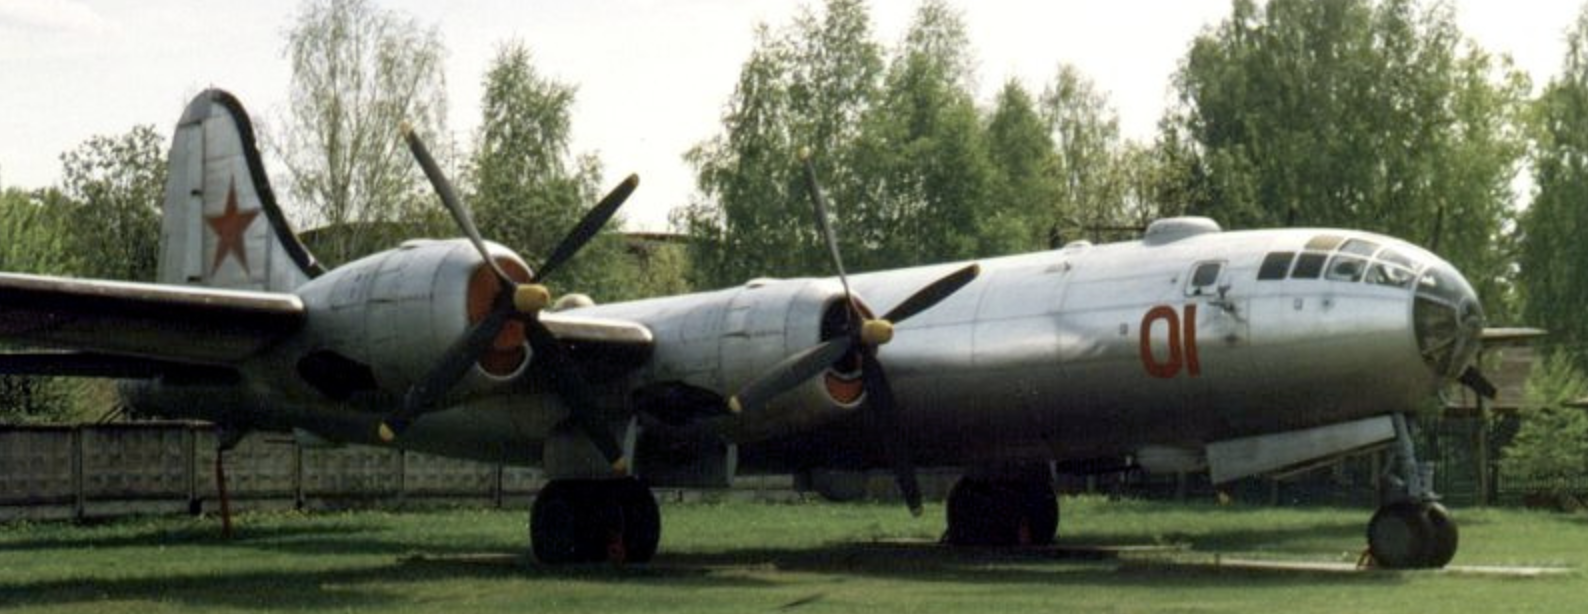
If cutting plastic isn’t your cup of tea, an interesting variant is a Russian Tu-4. Russia retained more than one B-29 that made an emergency landing in their territory during WWII for "inspections." While the USA had no interest in a formal lend-lease agreement to avoid B-29 design elements falling into Russian hands, the Soviets managed to reverse-engineer the B-29 as an almost exact clone. Variations in metal stock thicknesses due to the difference in English-metric measurement standards made the Tu-4 a few hundred pounds heavier than the Boeing B-29, but 847 Tu-4’s were built (compared to nearly 4000 B-29’s) and this variant strongly influenced Soviet bombers built afterwards, including the Tu-95 "Bear." All you need to execute this “conversion” is a set of red stars and some numbers, which shouldn’t be hard to find in other kits or on the aftermarket. No cutting of plastic will be needed for this one and you’ll have an interesting new variant to add to your B-29 collection. Dem Brudders hope that Minicraft will create a decal option for this someday in a future B-29A release (hint hint ;-).
|
EXPERIENCE IT
There are quite a few B-29’s on display at aircraft museums around the United States. Enola Gay resides in the Udvar-Hazy Annex of the Smithsonian Air and Space Museum. Bock’s Car can be seen at the Museum of the United States Air Force. Both these aircraft have been meticulously restored and can be viewed and photographed with ease by visitors.
There are quite a few B-29’s on display at aircraft museums around the United States. Enola Gay resides in the Udvar-Hazy Annex of the Smithsonian Air and Space Museum. Bock’s Car can be seen at the Museum of the United States Air Force. Both these aircraft have been meticulously restored and can be viewed and photographed with ease by visitors.
|
Enola Gay at the Smithsonian Air And Space Museum Udvar-Hazy Annex just south of Dulles Airport in the Washington, DC area. This aircraft was on raised pedestals; photo was taken from a balcony.
|
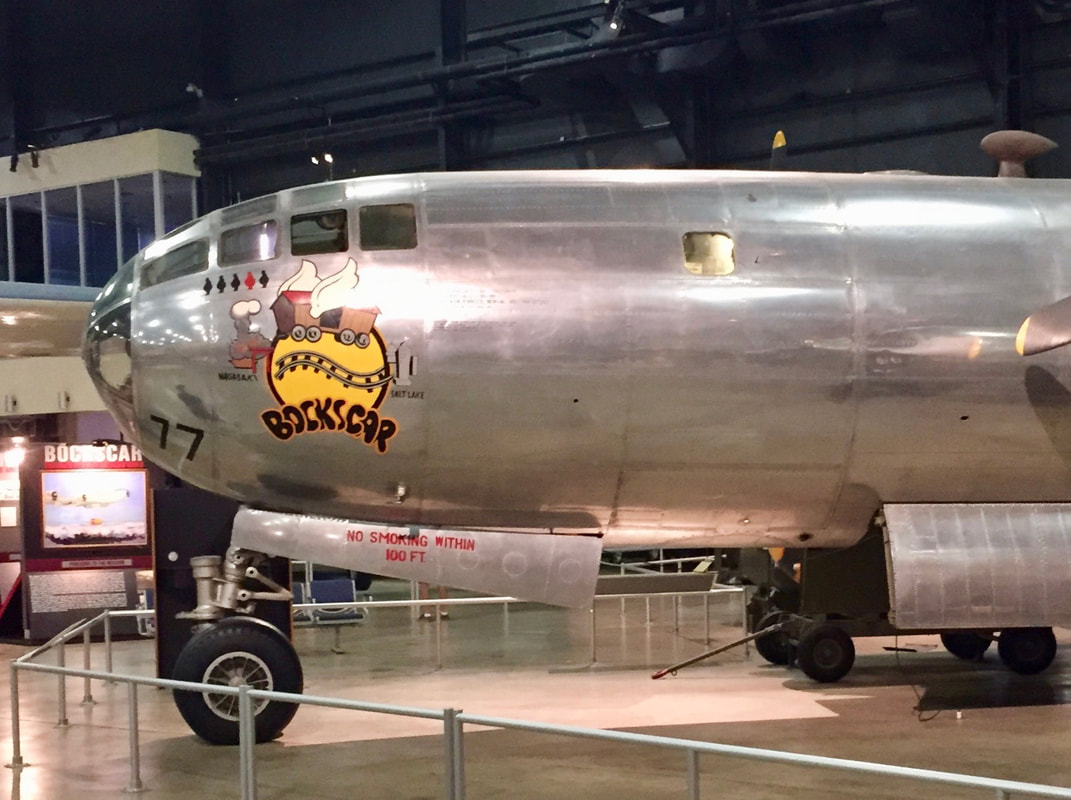
Bockscar resides in the National Museum of the United States Air Force in Dayton, OH.
|
|
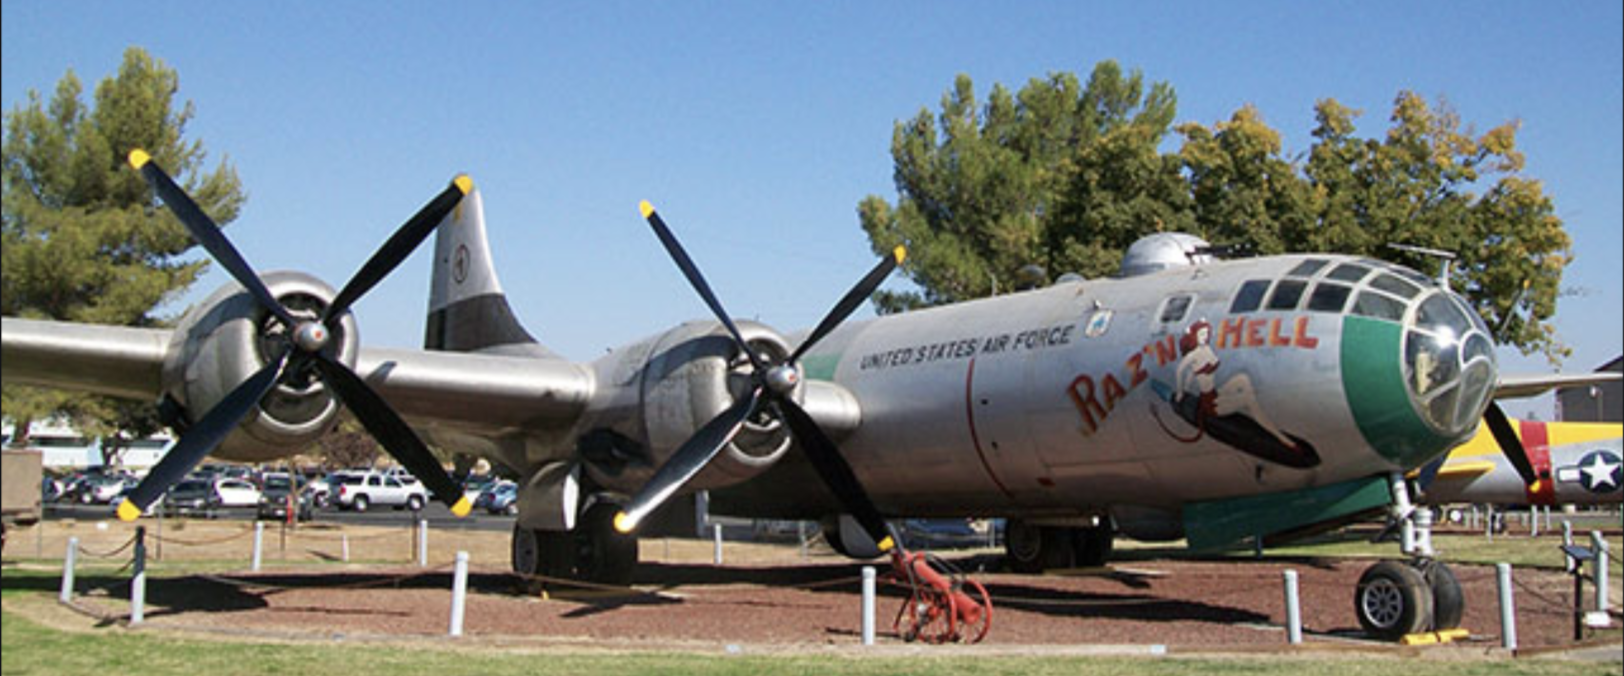
The Castle Air Museum in Atwater, CA has “Raz ‘n Hell,” a Korean War-era B-29 very similar to “Seven to Seven” depicted in the Minicraft kit. It has the souped-up quad-turret gun.
|
FOR MORE INFORMATION OR TO PURCHASE THESE MODELS:
|
CHECK IT OUT at Minicraft.com.
|
(SPONSOR LINK)
|
SCROLL DOWN JUST A BIT TO SEE WHAT ELSE IS NEW AT DEMBRUDDERS.COM
