PROS: An old Monogram classic returns even better than before in an easy, fun build at a low price!
CONS: The box is not waterproof!
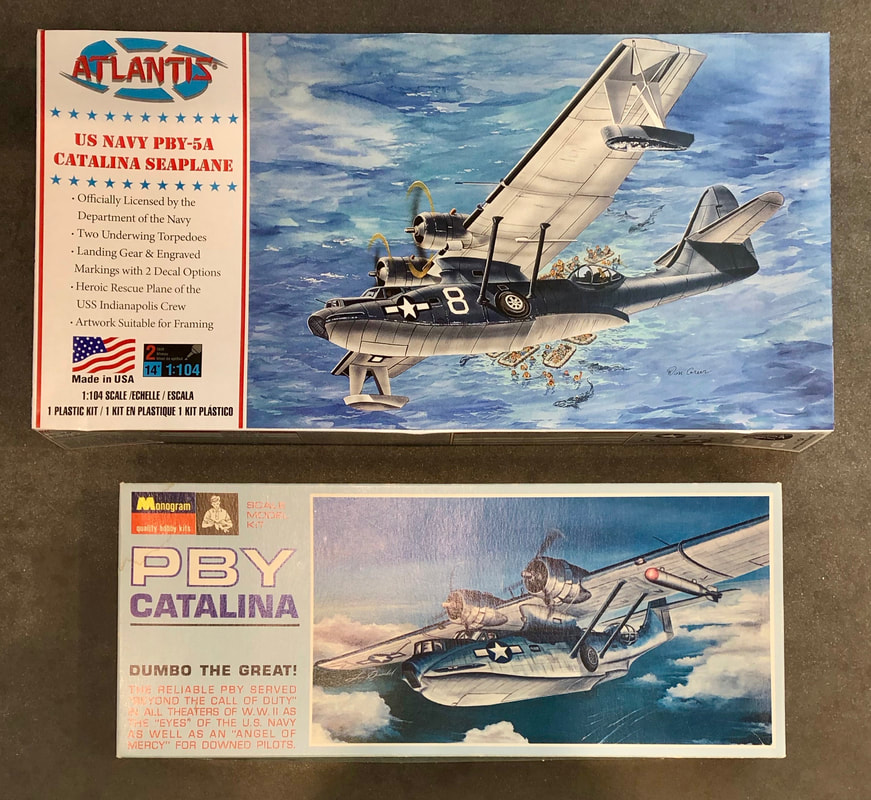
Atlantis Models has released a PBY-5A Catalina in 1/104 scale. This was originally a classic Monogram kit, which debuted in 1955. It has not been re-released since 1973. Surviving examples were becoming rare and a little pricey at places like eBay.
CONS: The box is not waterproof!
Atlantis Models has released a PBY-5A Catalina in 1/104 scale. This was originally a classic Monogram kit, which debuted in 1955. It has not been re-released since 1973. Surviving examples were becoming rare and a little pricey at places like eBay.
|
Since the debut of the Monogram kit, other PBY kits showed up in 1/72 scale; those from Revell and Airfix are perhaps the most remembered. In 1995, a very nice 1/48 scale PBY made a big splash in the hobby when it was released under the Monogram label. Monogram was owned by Revell at the time. Perhaps the branding of it as a Monogram kit was because of the fondness many modelers had for the original 1/104-scale Monogram PBY.
|
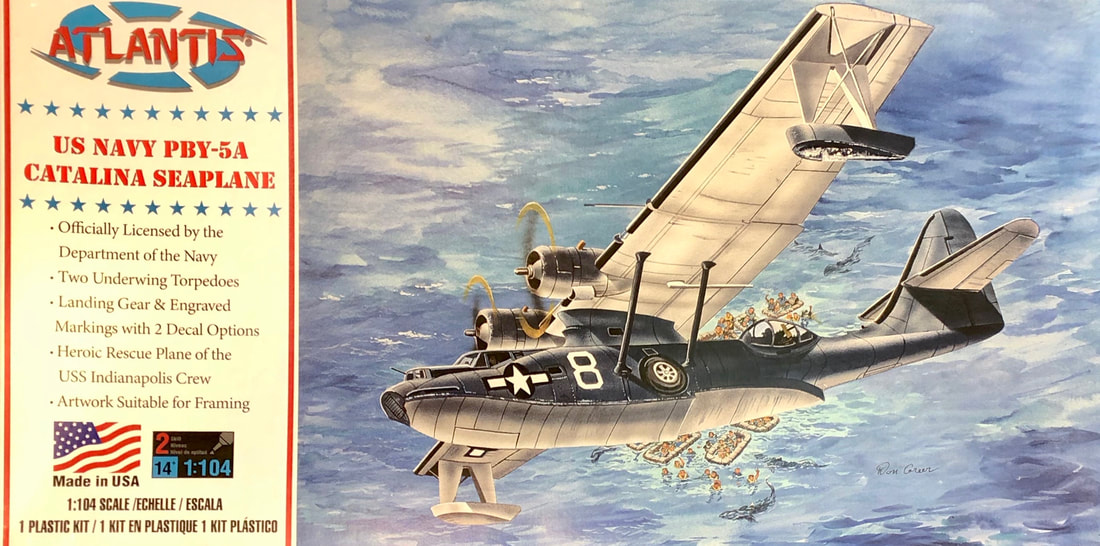
Don Greer's artwork portrays the rescue of the USS Indianapolis survivors. The US Navy cruiser was sunk by Japanese forces just prior to the end of WWII.
|
Starting in the 1990's, many older Revell and Monogram kits received re-releases in the form of Revell’s popular Selected Subjects Program. Kits from the genesis of the hobby showed up with their original box art and sold very well. The original Monogram PBY never saw the light of day in spite of this program and examples continued to sell on eBay at collector prices.
|
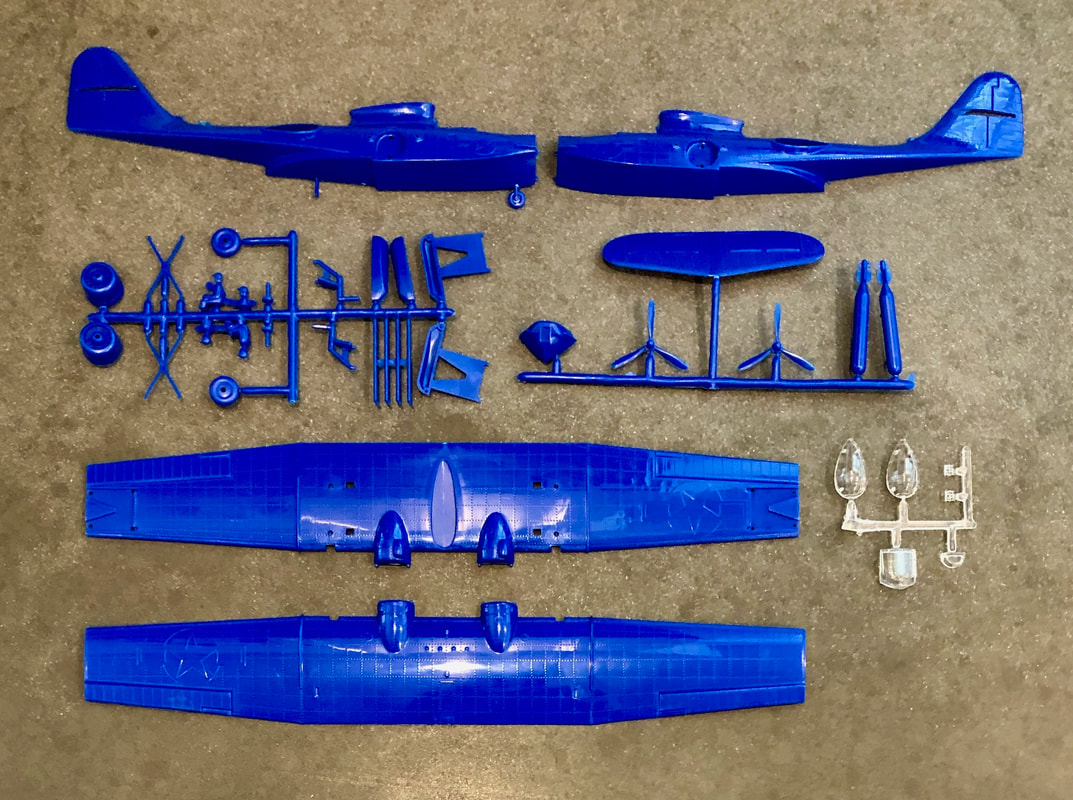
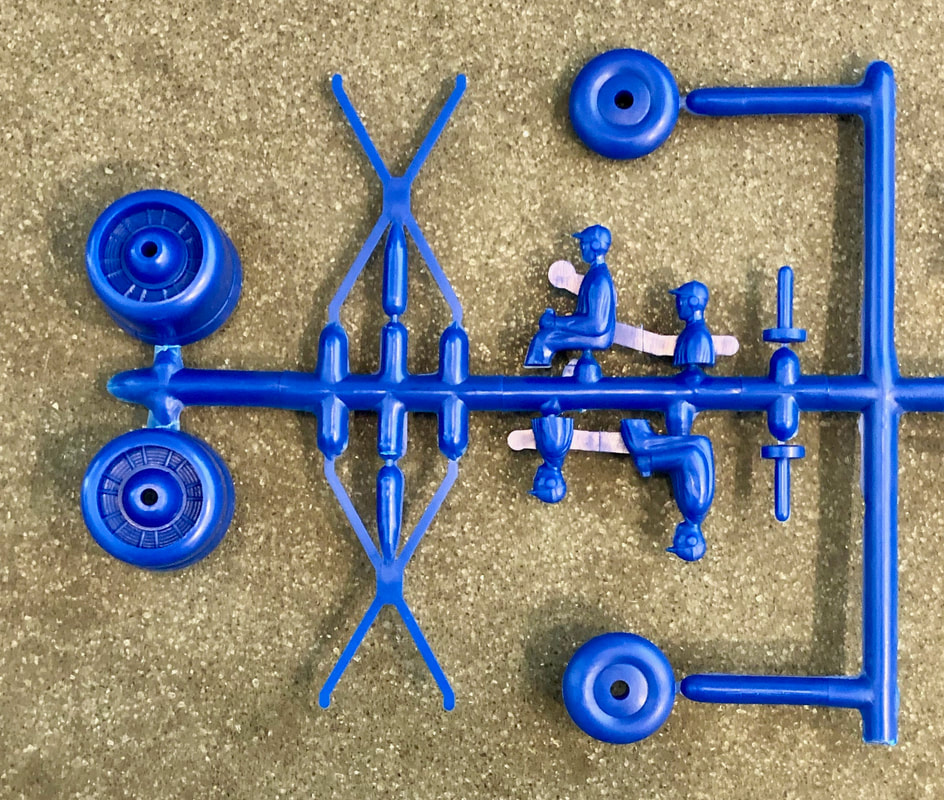
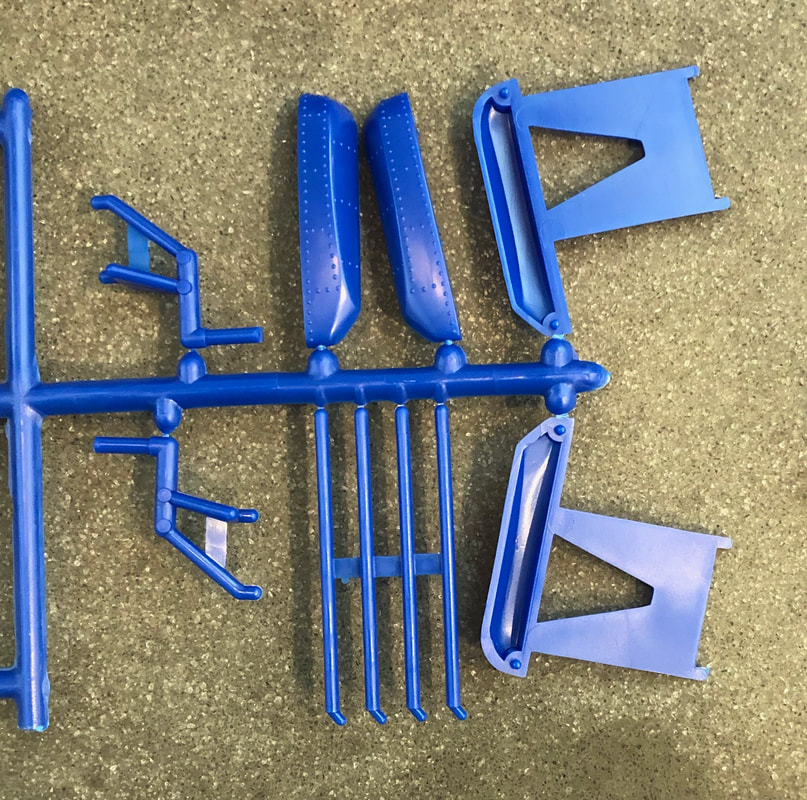
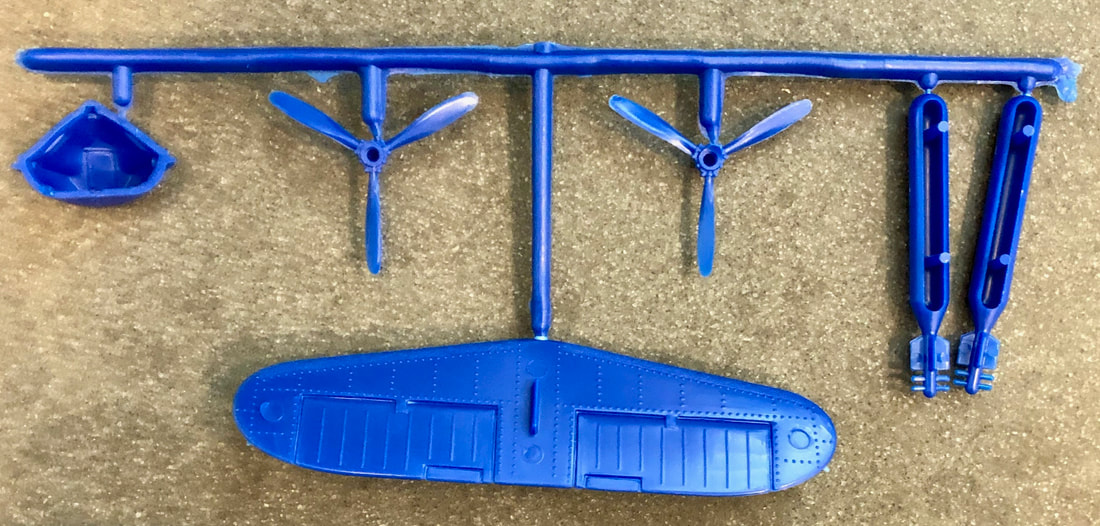
Parts layout appears the same as previous releases. The torpedoes are there!
|
I built one of these on its last release around 1973 and recalled that it was a fun, easy build for the most part. I tried to acquire another in recent years, but the inflated eBay prices were an obstacle. Finally, a year or so ago, I managed to acquire one at a model show vendor’s area from a modeler who just wanted to trim his collection and not take me for what the kit was going for on eBay. My cost was near the low $21.99 retail price that Atlantis has set for this re-release.
This is the first time Dem Brudders have a previous release to compare to a new Atlantis kit. We were curious to see how they stack up. I’ve suspected that Atlantis puts some work into mold cleanup—and now we know. Stay tuned for an in-depth comparison between a 1967 release and 2020 release of the Monogram / Atlantis PBY-5A. |
The box art looks familiar, but it’s different than previous releases. Perhaps it looks the same thanks to the style of artist Don Greer. Most longtime aircraft modelers have some great Squadron "In Action" books in their personal library, and Don Greer has done a number of those covers, which may be why his dreamy, ephemeral style looks familiar.
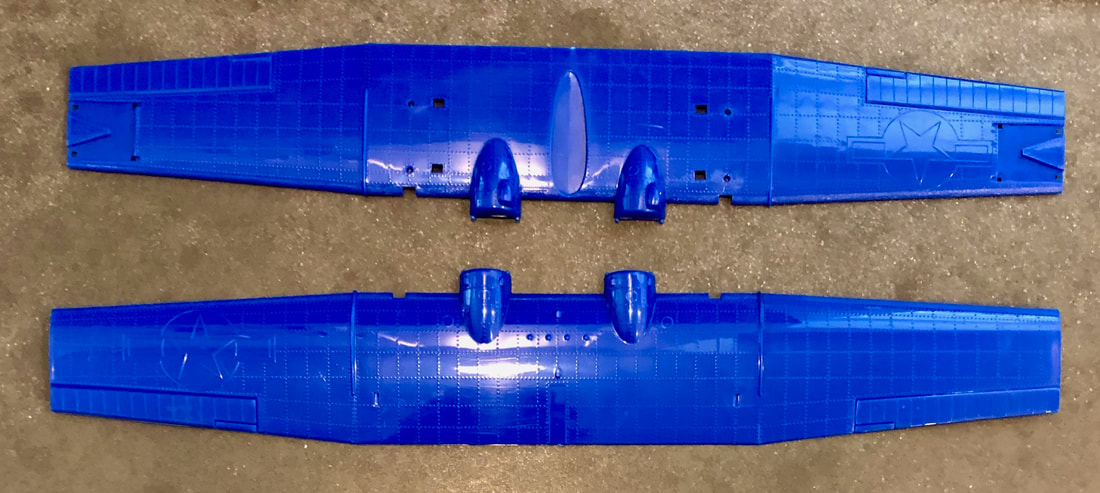
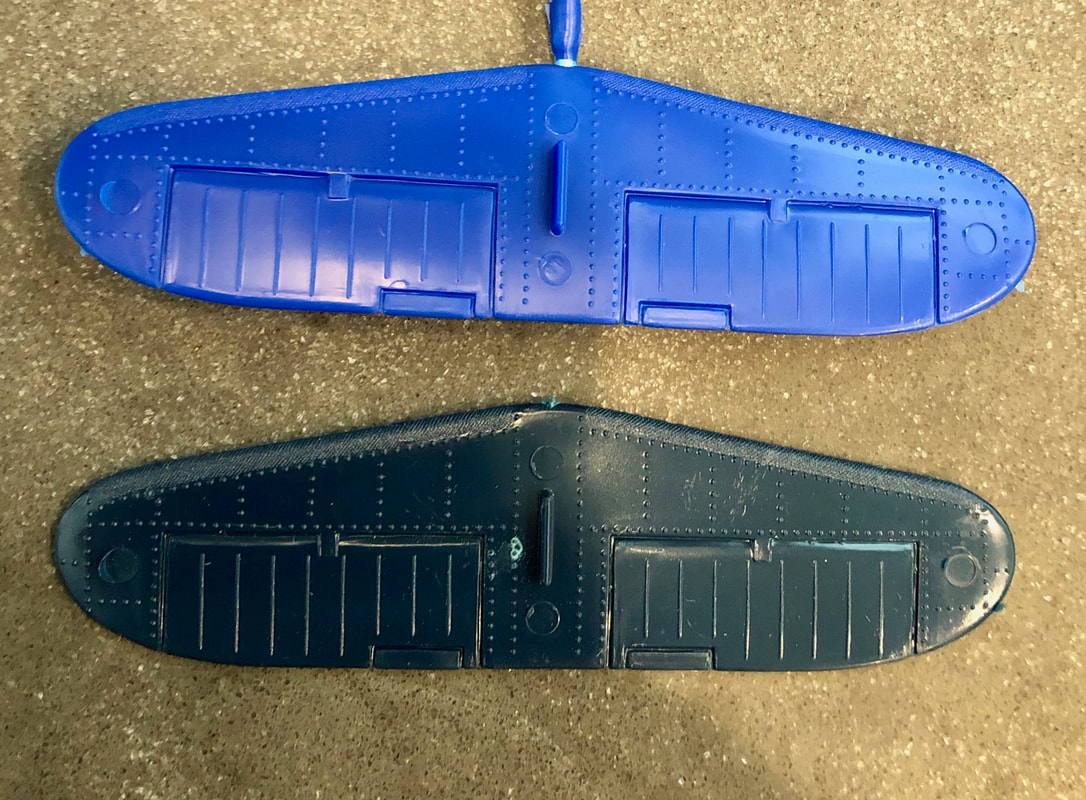
The square holes in the wing are intended for the struts. Round holes are for the torpedoes. Note raised decal locator markings.
As a very early aircraft model, the kit came with raised locator lines for the decal markings along with plenty of rivets. If you don’t want to leave these as-is, it should be a simple matter to sand them off. You could leave the rivets and remove the decal locator lines with a curved Xacto knife by carefully scraping them down.
|
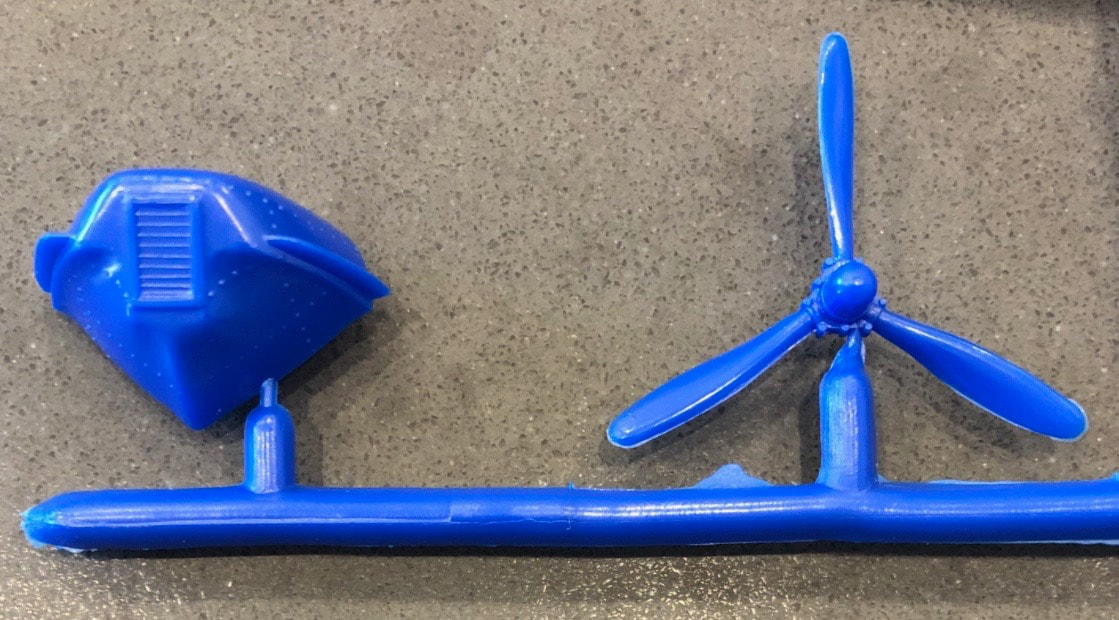
Monogram put some nice subtle details on the nosepeice and props.
|
The kit has a small amount of flash. One fuselage half has some flash over the cockpit that the original release doesn’t have, but dealing with this is extremely minor. It is fit of the fuselage halves where Atlantis has done some work on the tooling.
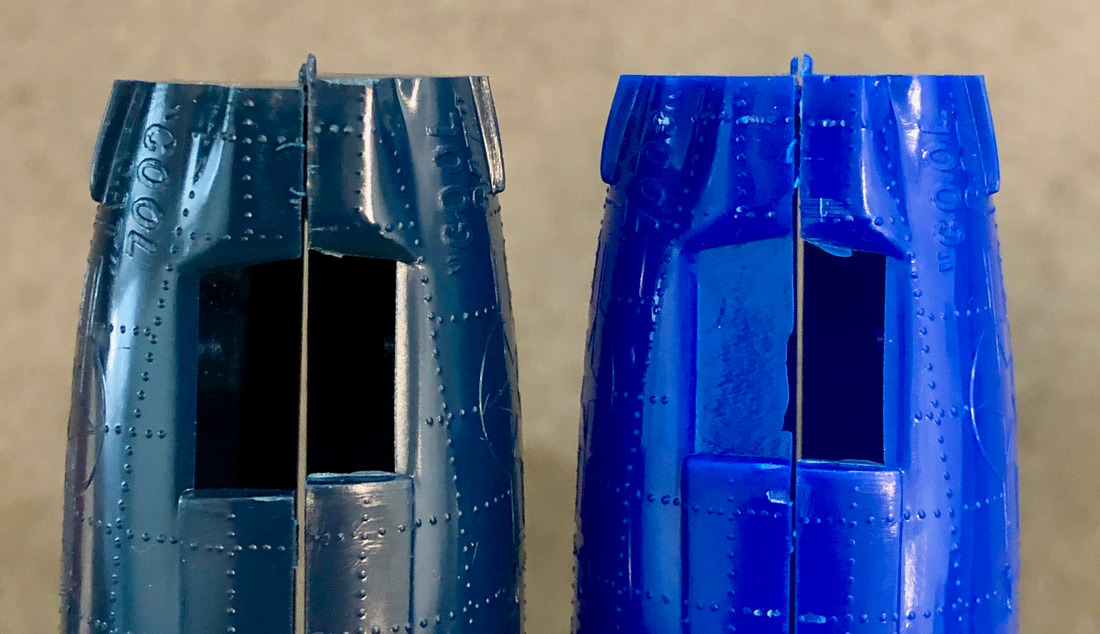
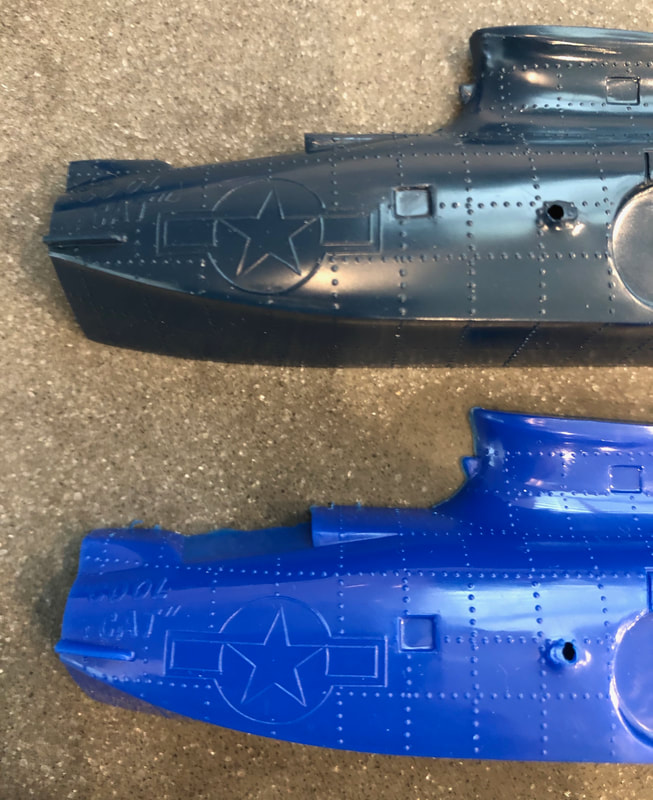
Our “archive” 1967 version of the Monogram PBY has a bad offset of fuselage locator pins. I recall that the 1973 release had this issue as well. More experienced modelers simply remove the locator pins in such instances to get the fuselage halves to match up. I remember as a youth that the 1-mm offset in my 1973 Catalina kit caused issues with the fit of the nose piece and canopy, and my model looked a bit wonky as assembled out-of-the-box since my skills at the time did not facilitate removal of the alignment pins. |
Box side #1: Model specs, aircraft history, paint color chart, and an image of the decals are here.
MORE history, the eyesore UPC, and specs for the actual aircraft here. The bottom of the box had no photo. Stick a picture of your own built model there if you want.
Atlantis is to be commended for their attention to this detail. The offset is completely gone and now, nobody has to hassle with this bugaboo when they build the Atlantis kit. I suspect their other releases have received similar treatment. While they are in most cases vintage kits, parts fit is generally very good or better than one would expect. They're taking test shots and tweaking things in the molds prior to release!
|
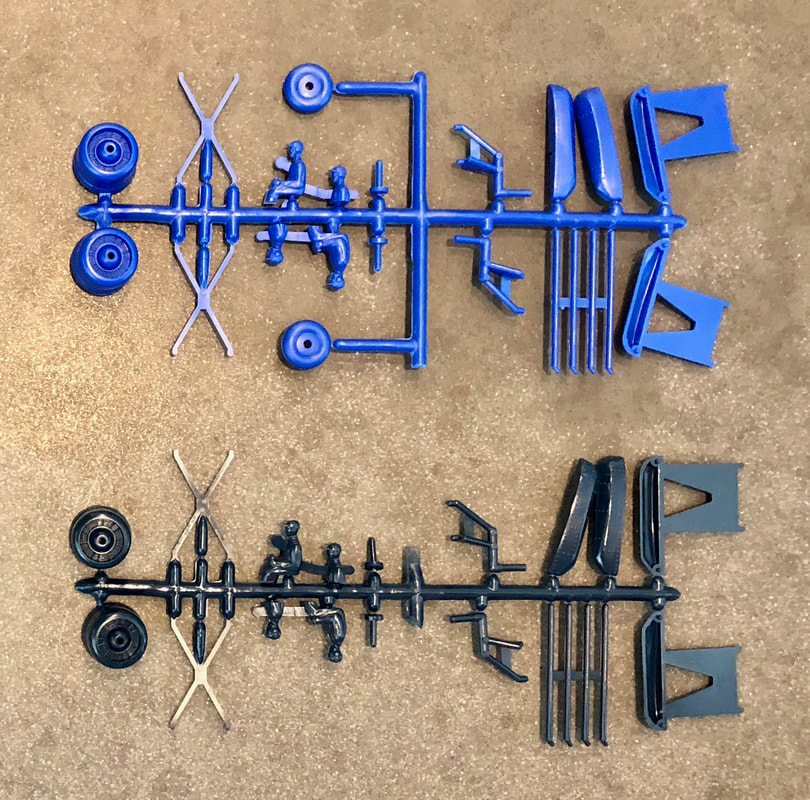
The rest of the parts appear the same as they did before. Atlantis plastic seems a little softer than the old, brittle Monogram material and of course the blue is a shade or two lighter.
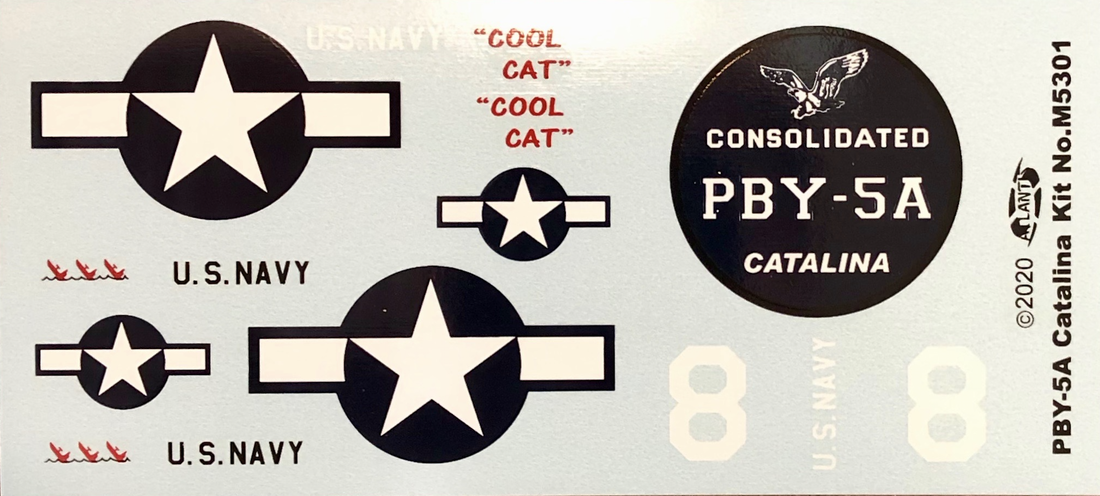
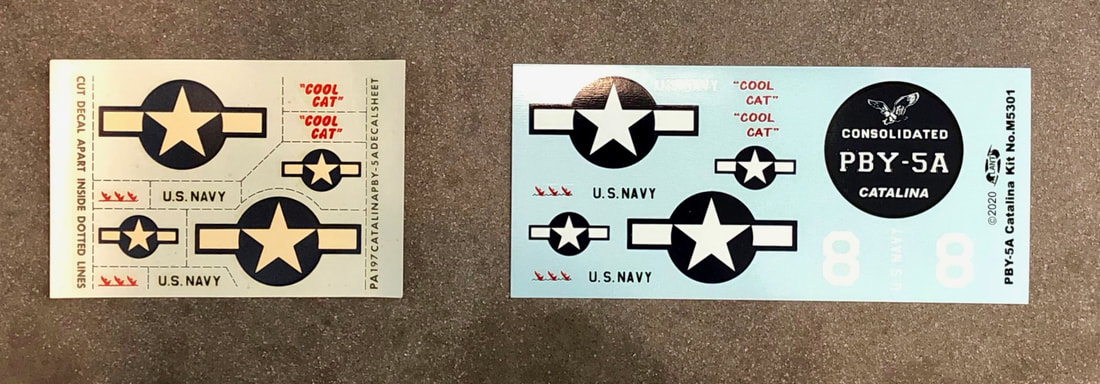
One of the downsides of the decal locator lines etched in the parts is that it limits decal schemes on a re-release. Atlantis has duplicated the “Cool Cat” markings shared with previous releases. Quality of the decals is better than previous releases. |
Atlantis decals are better than the originals for their quality and added content. If you already have an older version of this kit, you'll still want to pick up one of these!
|
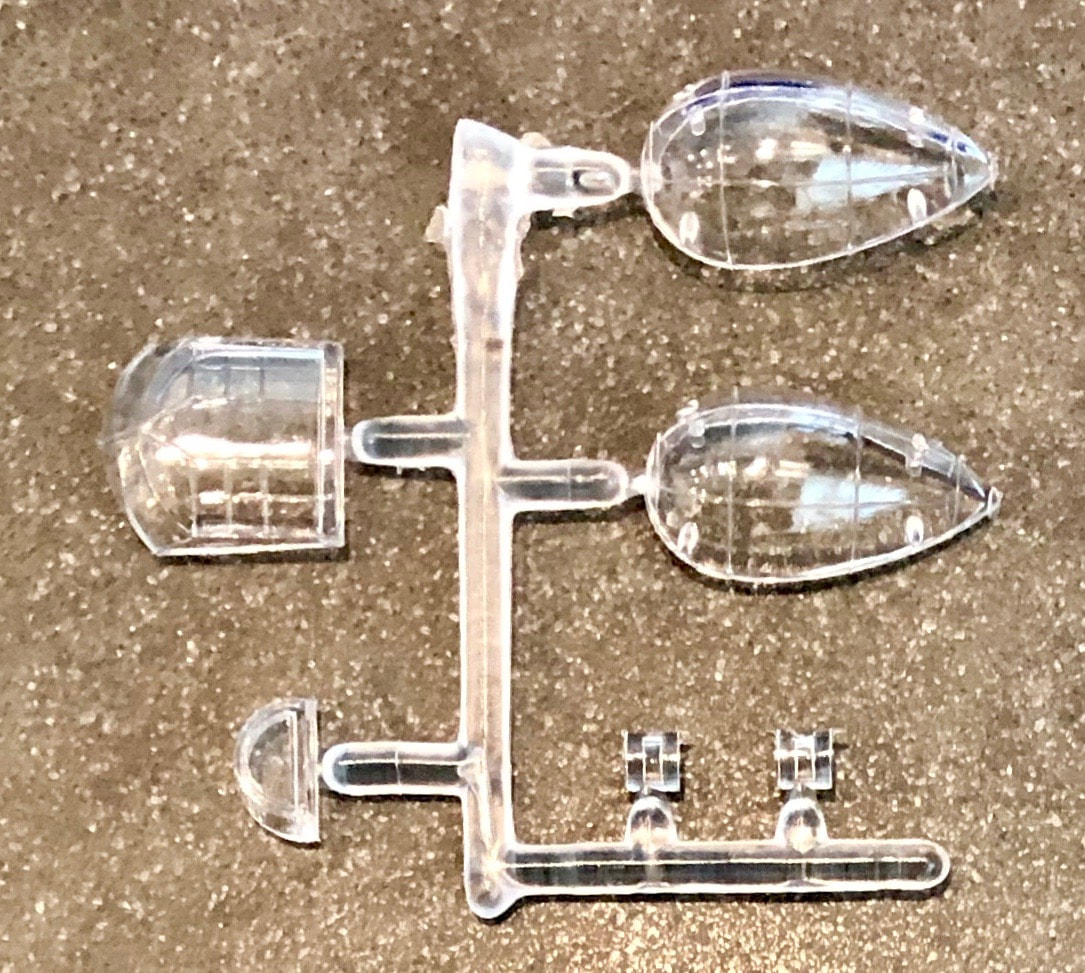
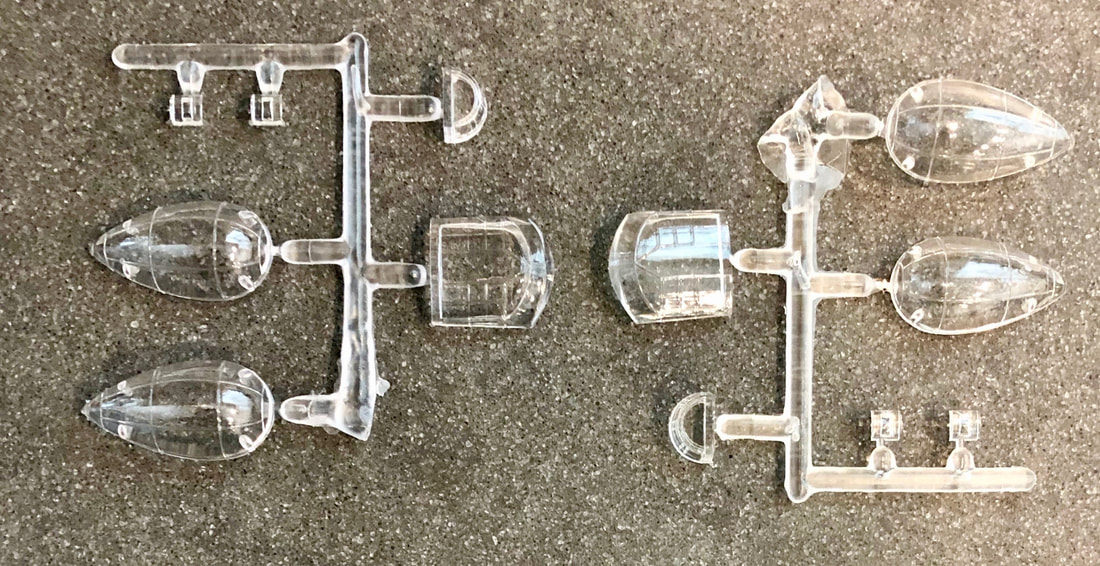
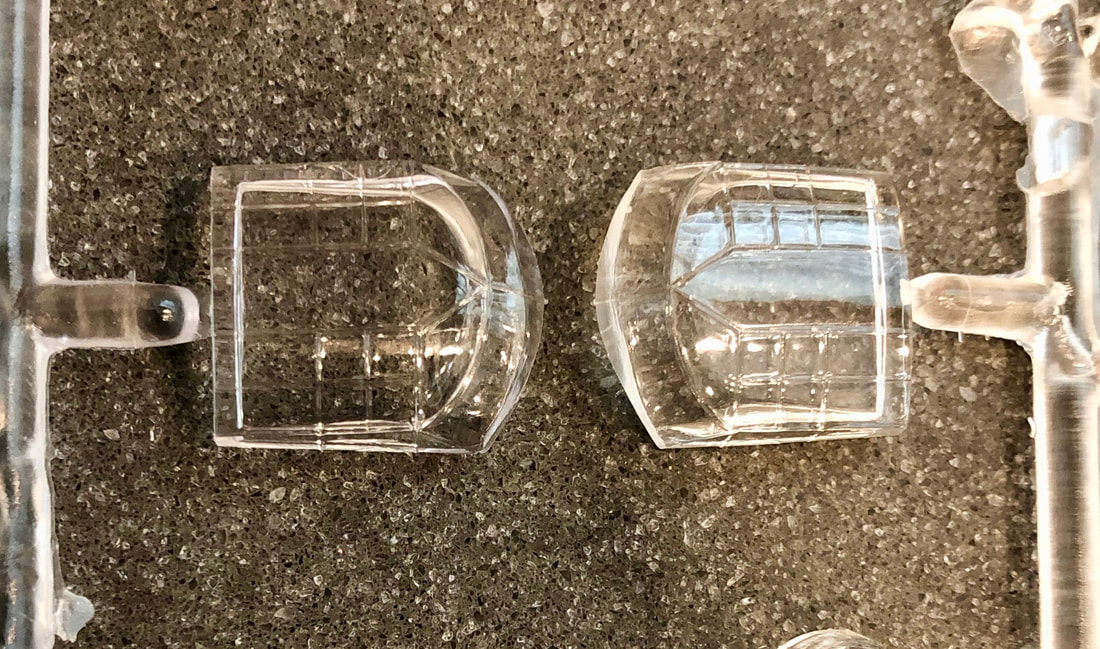
Clear parts are good with this release. One thing that was very nice on the original kit was the location of the sprue attachment points for the canopy parts—they aren’t in a location where the “glass” could be damaged removing them from the sprue. The clear landing lights were a nice detail in the original kit, and they’re still there on the Atlantis version. The instructions don't mention putting some weight in the nose. If you do this, you can cut off the tail support intended to prevent the finished model from being a tail-sitter.
DEM BRUDDERS IMPORTANT SAFETY TIP: One more item to consider is fastening the wheels to the landing gear struts. Many Monogram kits of the day would have you slide the tires on the struts, heat a knife over a flame, and press the knife over the stud poking out of the wheel to hopefully make a rivet-type head to keep the wheel on so it would roll. As I recall, this was really hard to pull off correctly (and safely!) as a kid. If you didn't burn yourself or light your house on fire, the knife was either too hot or too cool and getting that nice rivet head-thing never worked out quite right, at least for me. And let's not even get started about the knives I ruined! There were a lot of bad things that could happen here. No doubt today's Consumer Product Safety Commission would have issues with kids trying this nowadays. I'd recommend cutting the protruding post off even with the outside wheel hub and just gluing the wheel on. It's the safer, quicker route and the result will just look better. The wheels won't roll, but you can still fly the finished model around your workshop and make the engine noise yourself when nobody's looking.
DEM BRUDDERS IMPORTANT SAFETY TIP: One more item to consider is fastening the wheels to the landing gear struts. Many Monogram kits of the day would have you slide the tires on the struts, heat a knife over a flame, and press the knife over the stud poking out of the wheel to hopefully make a rivet-type head to keep the wheel on so it would roll. As I recall, this was really hard to pull off correctly (and safely!) as a kid. If you didn't burn yourself or light your house on fire, the knife was either too hot or too cool and getting that nice rivet head-thing never worked out quite right, at least for me. And let's not even get started about the knives I ruined! There were a lot of bad things that could happen here. No doubt today's Consumer Product Safety Commission would have issues with kids trying this nowadays. I'd recommend cutting the protruding post off even with the outside wheel hub and just gluing the wheel on. It's the safer, quicker route and the result will just look better. The wheels won't roll, but you can still fly the finished model around your workshop and make the engine noise yourself when nobody's looking.
|
I didn't note any sinkholes worth mentioning and ejection pin marks are minor. The horizontal stabilizer has some on the bottom and one side of each float support has a few, but only contest modelers will care about these to any degree. Parts count in this kit isn’t extremely high here, either. This will be an easy, fun build for any modeler, much easier than previous versions thanks to the fit-upgrade given by Atlantis.
Dem Brudders give this one four enthusiastic thumbs up! It’s great to see this one available again after decades without, and kudos to Atlantis for making it better than ever! |
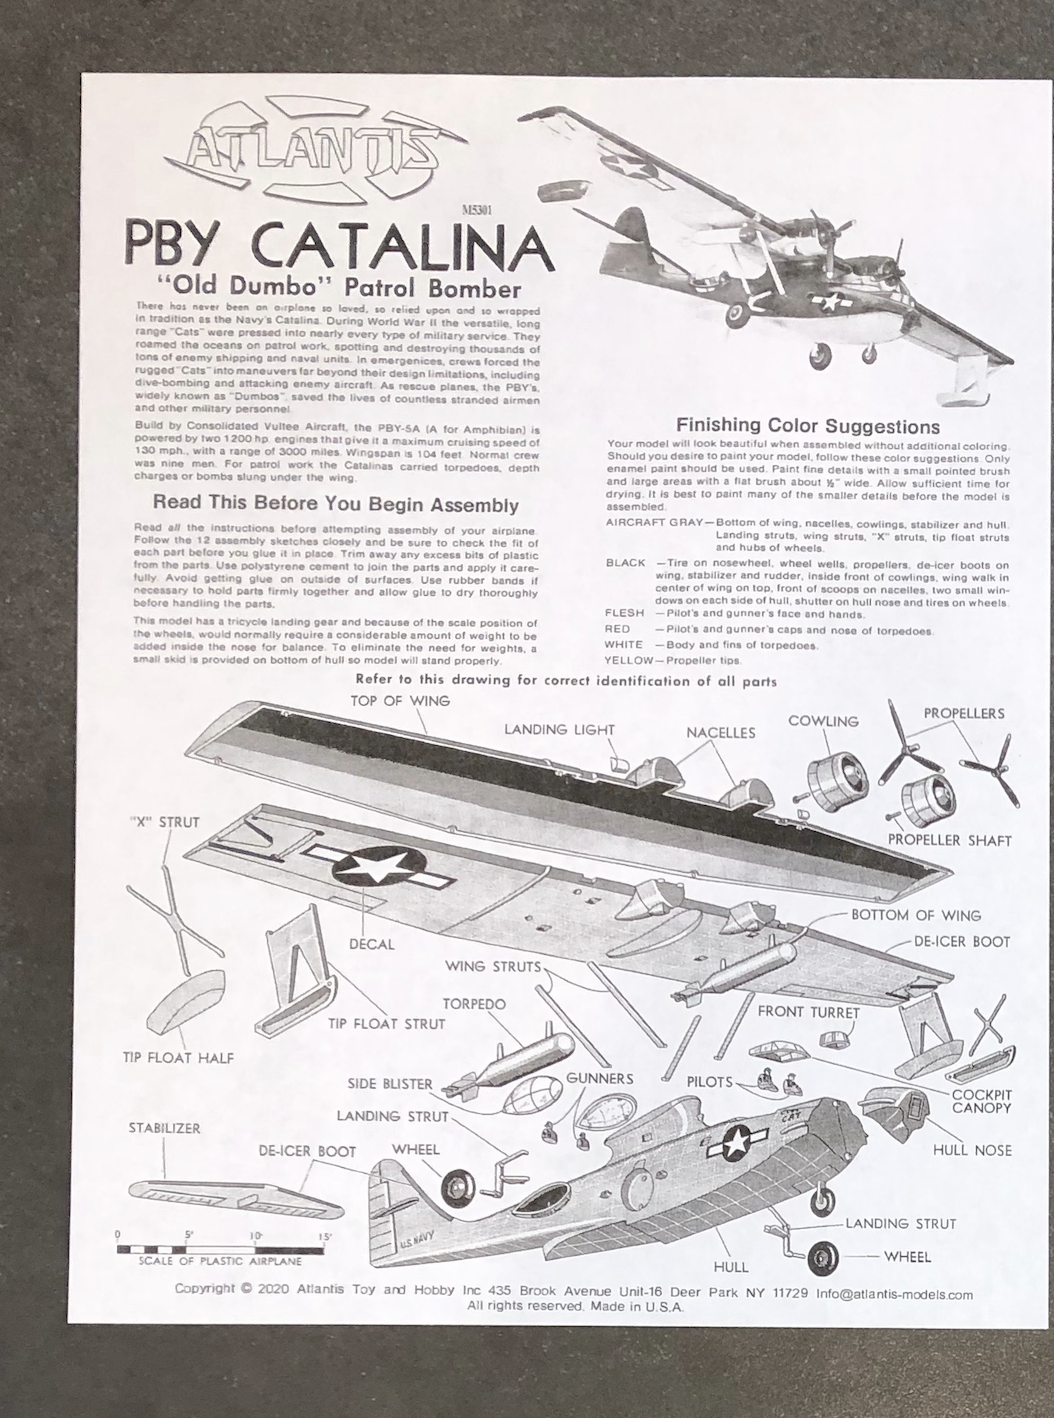
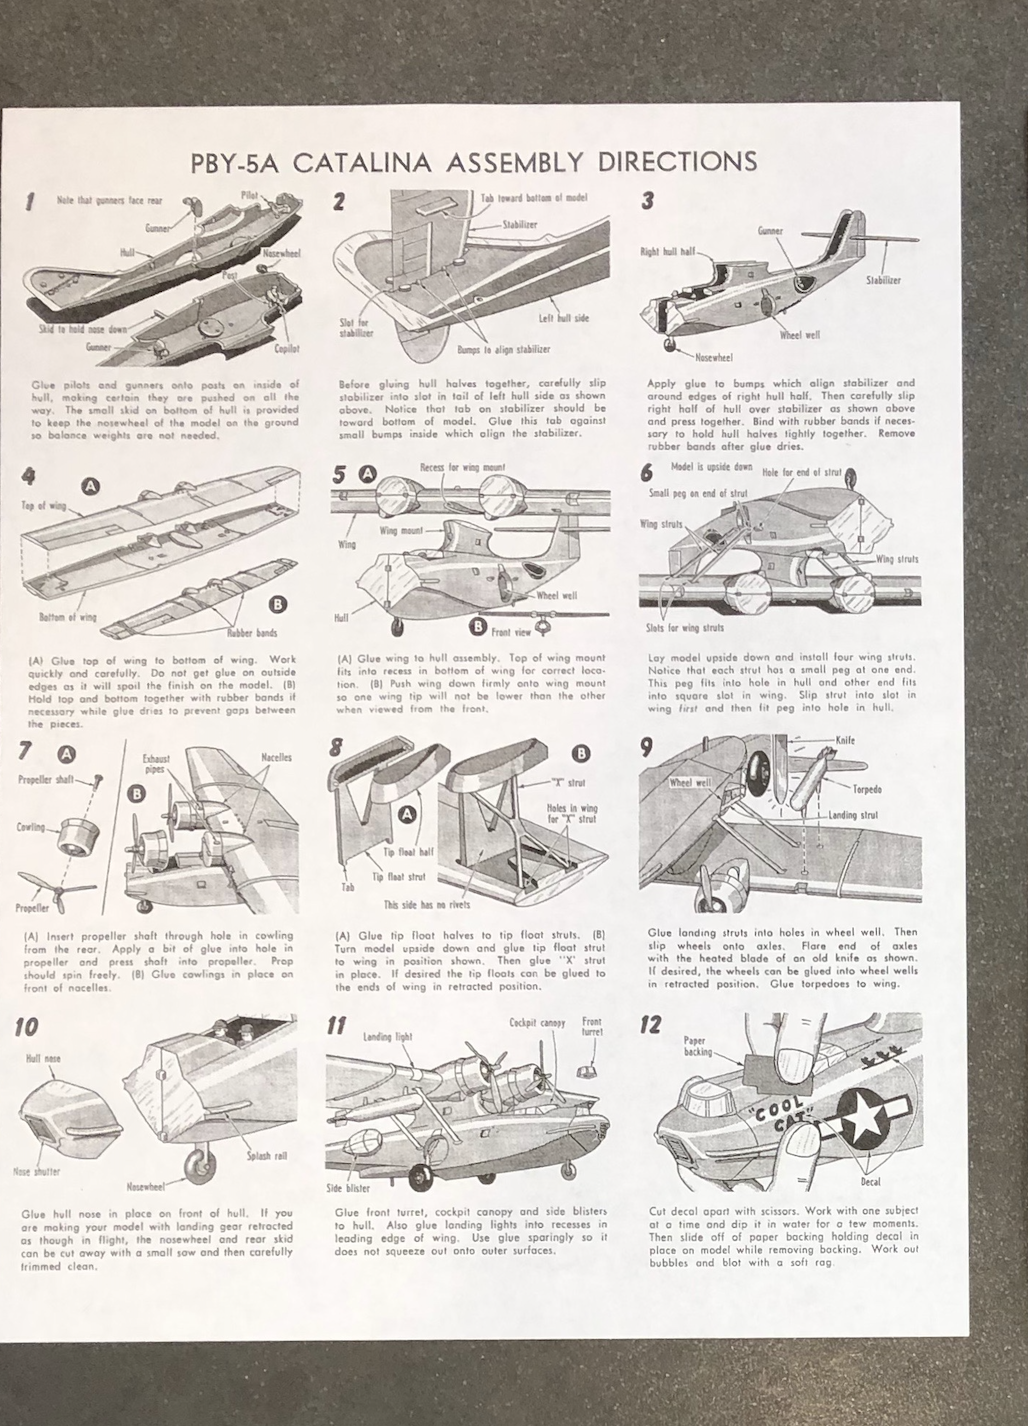
Roddy Redshirt doesn't do too well with the instructions in our video review. Here's a readable version. These are identical to Monogram's original instructions that came with the 1967 kit save the Atlantis logo change.
SPECIAL THANKS TO ATLANTIS MODELS FOR PROVIDING THE KIT USED IN THIS REVIEW!!
SPECIAL THANKS TO ATLANTIS MODELS FOR PROVIDING THE KIT USED IN THIS REVIEW!!
|
|
Learn more about the Atlantis PBY 5A Catalina kit at Amazon.com!
|
BONUS MATERIAL: COMPARING THE ORIGINAL MONOGRAM VERSION TO THE NEW ATLANTIS KIT
That's the original Monogram kit on the left. Note the offset of the fuselage halves! Atlantis has fixed this issue as noted in the image to the right. That bit of flash over the portside fuselage half is a small price to pay for the repair of this issue which created havoc for youngsters trying to build this kit a couple generations back, this modeler included!
What's new is old: Don Greer's 2020 artwork is similar to Lou Drendel's 1960's art. Both Lou and Don have done artwork for the covers of Squadron's "In Action" books. That's why they both look familiar!
Compare decal sheets! The old Monogram decals were pretty thick. We'll bet the Atlantis decals go in place much better.
|
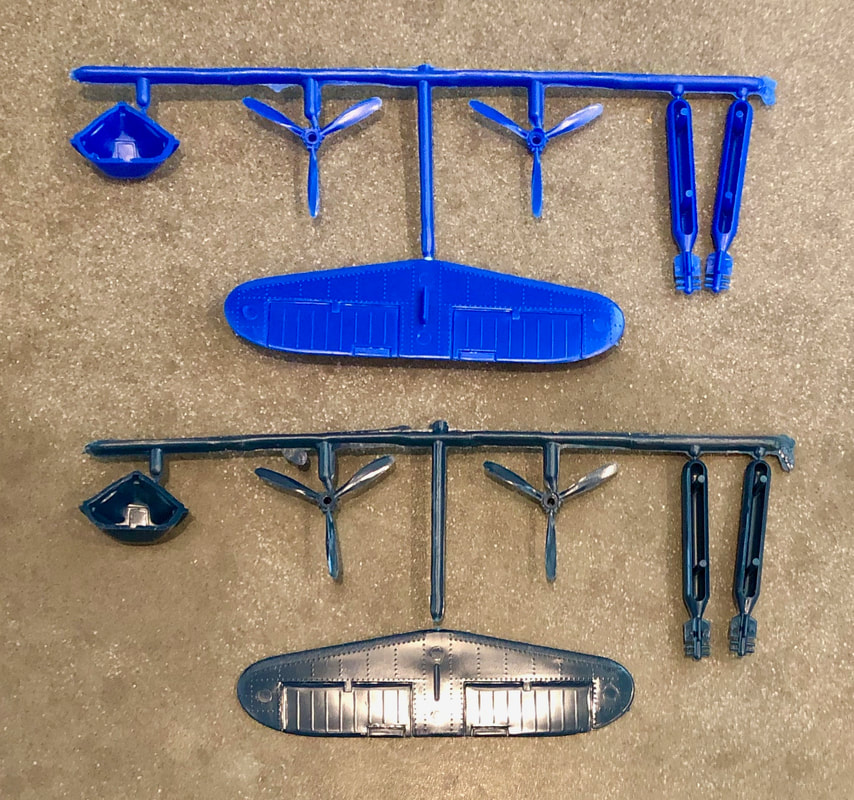
There are no apparent differences on this sprue. Atlantis at the top, of course.
|
The molds to this model have aged extremely well--or more likely, they were properly stored for nearly half-a-century. If I didn't know better, I'd think they were two sequential runs with a different lot or color of plastic.
|
|
|
Learn more about the Atlantis PBY-5A Catalina kit at Amazon.com!
|
Indulge us as we chuckle at the misfortunes of Roddy Redshirt and his ham-fisted attempts to review a fresh re-release of a beloved kit. The PBY Catalina played a vital role in the rescue of downed aviators and sailors during WWII and beyond. We hope you'll ponder that as you build your own PBY. Also, we believe that gratitude is due to the search-and-rescue services of our military forces. We also mustn't forget the people of the U.S. Coast Guard, who regularly put their lives in danger to help those in trouble on the high seas.
HOW WE DID IT ON $6
Initial traffic to our second YouTube video is heavy so far. In fact, on the first day it was posted, we got more views on our PBY video than we had in two months with the Atlantis Cheyenne video.
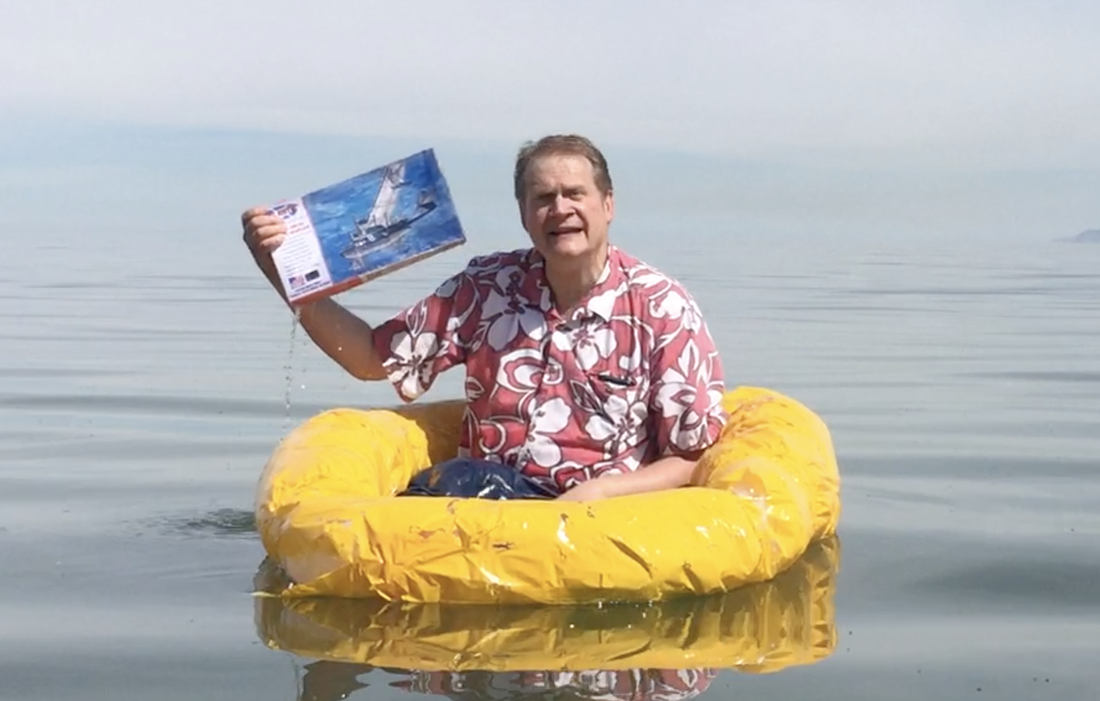
A few weeks prior to the release of the Atlantis PBY kit, I got the idea for the rescue raft theme. It seemed like a natural thing after seeing the box art image that Atlantis put on their website. I briefly considered buying a cheap raft on eBay, but decided a 1/1 scale duplicate of a WWII rescue raft would look better on "film" and cost much less. I set a maximum budget of about $10 to make the video.
|
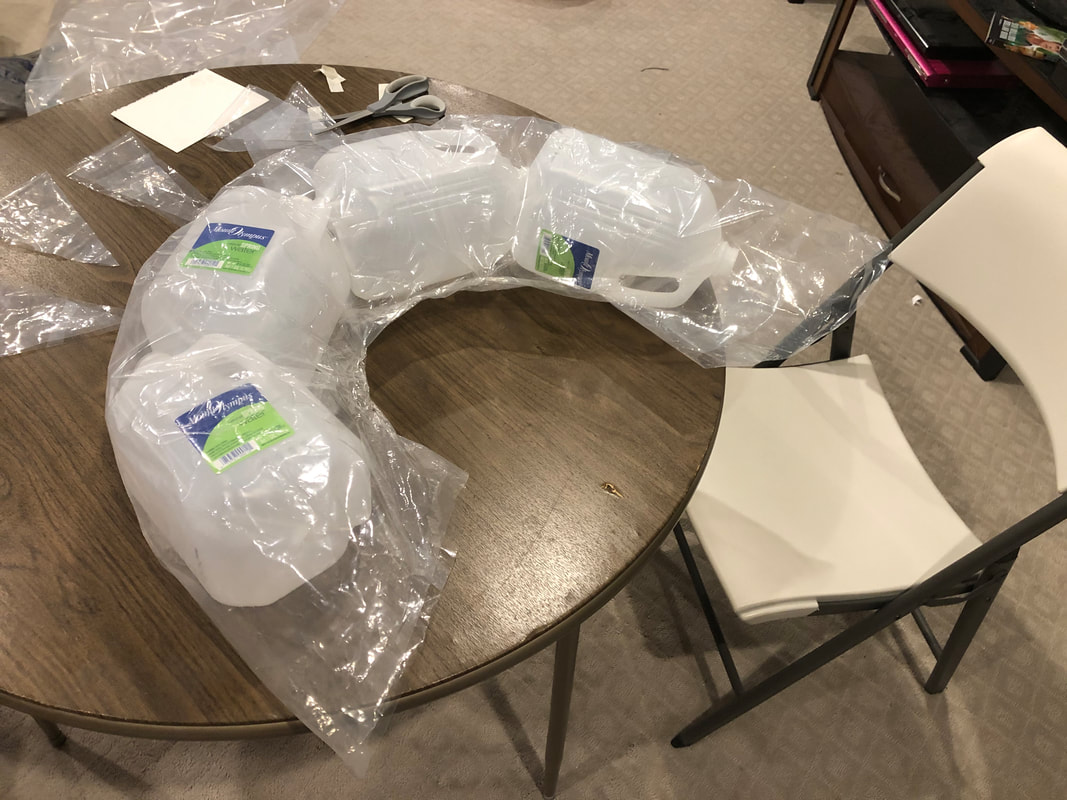
1/1 scale model of an AN-B-2B WWII rescue raft takes shape
|
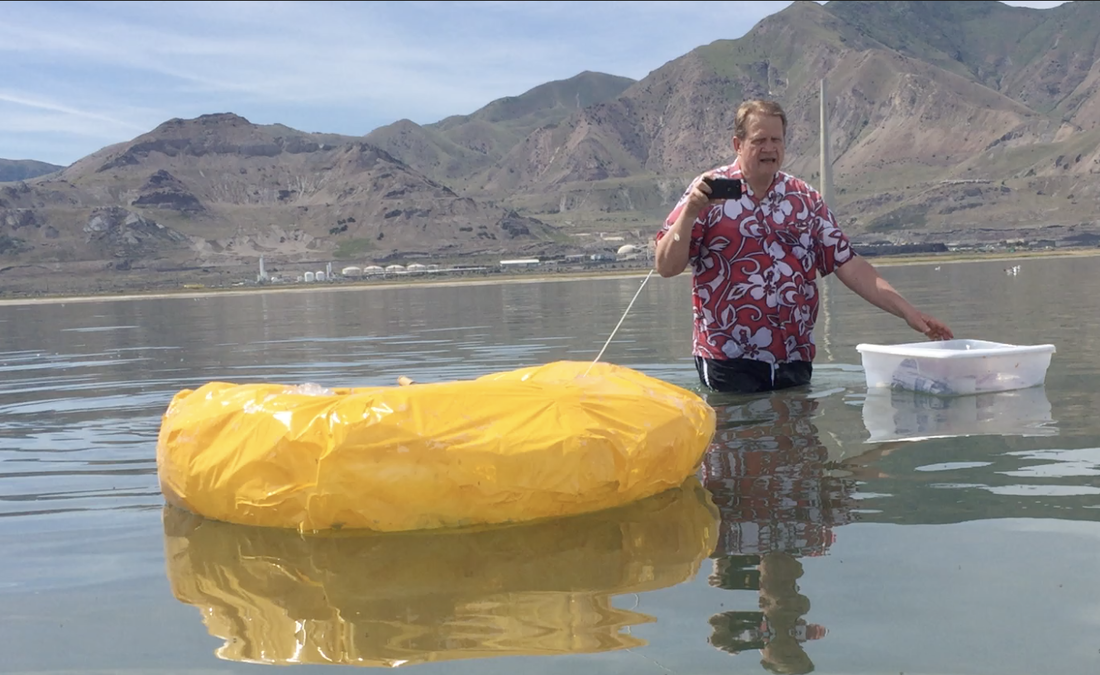
FAKE RAFT: At my workplace, we throw away a lot of bubble-wrap. You get tired of popping it for fun after a while, and instead, I hoarded it briefly and took it home as the "stuffing" of the raft. The raft's outer covering would be some sheet plastic we had around the house. The only items needed to complete it were two rolls of packing tape from the dollar-store ($2.00), and a can of low-grade yellow spray paint from Wal-Mart ($4.00). Other than gas (Brudder Dick drove), this represented the total expenditure to make the video.
I was pretty amazed at how much bubble wrap it took to stuff the raft. To help, I used some empty gallon water and milk jugs. Taping the thing together and painting it in the back yard probably took about three hours or so. |
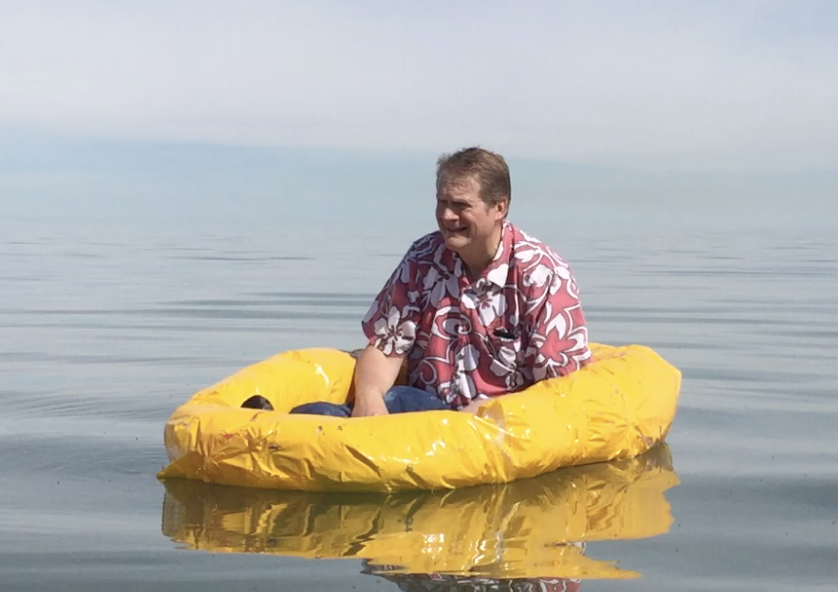
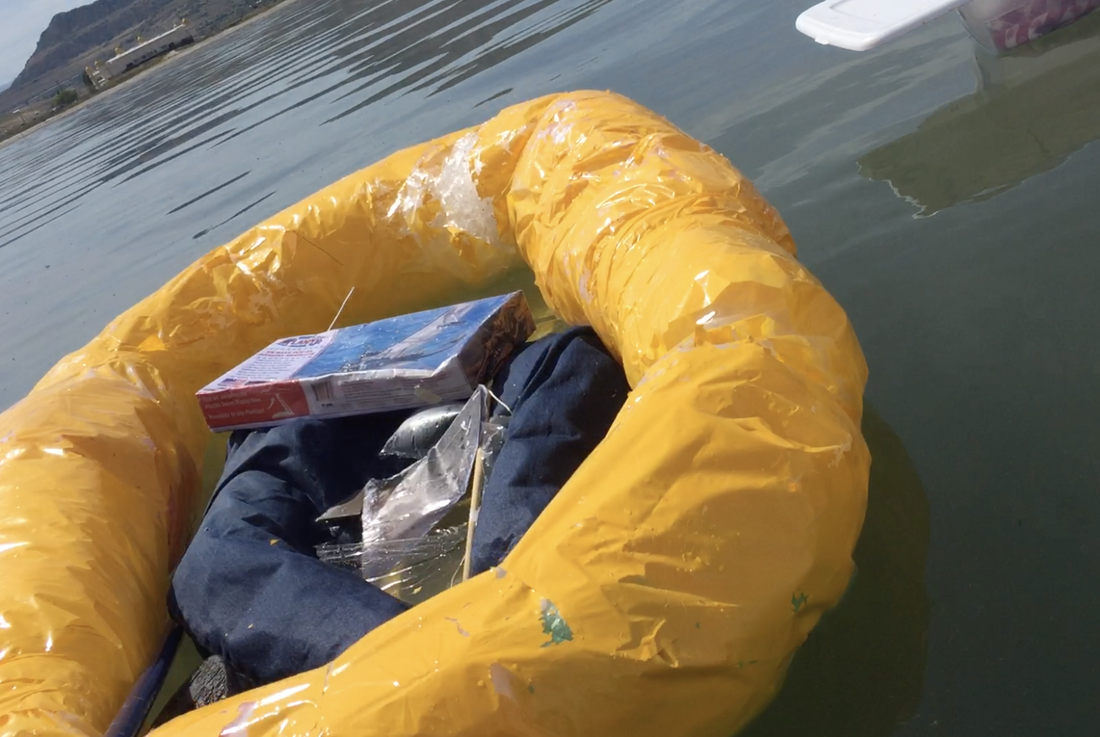
The "raft" was designed so "Roddy Redshirt" could actually stand on the lake bottom. An old set of blue jeans stuffed with cardboard and bubble wrap and my black "yard work" shoes composed a set of fake legs that provided a sufficient illusion that Roddy is floating in the raft and not standing on the "sea floor."
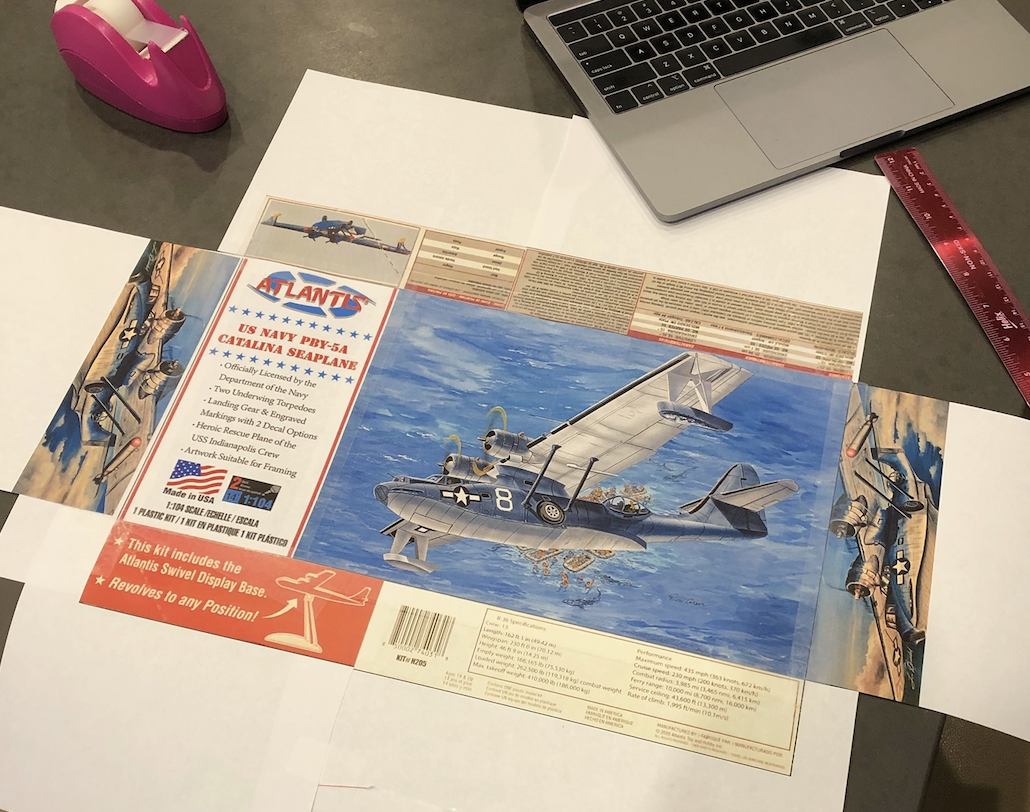
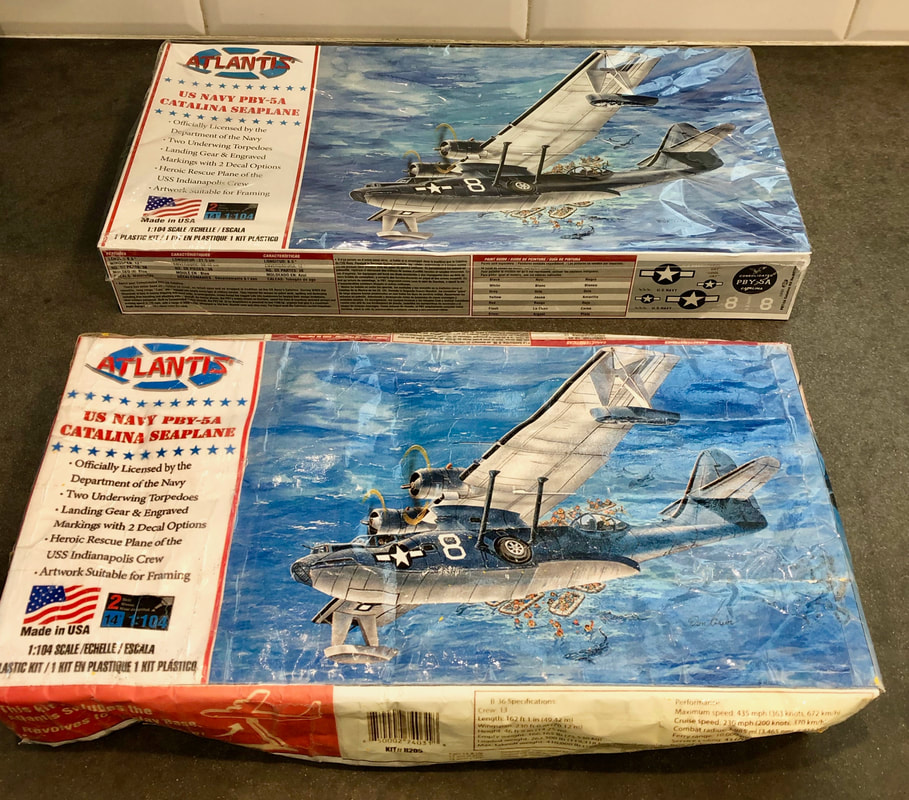
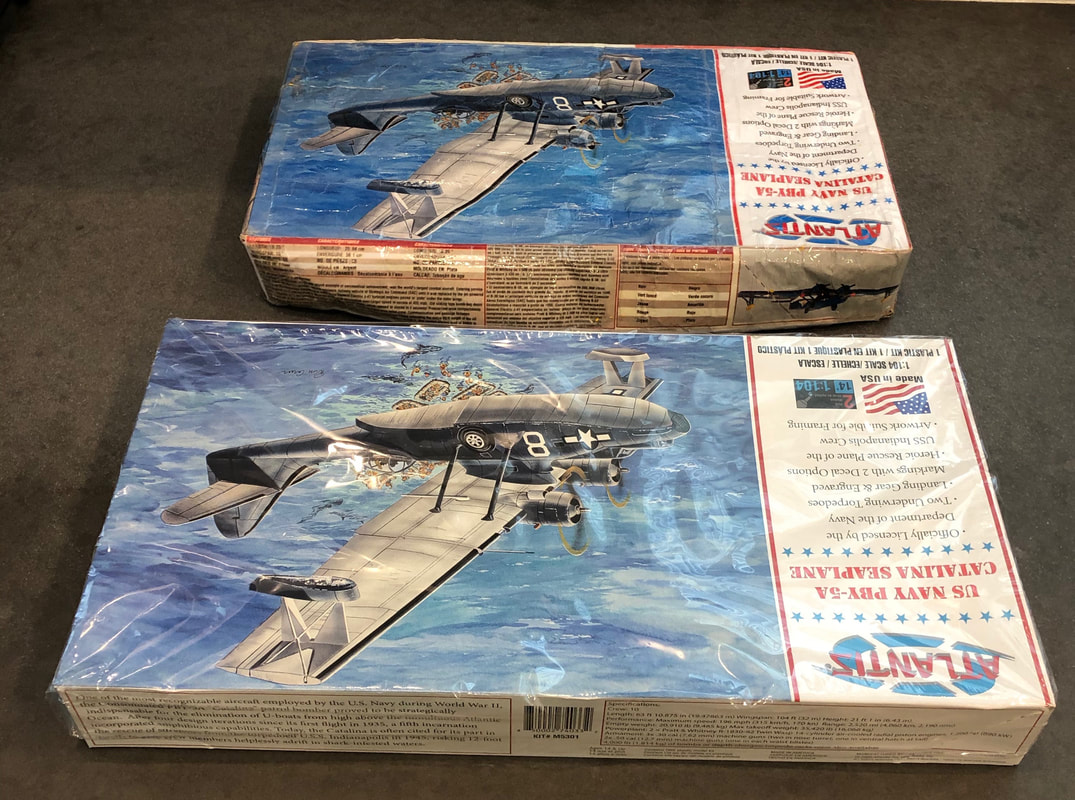
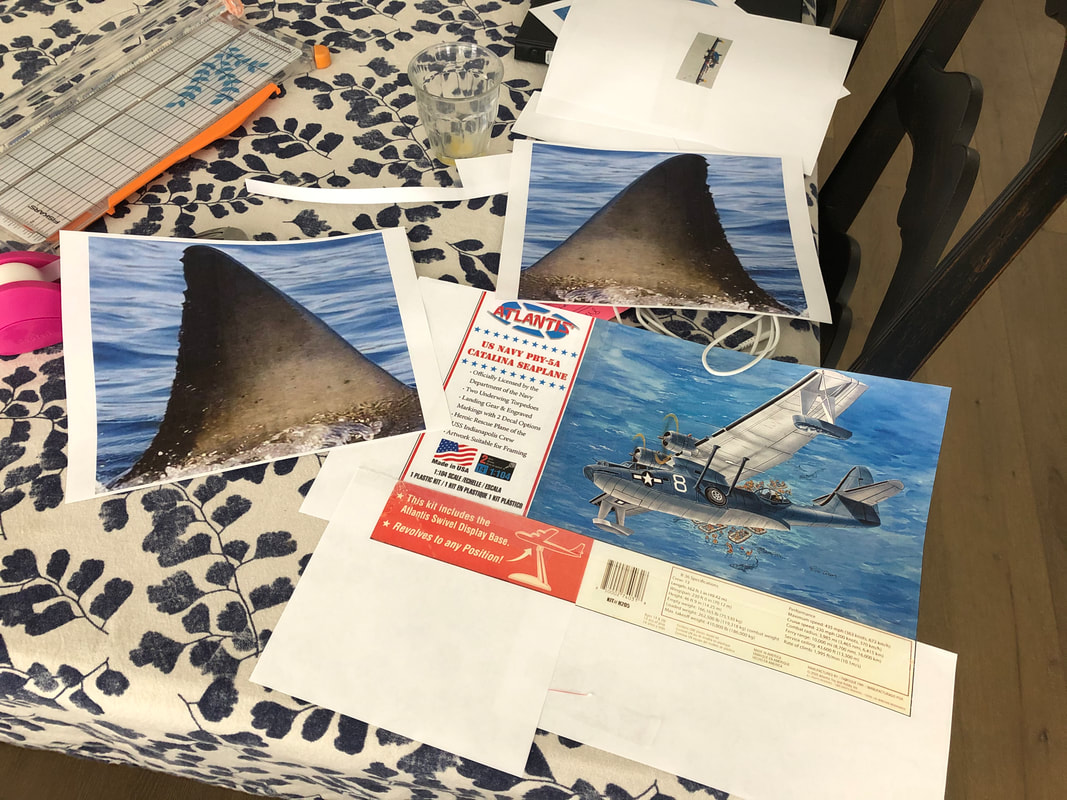
FAKE KIT BOX: There was no way we were going to ruin a real model kit box to film a video. I consider a free model from a company intended for a kit review as a gift, and I'm not one to abuse a gift. A "stunt-box" was needed. Atlantis Models made it easy to make one with a website image of the box art for the then-upcoming PBY kit. I took a screen-grab and sized the printer image to fit on a scratchbuilt 8X16-inch box. I assumed that Atlantis would use the same size box as they did with their B-36, and I was right. Since my home printer only does legal-size at the largest, I did some literal cut-and-paste to get the image the right size. The sides of the fake box are copies of the Atlantis B-36 box except for some images I took from the 1967 Monogram PBY box that I have.
|
This paper overlay was made on my ink-jet printer. Scaling to the right size (or at least close) was easy since I'm sizing images all the time to use in building model kit conversions and scratchbuilt projects. Note the box ends with the vintage Monogram art. I got this detail wrong!
|
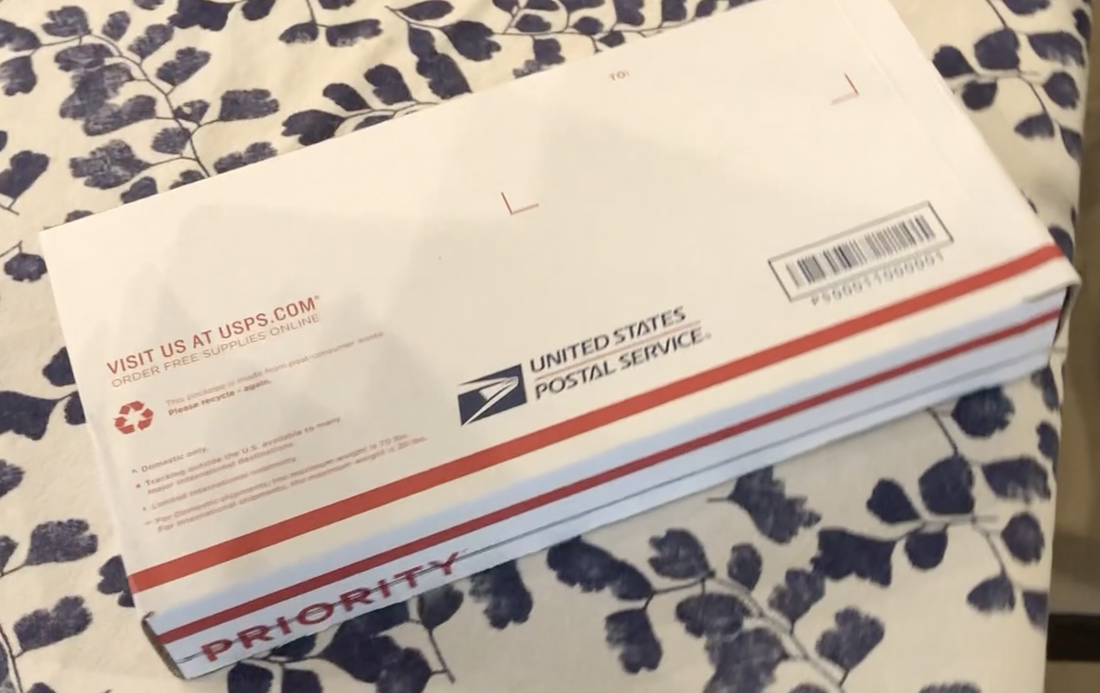
A used Priority Mail box was cut and resized to fit the paper overlay. Since my math skills aren't exactly A-Grade, the size was off by just a bit, so I formed the box to fit the paper and not the other way around.
|
I cut some strategic holes in the back of the fake kit box once it was finished. A large one near the top would allow the box to fill with water easily. Several smaller holes near the bottom corner would allow multiple streams of water to drip out once the box was lifted up for the video. You can see the holes briefly when Roddy puts the box back down in the raft during the first water scene.
Plenty of dollar-store tape covered the box; I calculated that it only had to last about a half-hour--the estimated time to film the actual on-water scenes for the video. The ink for my inkjet printer holds up in water pretty well so I didn't worry about the colors running during filming.
Plenty of dollar-store tape covered the box; I calculated that it only had to last about a half-hour--the estimated time to film the actual on-water scenes for the video. The ink for my inkjet printer holds up in water pretty well so I didn't worry about the colors running during filming.
FAKE SHARK FIN: I was in a bit of a rush when it came time to do the shark fin. It was easiest to enlarge a screen-grab of a shark fin from the Internet. I simply used my photo editor to flip it backwards to get a backside. The cardboard fin was a cast-off Cheerios cereal box overlaid with the fin-image paper covered with dollar-store tape. The whole assembly could pivot on a dowel, and a small fin underneath allowed it to change direction. Brudder Dick simply moved the shark fin back and forth on the surface of the water while he filmed. You can see the steering fin when he lifts it out of the water at the final post-credits scene (watch the video until the very end!).
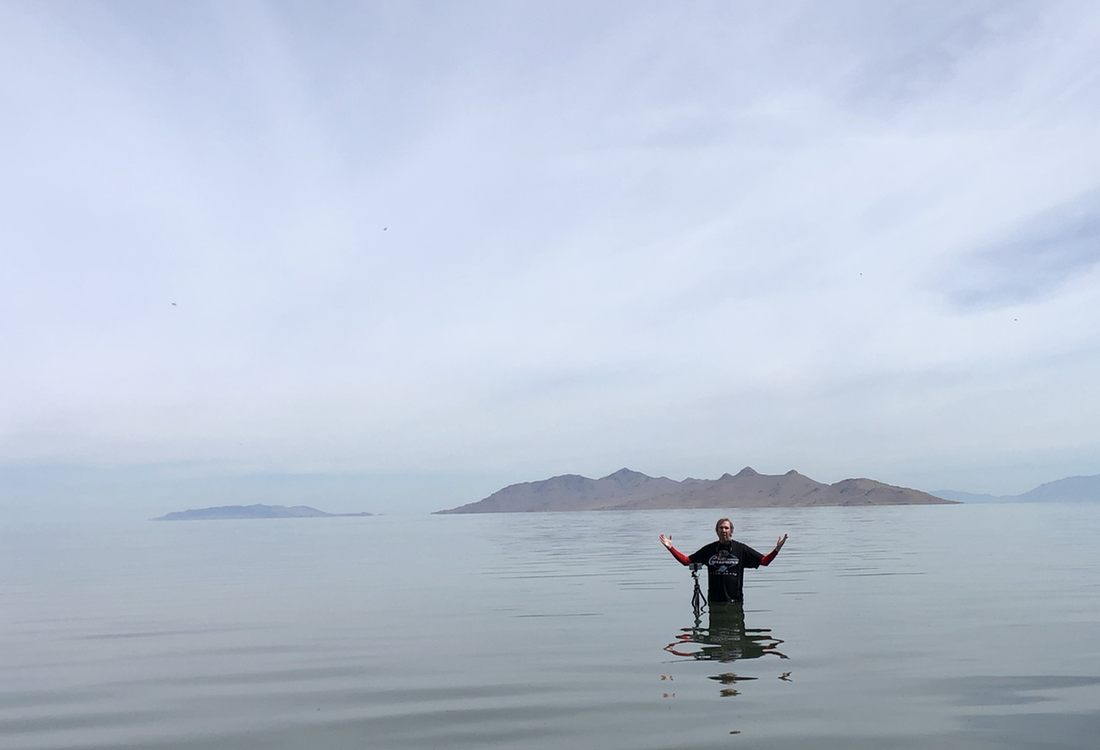
FAKE PACIFIC OCEAN: We filmed this video on The Great Salt Lake from what locals know as the Saltair Pavilion area. The Great Salt Lake is several times saltier than the ocean, so you really wouldn't want to run a power boat on it. A few folks run their sailboats. We reasoned that we wouldn't have any boats across our background if we got out there at a reasonable time in the morning before the boaters arrived. This access to the lake is only a half-hour or so away from home. Another reason the lake is bereft of people is that the shoreline has a rather pungent sulfurous odor from rotting algae, and the beach is infested with billions of pesky brine flies. It's not exactly a place where you want to drop a towel and get some sun or a nice swim.
|
The beauty for the video is that at the Saltair location, there is a nice vista of water as far as the eye can see (water out to the horizon) and Brudder Dick perfectly framed this view, which is suggestive of the South Pacific with a few random desert islands in the distance. The view 180 degrees away is composed largely of the Kennecott Copper refinery and Interstate 80.
The weather was very calm, and the lake was almost flat as seen in the video. This made it very pleasant for filming and water temperature and air temp were both very pleasant. |
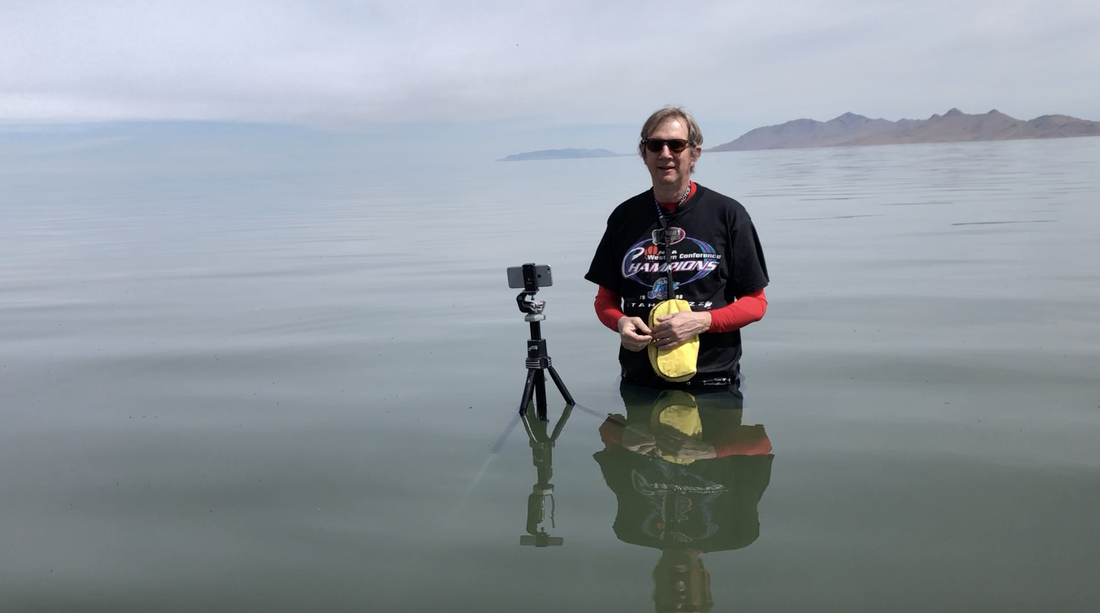
Our cinematographer, Brudder Dick, with Antelope Island in the background (looking north).
|
An additional insidious thing about the Great Salt Lake is that the elevation change of the lakebed is very slight. This means that to get out far enough to film in waist-deep water, you have to hike about a half-mile through the water! Current lake level is low and we had to hike about a half-mile or so, carrying the raft and all our equipment, just to get to the stinky water's edge so we could hike another half-mile to film.
|
That Sinking Feeling: This is an actual screen grab from the "Roddy Redshirt's Demise" scene. The video was cropped to hide the fact that Roddy was actually in fairly shallow water. You can see the air line (for the bubbles) and masking tape for the "decals" in the video. We spared every expense to get our $6 worth.
|
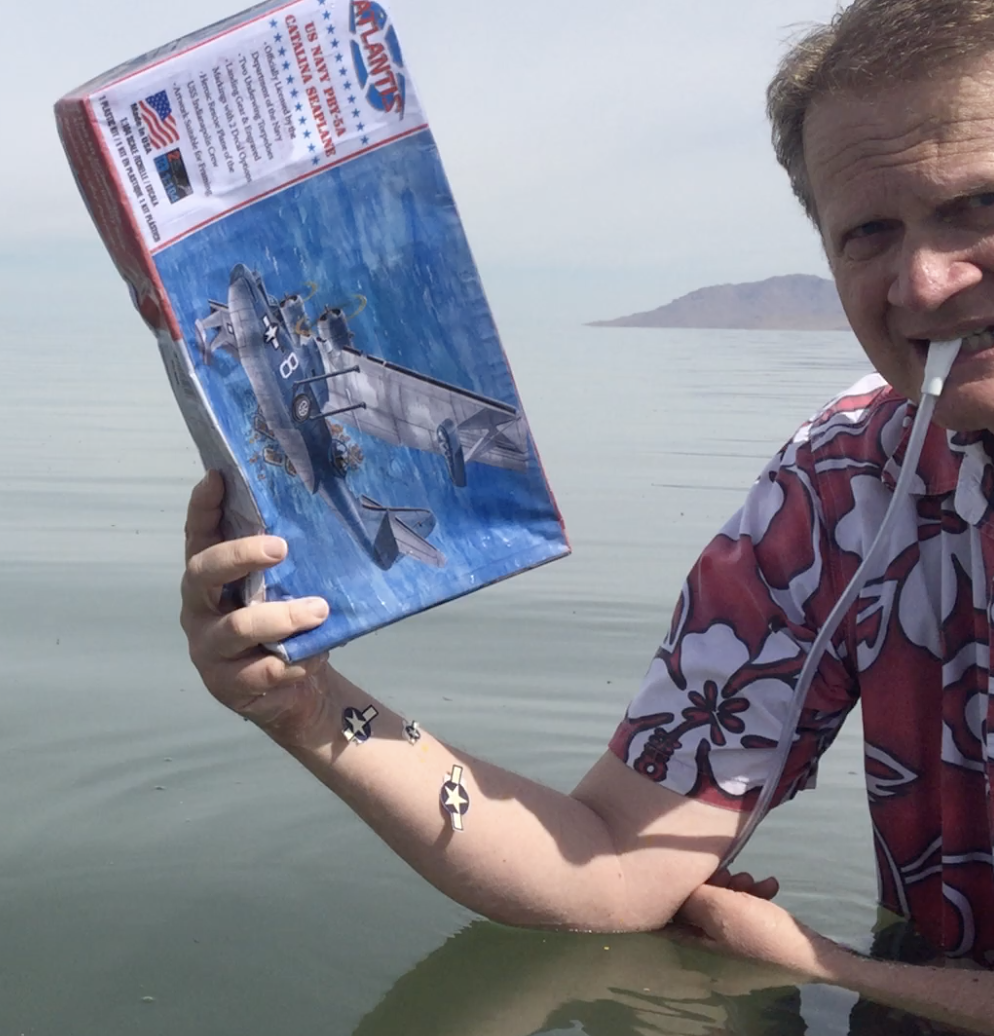
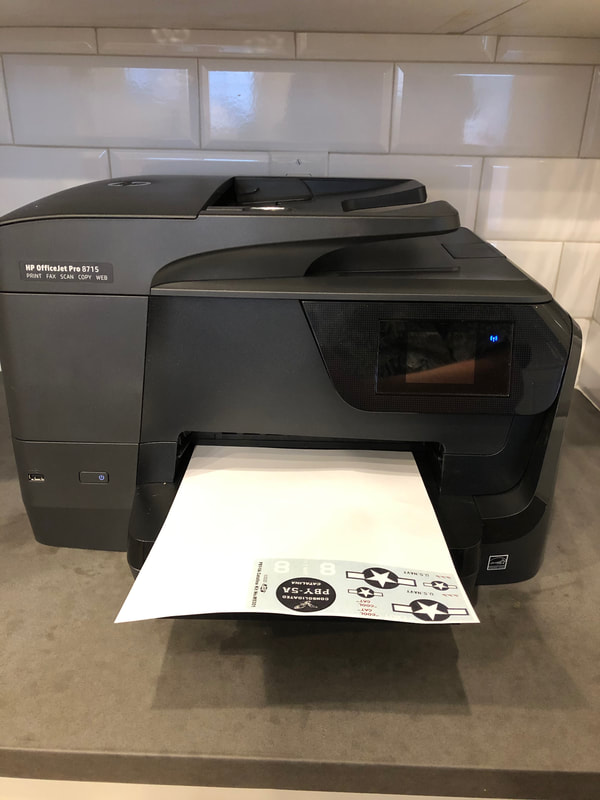
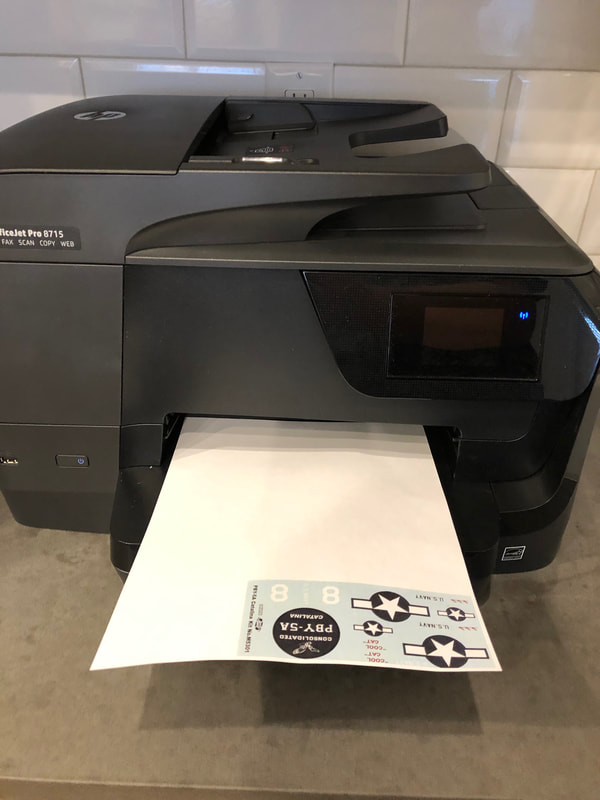
Fake decals for the water scenes (left) were cutouts from a copy from the old Monogram kit decal sheet. For the green-screen "studio" scenes, we copied the Atlantis decal sheet on my color printer/scanner!
|
REAL SEAGULLS: Every scene with the real Atlantis kit was done using green-screen in Dem Brudders Studios the same day I received the model from Atlantis. The "bobbing background" was a five-minute shot of just the lake view with nothing in frame other than water, sky, islands, and one seagull! Speaking of seagulls, after we shot the "bread" scene, a handful of seagulls came to eat the bread as we set up the next shot. They were finishing up the bread as we filmed the "fishing" scene and you can hear their squawks in the video! We were appreciative that these "extras" were willing to work for nothing more than a few pieces of stale bread. We heard of no complaints filed with the Actors Equity union.
FAKE DECALS: After making a color copy of the decal sheet for the studio green-screen shot, I cut out the fake decals. To duplicate blue, plain decal paper, I simply Googled "light blue," looked at the images that came up, and did a screen grab on the right shade to print up a plain, light blue piece of fake decal paper.
FAKE DECALS: After making a color copy of the decal sheet for the studio green-screen shot, I cut out the fake decals. To duplicate blue, plain decal paper, I simply Googled "light blue," looked at the images that came up, and did a screen grab on the right shade to print up a plain, light blue piece of fake decal paper.
The "fake" decals were cut from the printed sheet and barely tacked to the fake light-blue "decal paper" using a glue-stick. I set them horizontally in a bin of water and had Roddy carefully lift them in a horizontal position on-camera. The hope was that the decals would drop off the paper when it was turned vertical in the shot. When this didn't happen, Roddy improvised, helping them off the sheet. The effect is reasonably convincing that we ruined an actual decal sheet. Didn't happen.
FAKE INSTRUCTIONS: This was easy; I simply did a back-to-back copy of the instructions on my printer. The water-resistant ink didn't run and my original Atlantis instructions are fully intact waiting for me to start the kit!
REAL BRIGHT: We used an old stunt-iPhone to do the filming (iPhone 4). I knew if it was dropped in the heavily salty water, it would have been toast instantly. In spite of careful plans, knucklehead Roddy Redshirt had Brudder Bills' iPhone in his pocket the whole time (you can see it in the video!). If he had dropped it in the water, we would have killed him before he drowned!
SCROLL DOWN JUST A BIT TO SEE WHAT ELSE IS NEW AT DEMBRUDDERS.COM!
