By Bill Engar
FLIGHT SUMMARY: IT'S A WINNER! ATLANTIS MODELS' 1/77 NORTHROP F-89J SCORPION IS A VINTAGE AIRCRAFT KIT THAT HAS VERY NICE SURFACE DETAILS. BEST FOR BUILDERS WITH A LITTLE EXPERIENCE USING PAINT, GLUE, AND HANDLING SMALL, FRAGILE PARTS. INTERMEDIATE AND ADVANCED MODELERS WILL WANT TO HAVE SOME MODELING PUTTY ON HAND. PARTS WILL NEED A LITTLE CLEANUP BUT OVERALL IT SHOULD BE A FUN, SATISFYING BUILD.
#H221 - 44 PARTS - 2021 MSRP $21.99 - UNASSEMBLED KIT REQUIRING PAINT AND GLUE (NOT INCLUDED)
UPDATE: AUGUST, 2023. OUR ATLANTIS (REVELL) F-89 BOX ART MODEL BLOWS APART THE MYTH THAT YOU CAN'T WIN AN AWARD AT THE IPMS NATIONALS WITH A 1950'S VINTAGE MODEL KIT! READ ON FOR EXPLANATION
#H221 - 44 PARTS - 2021 MSRP $21.99 - UNASSEMBLED KIT REQUIRING PAINT AND GLUE (NOT INCLUDED)
UPDATE: AUGUST, 2023. OUR ATLANTIS (REVELL) F-89 BOX ART MODEL BLOWS APART THE MYTH THAT YOU CAN'T WIN AN AWARD AT THE IPMS NATIONALS WITH A 1950'S VINTAGE MODEL KIT! READ ON FOR EXPLANATION
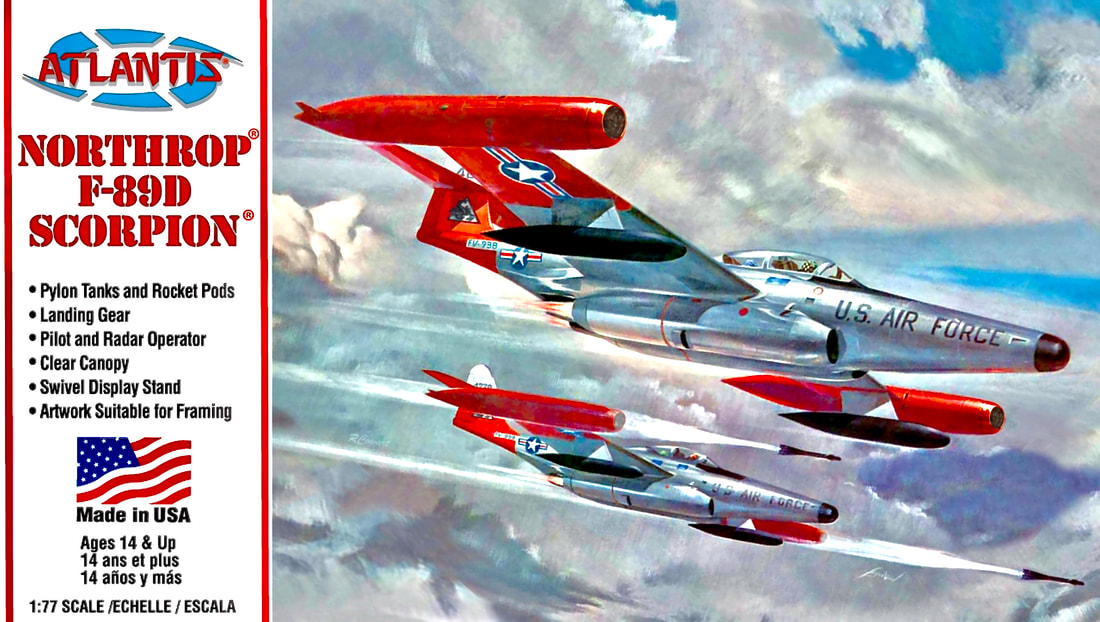
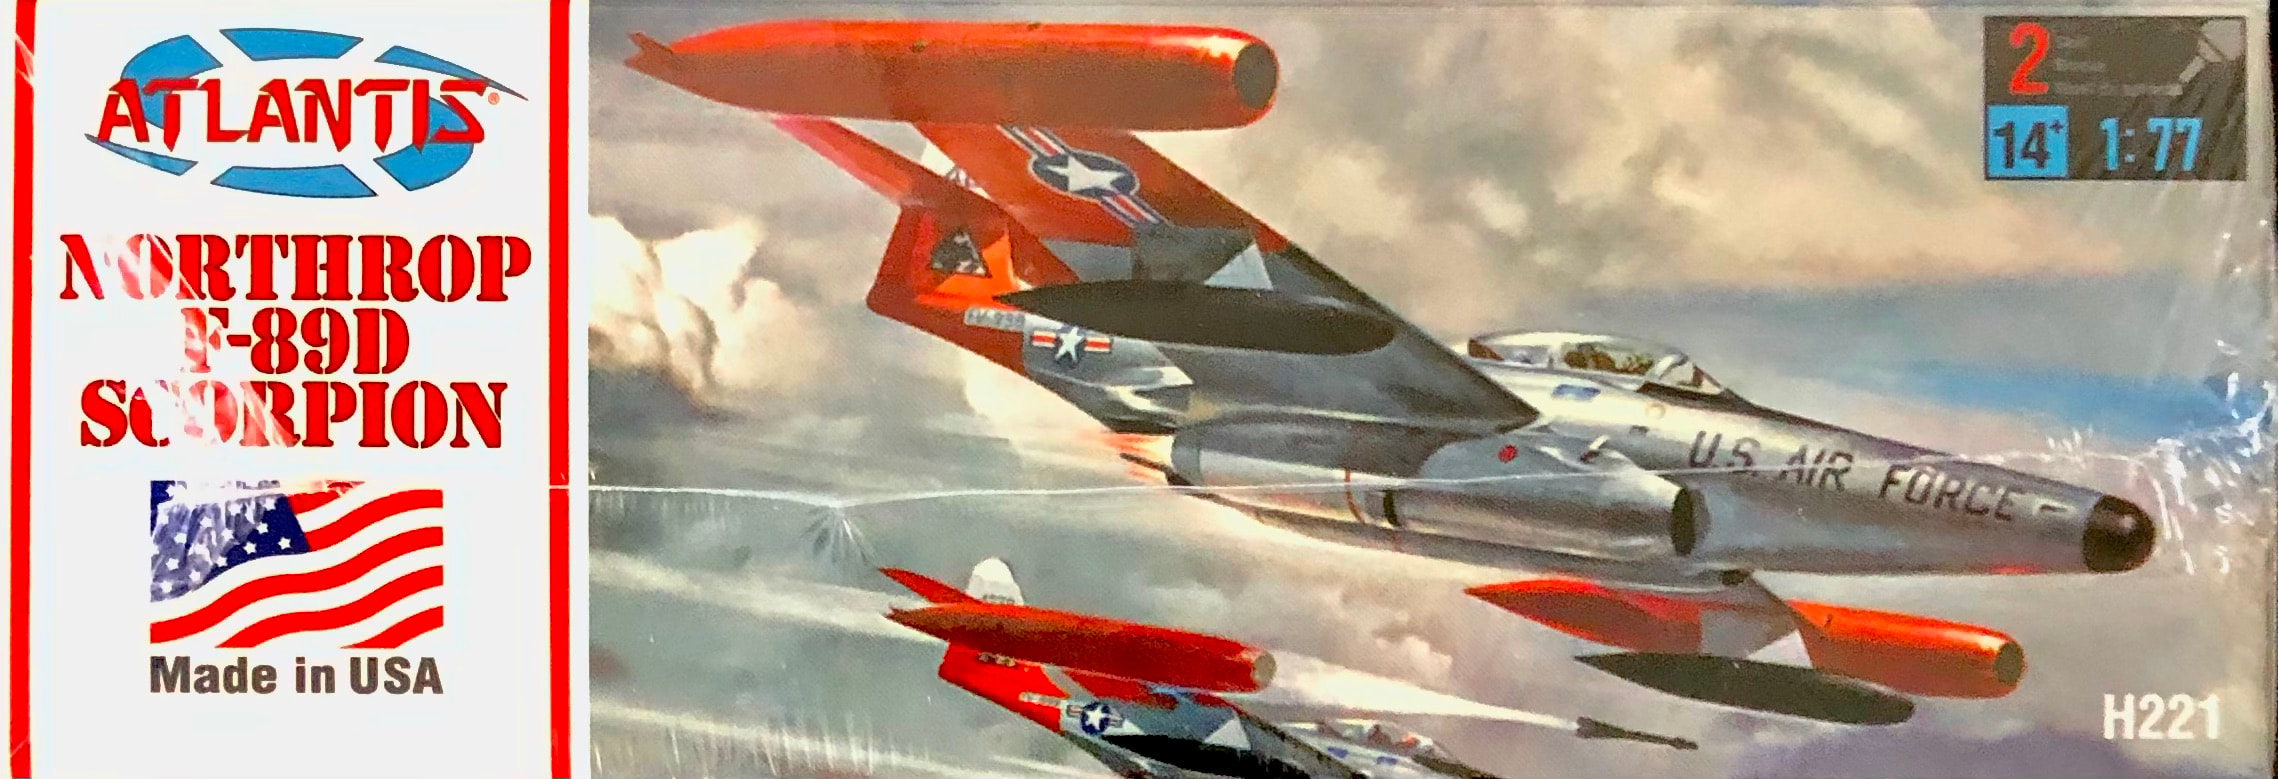
ALL-NEW CLOTHES ON AN OLD FRIEND: Atlantis Models' 1/77 F-89D kit comes with famous Revell artist Jack Leynnwood artwork used for the first time with this kit!
The F-89 was the first jet aircraft designed specifically as an interceptor. The Atlantis version (F-89D) depicts wing pods that housed and fired 2.75-in unguided folding-fin rockets. The pilots could pick the size of the salvo they'd fire at an enemy aircraft and the desired effect was something like a shotgun approach.
In 1957, an F-89J fired an unguided Genie missile armed with an operational nuclear warhead during a test as part of Operation Plumbbob. After a short (12 second!) flight, the 1.5 kt warhead detonated on July 19, 1957. The F-89 escaped the blast and is on display today in Great Falls, MT.
In 1957, an F-89J fired an unguided Genie missile armed with an operational nuclear warhead during a test as part of Operation Plumbbob. After a short (12 second!) flight, the 1.5 kt warhead detonated on July 19, 1957. The F-89 escaped the blast and is on display today in Great Falls, MT.
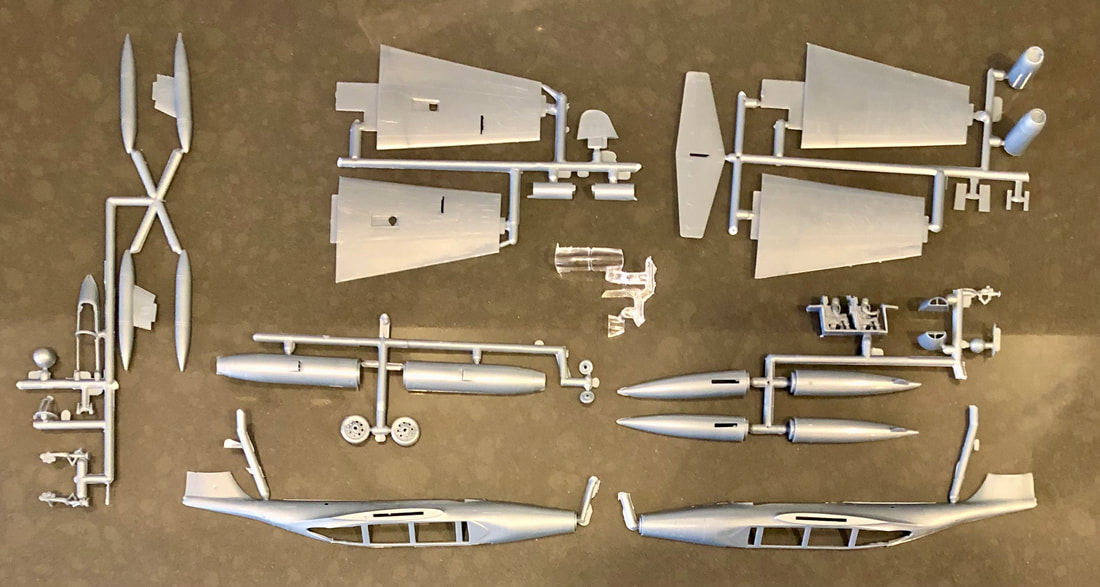
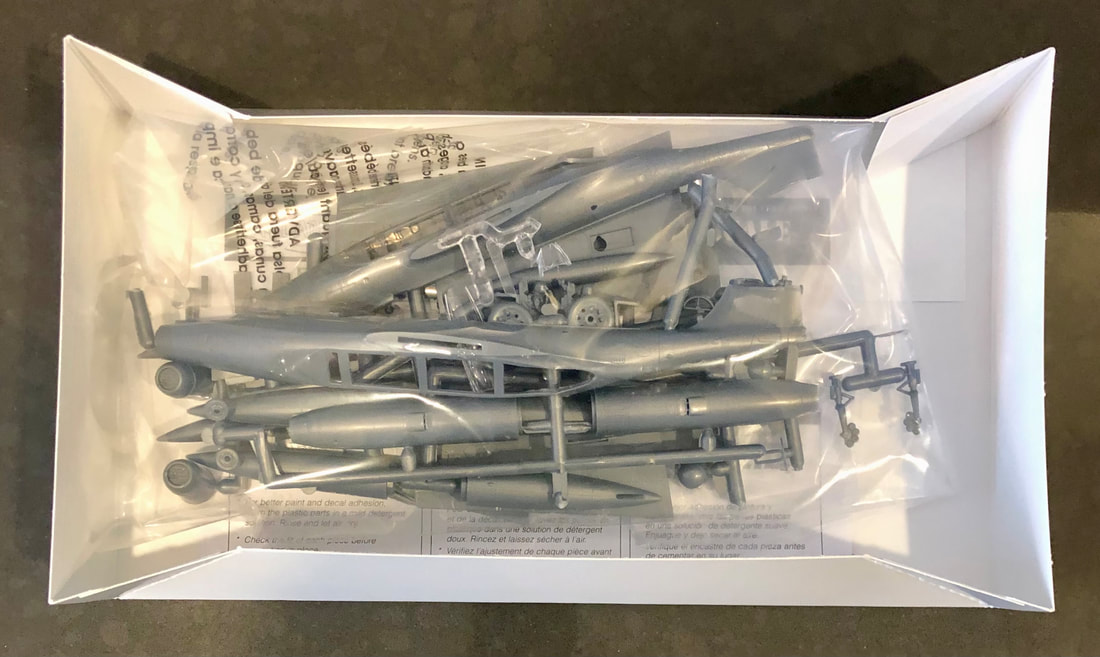
This was originally a vintage Revell aircraft model kit released in 1955. It hasn't been available since 1987. It's molded in silver-gray plastic.
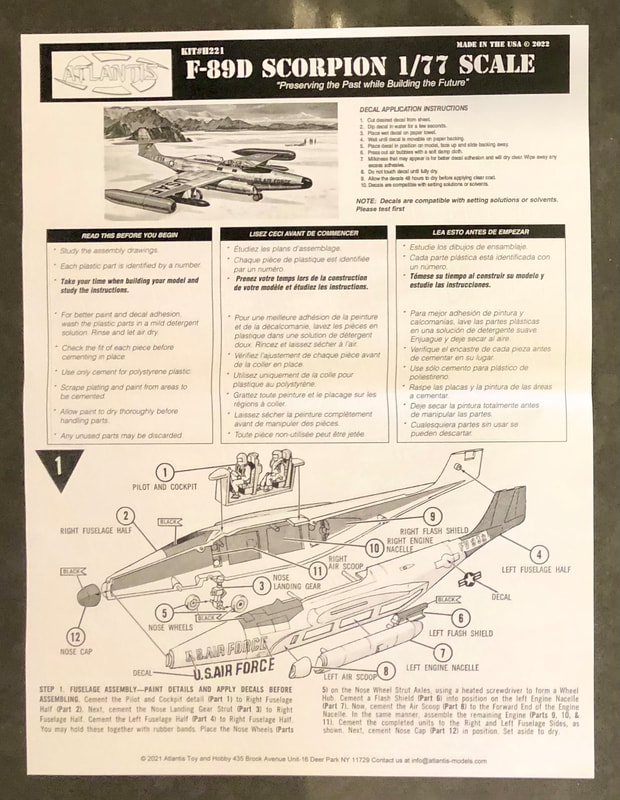
The Atlantis F-89D has many intricate surface details of the sort that helped build Revell's legendary reputation. They became the biggest model kit company eventually after releasing models like the F-89. The level of surface detail here is actually pretty amazing considering it was first tooled in 1955. The model saw fairly regular releases after that for 30 years or so. The final Revell release of the kit was in 1987.
|
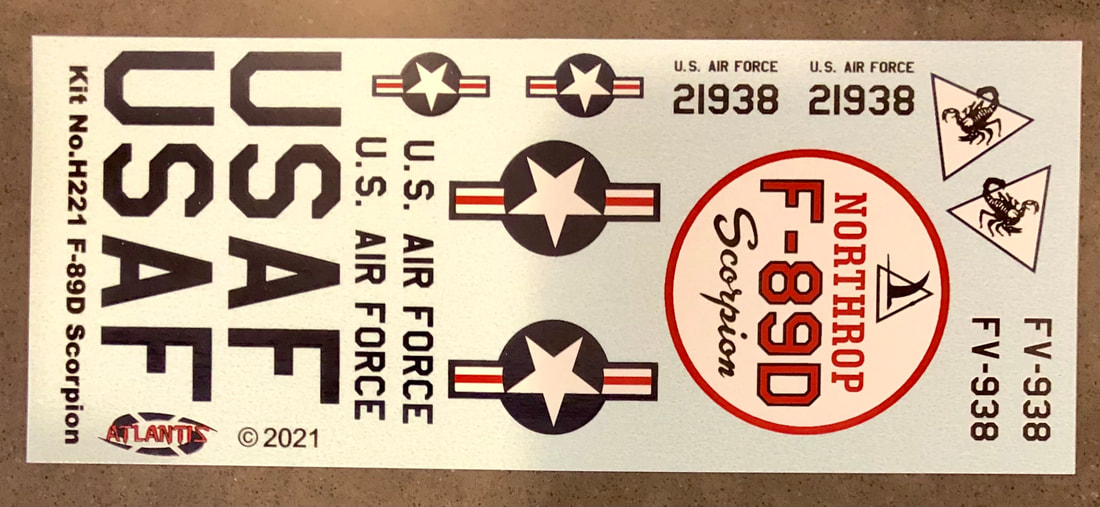
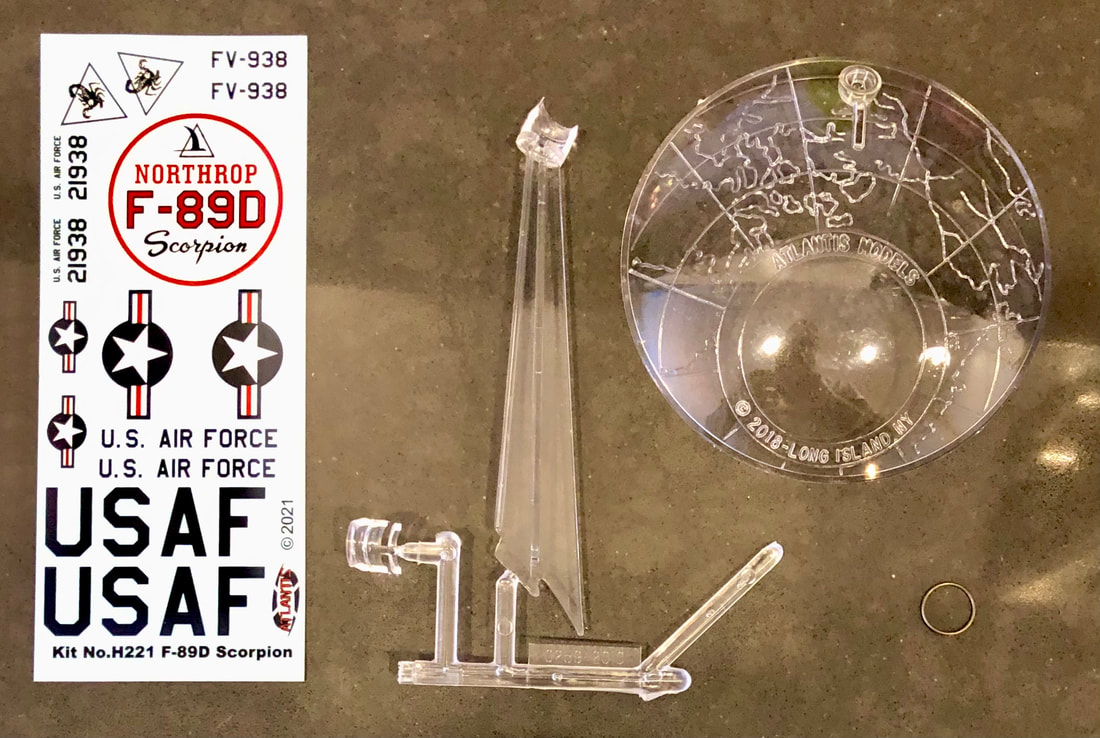
Atlantis Models includes high-quality decals with their model kit releases. They go on easily and look great on the model. Most often, they're better quality than what was included with earlier releases of these classic kits.
|
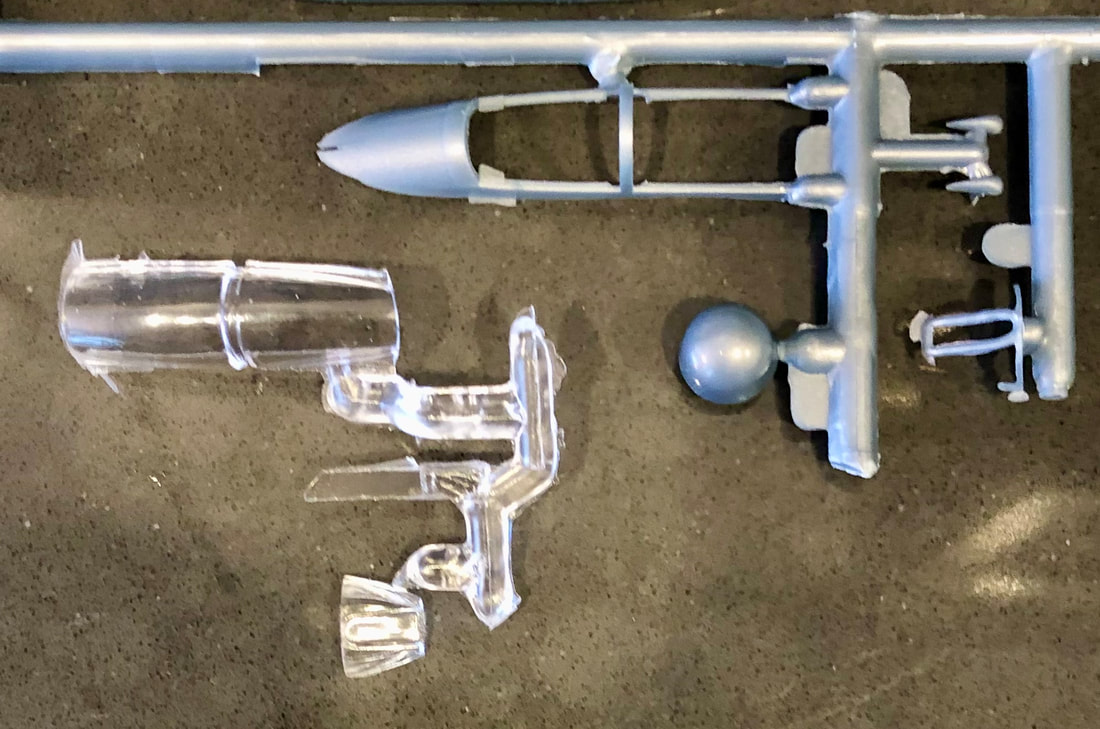
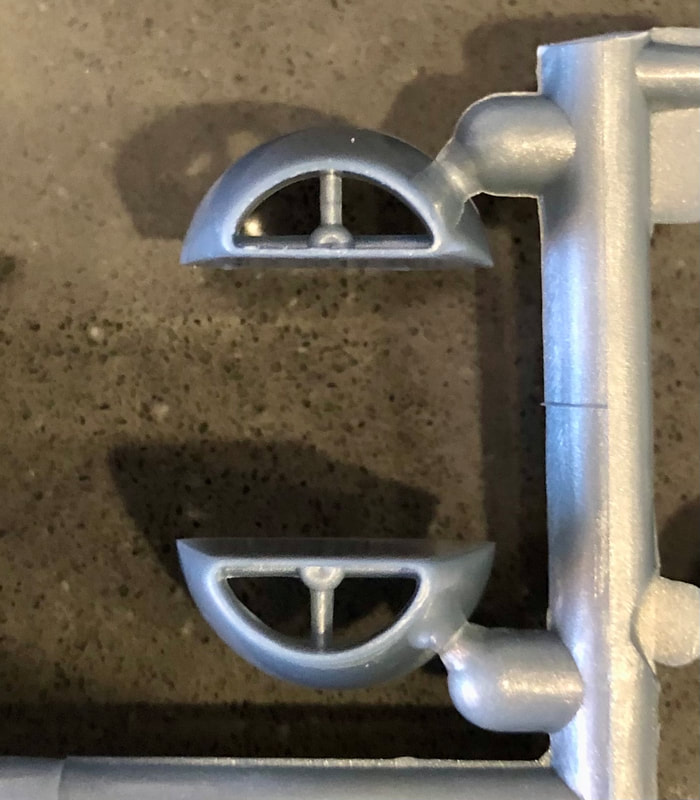
The model was engineered with a split canopy! That means you can display it in the open position if you wish. You can see there will be some minor flash that will need trimming.
|
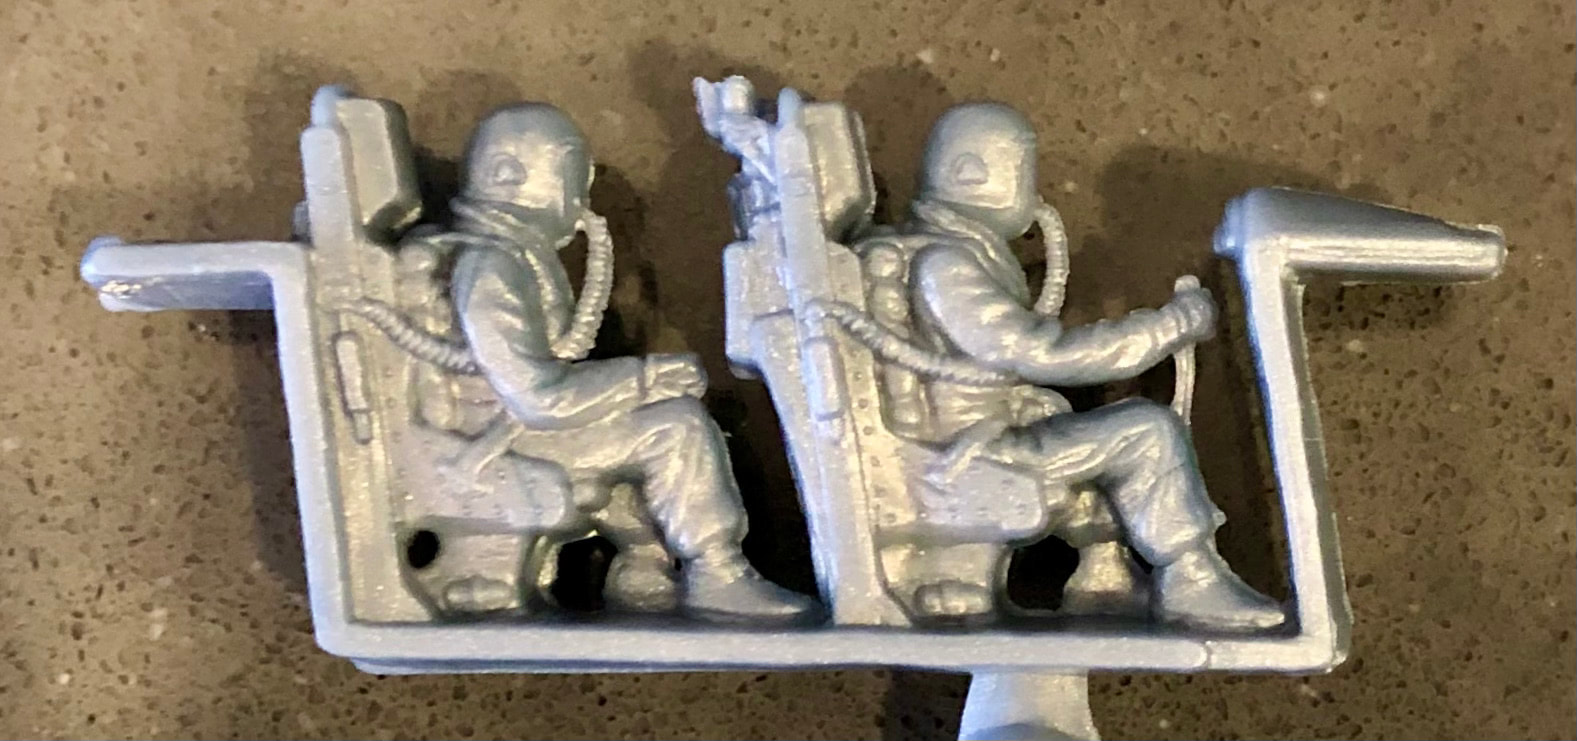
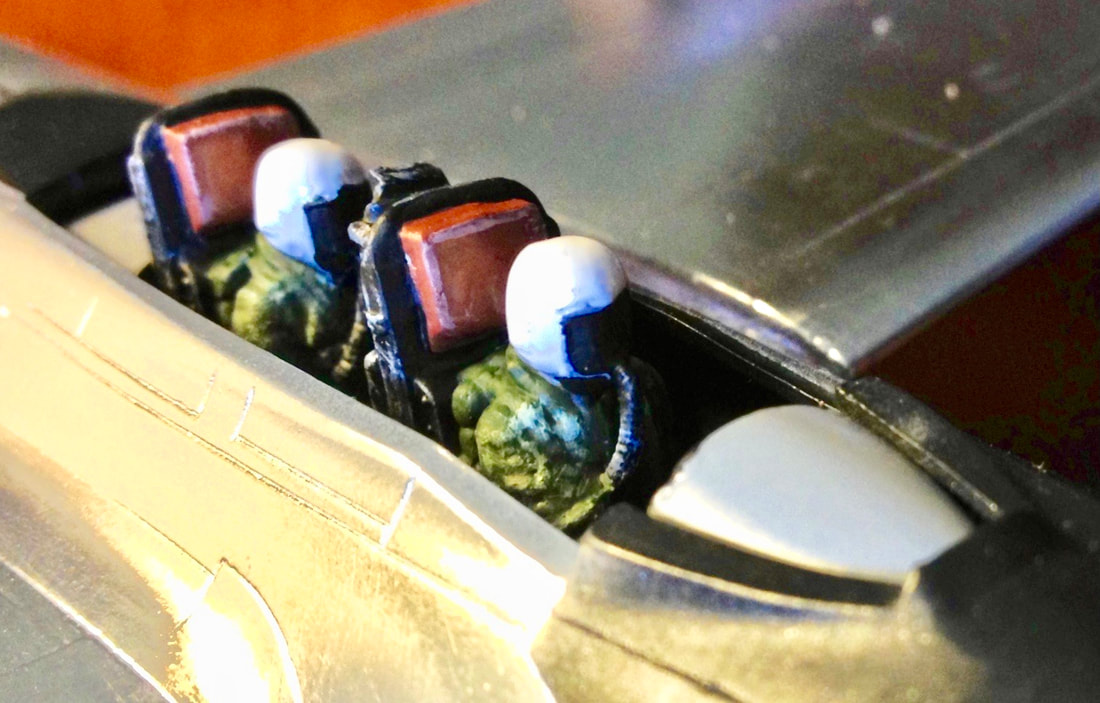
The model has a few vintage-kit quirks. Some modelers might not care for the one-piece crew/cockpit, but you can actually paint this piece up pretty nicely since it has a lot of intricate detail. Your other option is to scratchbuild a cockpit if you have AMS (Advanced Modeler's Syndrome).
Another cool feature is the four-piece canopy that requires NO masking! It’s easy to display the canopy open or closed using the parts right out-of-the-box. I'd recommend careful trimming and diligent test-fitting of these parts prior to gluing. the forward canopy framing is a bit fragile; less experienced modelers might have their patience tested by this but after some careful trimming and sandpaper cleanup, it fit nicely in the forward canopy recess and it looks great on the finished model!
When gluing those canopy transparencies to the frame, don't use regular model glue or super glue. Chances are it will create a white fog at the edges no matter how careful you are. Our favorite product for gluing canopies is Testors Clear Parts Cement and Window Maker. It dries perfectly clear!
The model has fine, recessed panel lines and a few small rivets in appropriate spots. The kit is definitely not crusted with rivets like some other kits from the era! To me, the shape really catches that bent-tail look that gave the Scorpion its name.
|
Don't be put off by this all-in-one cockpit/crew piece! It's actually pretty fun to paint and weather. There is a lot of detail here!
|
Separate intakes are nicely done.
|
Those panel lines are recessed. Access panels actually have hinge detail and latches. There are some restrained rivets. It won't be too difficult to sand off the raised decal guide lettering; you won't lose any detail if you do so with a little care.
|
Being a vintage model kit, you’ll have to contend with a few construction issues such as flash, and sinkholes. But everything fits together pretty well. Another vintage-throwback feature is that the model has finely raised decal placement markings, common for early model kits (this one was tooled in 1955!). You could easily sand them off, or use them for their intended purpose, as a guide where to put the decals! The raised lettering is so faint they might not be all that noticeable if you leave them as-is.
|
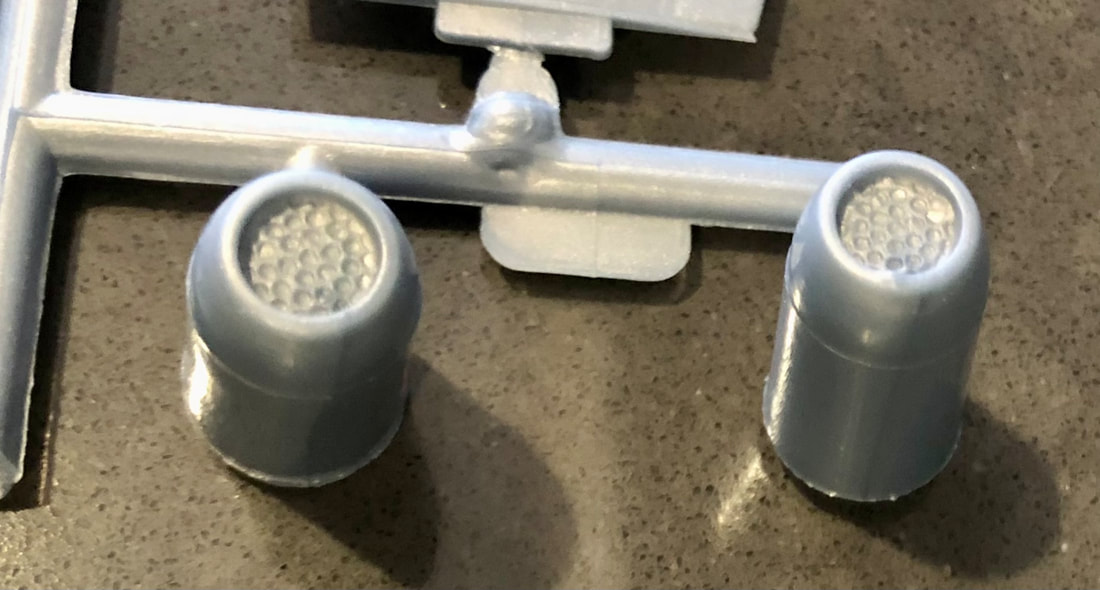
The business end of the rocket pods. AMS guys, if you really have to do something scratch-buildy, try drilling out those holes. You'll need a 0.036" micro-bit to assure accuracy.
|
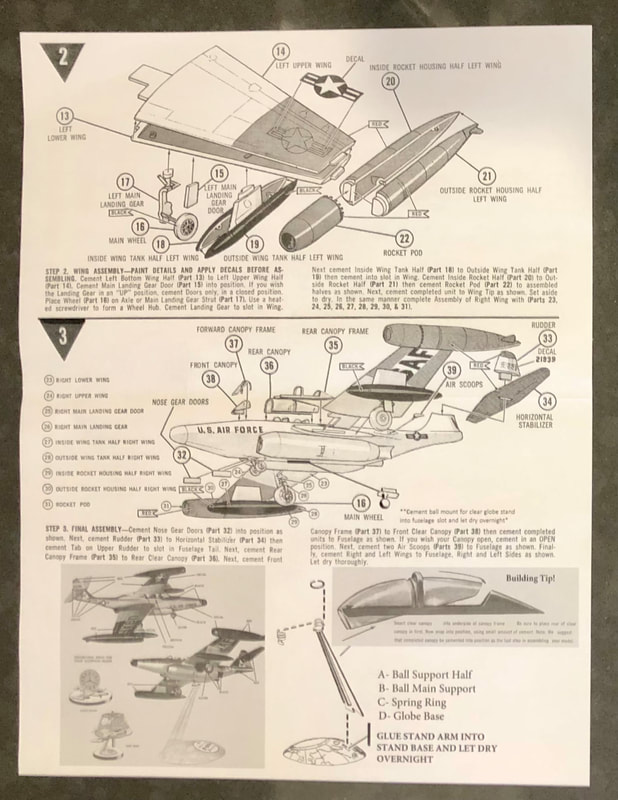
Another shot of the decals with the included "Atlantising Stand." You can build your model gear-up and in-flight if you wish.
|
Being 1/77 scale, the kit is very close to 1/72 so it will look fine displayed with your other 1/72 aircraft models. Or, it will look great along your other "Atlantis Scale" models.
Box art is a beautiful Jack Lyennwood painting, but this is the first time it has been used on a model kit box according to Peter Vetri of Atlantis Models.
Box art is a beautiful Jack Lyennwood painting, but this is the first time it has been used on a model kit box according to Peter Vetri of Atlantis Models.
Instructions include vintage Revell artwork. Painting is pretty simple; the instructions do a decent job with the painting guide. They specify that the rocket pods are overall red; this will match the box art! The half facing the pilots on older releases (and on my model) was black. We'll leave it to the individual modeler to decide how they want to depict this; ant-glare paint on the sides of tip tanks facing the pilots was commonly used! A rectangular area behind all stencil numbers and lettering should be silver. The wing insignias are easy; just put them over the red portions.
Sources tell us that in early use, factory-fresh F-89's had all-red rocket pods. During training, pilots probably noticed reflections and glare from the sun off of those bright surfaces and the black inboard sections were a later addition. My recommendation is to go with whatever is your preference!
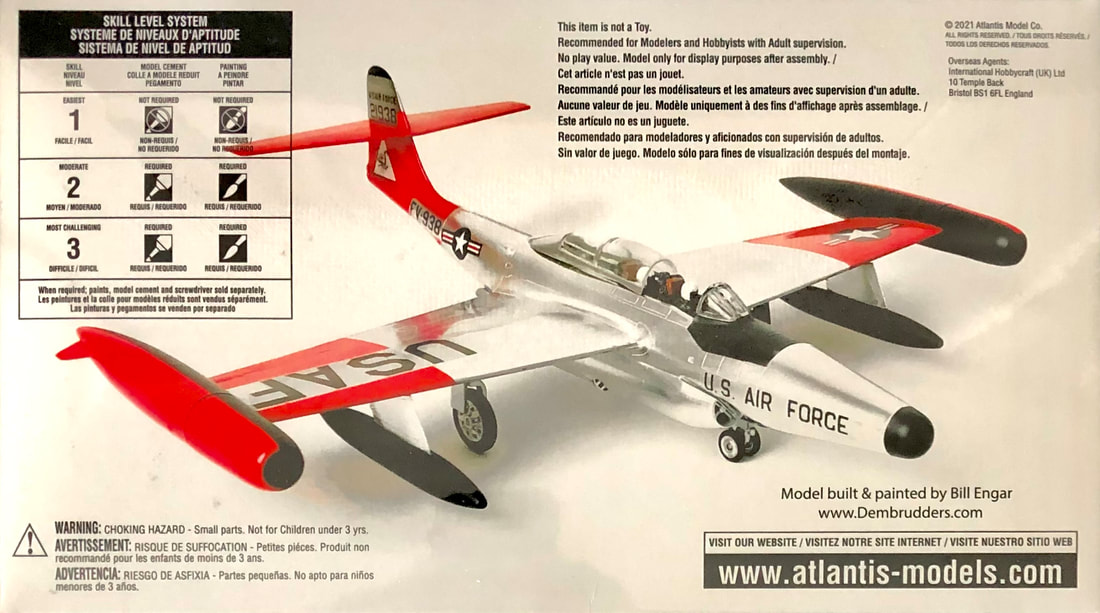
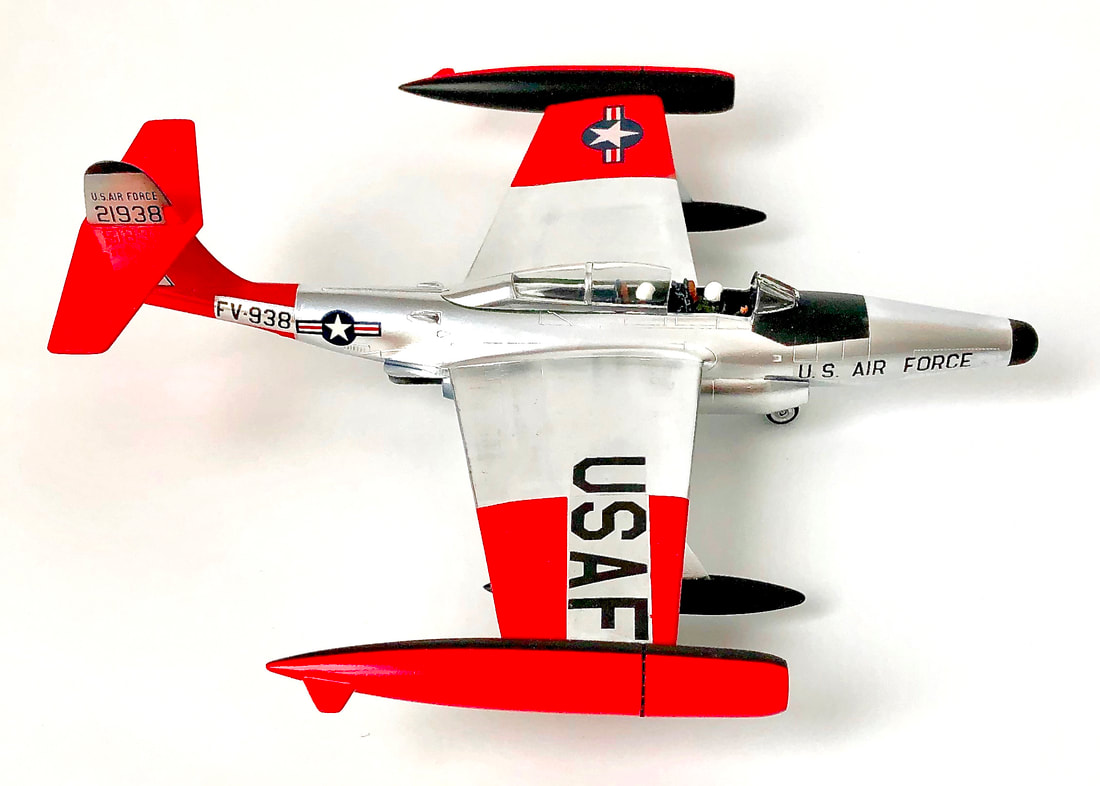
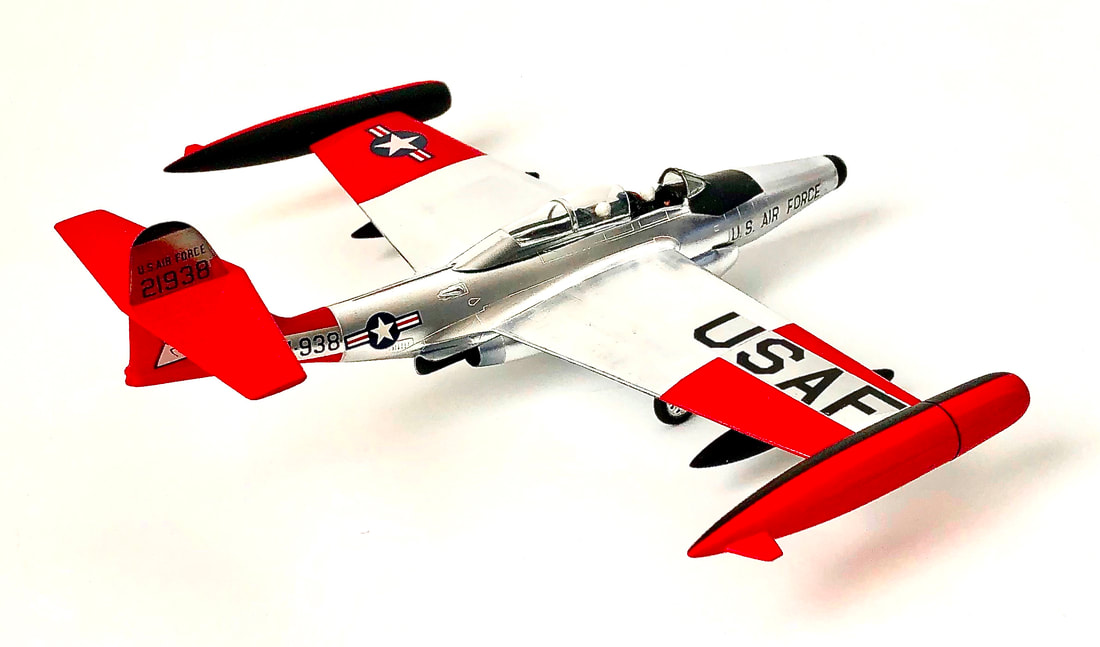
The model shown on the back of the box was built by Yours Truly. It is the 1987 Revell-USA release. I could detect no difference between the parts from that release and this Atlantis version except the 1987 version did not include the clear stand. Basic construction is straightforward; the biggest exercise was that high-conspicuity Arctic finish. But it was a lot of fun, and I really have no complaints about the model!
Revell’s classic F-89 provides an interesting, satisfying build! Intricate surface details abound; the engineering of this model is a level better than most of its peers. It's common for experienced modelers to want to add extra scratch-building or details to a model kit, especially a vintage one. But considering all the detail built into this kit, I really didn't see anything to add. For example, it's common for modelers to detail landing gear bays. But the bays on the F-89 were very small and there is really no point! This is really just a great model when built right out of the box!
Breakdown of the kit was done to enhance details. Engine pods are separate. Revell could have gone cheap and made the underside too flat to avoid a mold undercut, but they took the high road for accuracy here and the fuselage shape really looks spot-on thanks to this extra diligence in tooling. Exhausts and intakes are separate parts as well. This model really doesn’t need any scratchbuilt extras to look good; Revell engineering assured it builds into a faithful replica of the F-89.
Breakdown of the kit was done to enhance details. Engine pods are separate. Revell could have gone cheap and made the underside too flat to avoid a mold undercut, but they took the high road for accuracy here and the fuselage shape really looks spot-on thanks to this extra diligence in tooling. Exhausts and intakes are separate parts as well. This model really doesn’t need any scratchbuilt extras to look good; Revell engineering assured it builds into a faithful replica of the F-89.
Box side has kit dimensions. Mystery of the Universe: In Spanish, the model has a 10.25" wingspan (spoiler: it's a typo!).
Some minor parts cleanup work was needed with typical things like sinkholes and flash, but as I recall, everything fit together pretty well. Some seams benefited from the use of putty. The seam on the bottom between the engine pods might have needed the most putty; it’s in a not-so-visible place if you don’t want to mess with it.
My biggest challenges with the kit were mainly focused on the striking high-visibility Arctic paint scheme. These aircraft were stationed and would train in far-northern latitudes. The bright markings would greatly assist SAR operations if the aircraft went down in a snowy region.
To paint the aircraft shown on the box photo, I used airbrushed Testors enamels for everything except the natural metal. Alclad-II metal finish (polished aluminum) was also sprayed on easily with an airbrush.
I trimmed the mountings for the cockpit “sled” as well asl the lower edges of the sled itself so I could drop it in the model after the model was constructed and painted. This way, I didn’t have to mask around it while painting the airplane.
The all-in one crew ‘n cockpit sled was painted by hand with a fine paintbrush. I like 000 and 00000-size brushes for such work! The pilot uniforms were dry-brushed with a color slightly lighter than the base uniform color; I apologize that I didn’t get a closeup photo before dropping it in the model. It was actually a lot of fun working on it this way, and using the extra-fine paintbrushes and some magnification, you can be surprised at the detailing you can pick out.
The all-in one crew ‘n cockpit sled was painted by hand with a fine paintbrush. I like 000 and 00000-size brushes for such work! The pilot uniforms were dry-brushed with a color slightly lighter than the base uniform color; I apologize that I didn’t get a closeup photo before dropping it in the model. It was actually a lot of fun working on it this way, and using the extra-fine paintbrushes and some magnification, you can be surprised at the detailing you can pick out.
Since the decal markings are etched into the model's surface, there is only one choice of scheme. But a striking one it is, with Conspicuity Arctic-red! (Testors glossy red enamel #1103TT looks good to me). I'd recommend using a white undercoat. Testors enamel paints in those little 1/4-oz bottles have been around forever and are easy to find. I used a Paasche-H airbrush, a practically bulletproof single-action mini-sprayer, using paint thinner to cut the paint down to about the consistency of milk before spraying. The silver finish is Alcad II Polished Aluminum, right out of the bottle (NO thinning). This does best airbrushed over a dark, glossy undercoat.
|
Dry-brushing this assembly was a lot of fun, Oops; I just realized I could have painted the seatbelt straps and parachutes. Oh well!
|
For masking the red areas and the division between black/red on the tip-tanks, I simply used Scotch Magic Tape. I touched the adhesive with my fingers to knock down the “sticky” a tad; this prevents the normally strong tape adhesive from pulling up any previous paint or putty work. You get a much cleaner line using this tape.
Test-fit the rocket pods; do any trimming and test-fitting needed, and you can paint these separately from the airplane and put them on after all painting is complete. |
Atlantis Models continues the legacy of this historic kit with great decals and “new” Jack Leynnwood box art. We love Atlantis’ release of this kit and give it four enthusiastic thumbs up! Special thanks to Atlantis Models for providing this kit to review and enjoy!
In 1987, Revell released this set of four then-vintage model kits with Stu Shepherd artwork. The F-94C has since been re-released by Revell. Newly announced by Atlantis Models at time of posting is the F-100C! It's in 1/70 scale, which is so close to 1/72 that any size difference is hardly worth mentioning. The B-58 was nicely done in 1/91 scale; probably the best of the early box-scale B-58's. Like the F-89 and F-100C, it hasn't seen a re-release since 1987.
BONUS FEATURE
MYTH: "YOU CAN'T WIN AWARDS AT THE IPMS/USA NATIONALS WITH A VINTAGE 1950'S KIT"
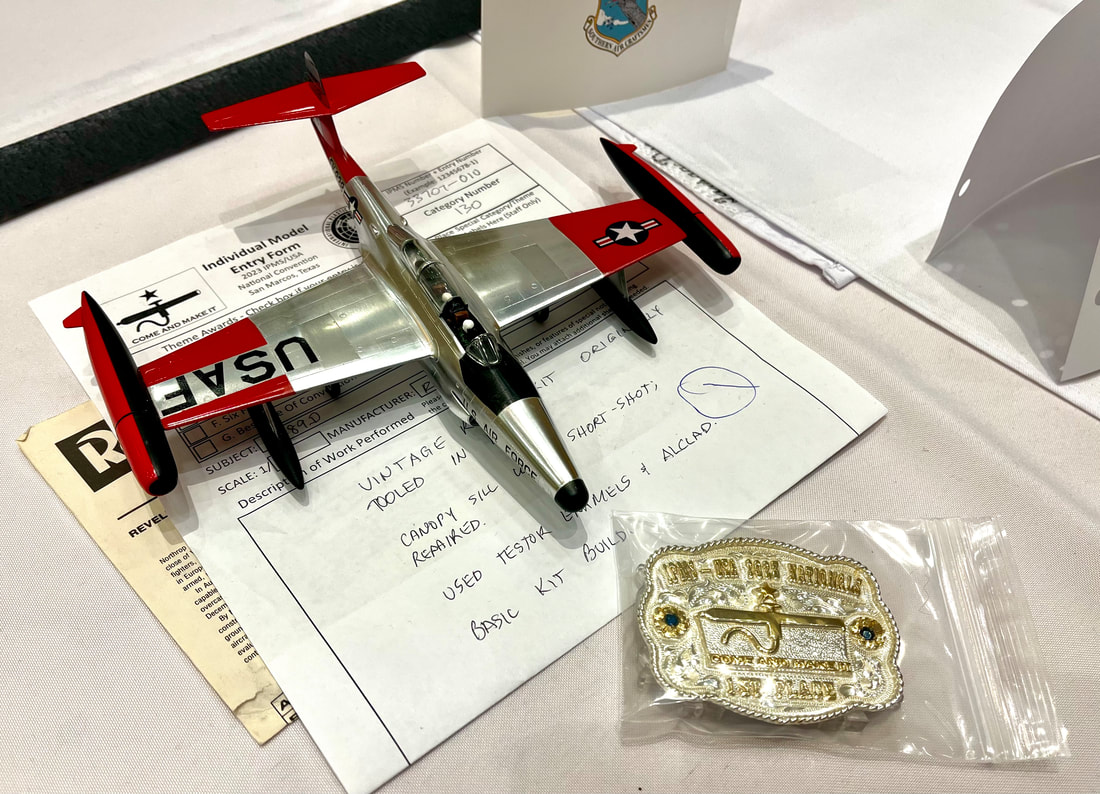
05 AUGUST, 2023, SAN MARCOS, TX: MYTH BUSTED.
ATLANTIS BOX ART MODEL WINS 1ST PLACE AWARD AT IPMS/USA NATIONALS IN SAN MARCOS, TX -- BUILT RIGHT OUT OF THE BOX!
I've heard more than one excellent modeler say it's impossible or very difficult to win awards at the IPMS/USA Nationals with vintage model kits such as those from the 1950's. Normally, I don't talk about my awards, but I want to encourage contest modelers not to be afraid of vintage kits such as those made by Atlantis Models. I've won many awards--dozens in fact--at the "Nationals" with old model kits from the 1950's and 60's.
I've heard more than one excellent modeler say it's impossible or very difficult to win awards at the IPMS/USA Nationals with vintage model kits such as those from the 1950's. Normally, I don't talk about my awards, but I want to encourage contest modelers not to be afraid of vintage kits such as those made by Atlantis Models. I've won many awards--dozens in fact--at the "Nationals" with old model kits from the 1950's and 60's.
This model, seen on the back of Atlantis' F-89 box, won the First Place award in the 1/72 Large Jet Basic Build category at the IPMS/USA Nationals in San Marcos, TX August 05, 2023.
Don't be afraid to enter a model contest with a vintage kit. Sure, you'll have to be diligent with things like filling seams, sinkholes, ejector pin marks, and perhaps trimming and adjusting fit on some parts, but with a little effort, there's no reason that a well-built older model can't compete with a state-of-the-art model from a much newer kit.
We've been impressed with how Atlantis Models has tweaked and adjusted tooling to improve a model kit since its previous release by the original manufacturer. In virtually every case we've seen, Atlantis decals are much better than those from the previous releases as well. If your Atlantis model wins an award at a model contest, send us a picture and we'll post it in our gallery!
We've been impressed with how Atlantis Models has tweaked and adjusted tooling to improve a model kit since its previous release by the original manufacturer. In virtually every case we've seen, Atlantis decals are much better than those from the previous releases as well. If your Atlantis model wins an award at a model contest, send us a picture and we'll post it in our gallery!
SCROLL DOWN JUST A BIT TO SEE WHAT ELSE WE HAVE GOING ON AT 2MODELER.COM! THERE'S ALL SORTS OF CRAZY STUFF!
