MINICRAFT MODELS HAS THREE KIT LINES (C-130, B-52, KC-135) IN THEIR VAST 1/144 SCALE MILITARY CATALOG THAT HAVE THE DISTINCTION OF PORTRAYING AIRCRAFT THAT HAVE BEEN IN SERVICE WITH THE U.S. AIR FORCE FOR OVER HALF A CENTURY. EACH OF THESE SIGNIFICANT AIRCRAFT TYPES HAS BEEN GIVEN FIRST-CLASS TREATMENT BY MINICRAFT WITH MULTIPLE VARIANTS AVAILABLE, GIVING MODELERS THE OPTION OF PORTRAYING THE AIRCRAFT IN EARLY OR LATE VERSIONS. JOIN US AS WE EXAMINE MINICRAFT'S KC-135 KITS IN-DEPTH.
By Bill Engar
IN-A-NUTSHELL: Minicraft uses state-of-the-art technology to execute a first class kit of an iconic aircraft. All the boxes are checked for the important things such as accuracy, ease-of-construction, details, and decals. This is simply a drop-dead gorgeous kit! You'll want to collect each of the variants!
In this review, we'll take a look at all four Minicraft KC-135 variants.
The KC-135 has been in service with the USAF since 1957. Revell released a model of the aircraft that same year. For many years, Revell's KC-135 was the model you bought if you wanted to build one of these aircraft in 1/144 scale (or more accurately, near 1/144 scale!!). The last Revell KC-135 release was in 1982, however, and the model was getting hard to find since then. Welsh Models made a vacuum-form version, but this one could be tricky to find as well.
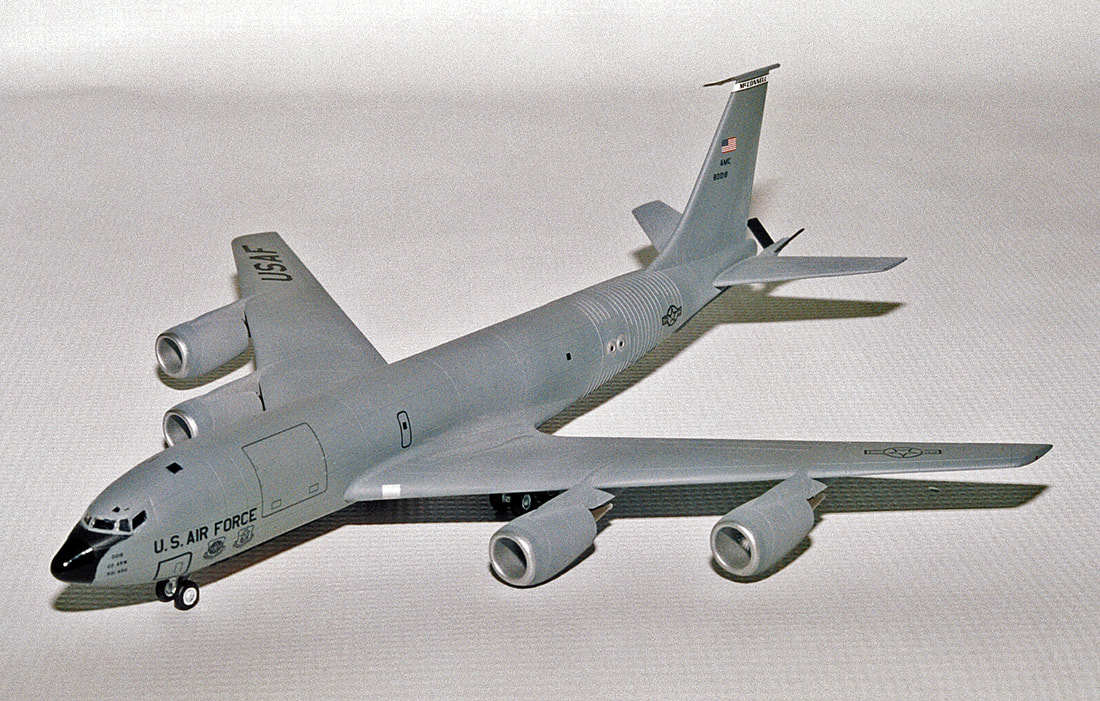
MINICRAFT KC-135A
IN-A-NUTSHELL: Minicraft uses state-of-the-art technology to execute a first class kit of an iconic aircraft. All the boxes are checked for the important things such as accuracy, ease-of-construction, details, and decals. This is simply a drop-dead gorgeous kit! You'll want to collect each of the variants!
In this review, we'll take a look at all four Minicraft KC-135 variants.
The KC-135 has been in service with the USAF since 1957. Revell released a model of the aircraft that same year. For many years, Revell's KC-135 was the model you bought if you wanted to build one of these aircraft in 1/144 scale (or more accurately, near 1/144 scale!!). The last Revell KC-135 release was in 1982, however, and the model was getting hard to find since then. Welsh Models made a vacuum-form version, but this one could be tricky to find as well.
MINICRAFT KC-135A
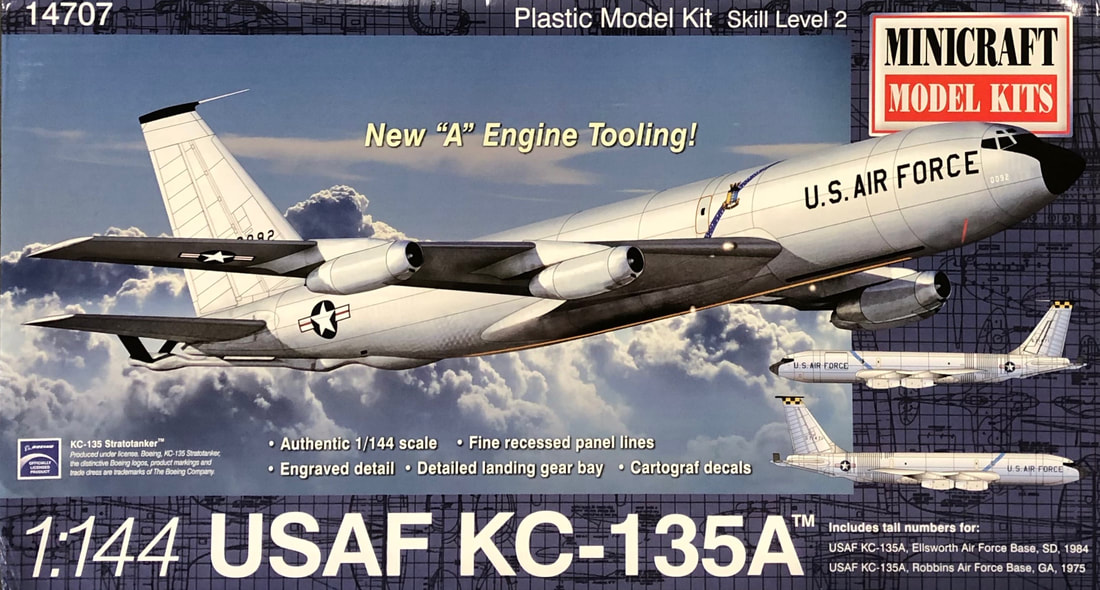
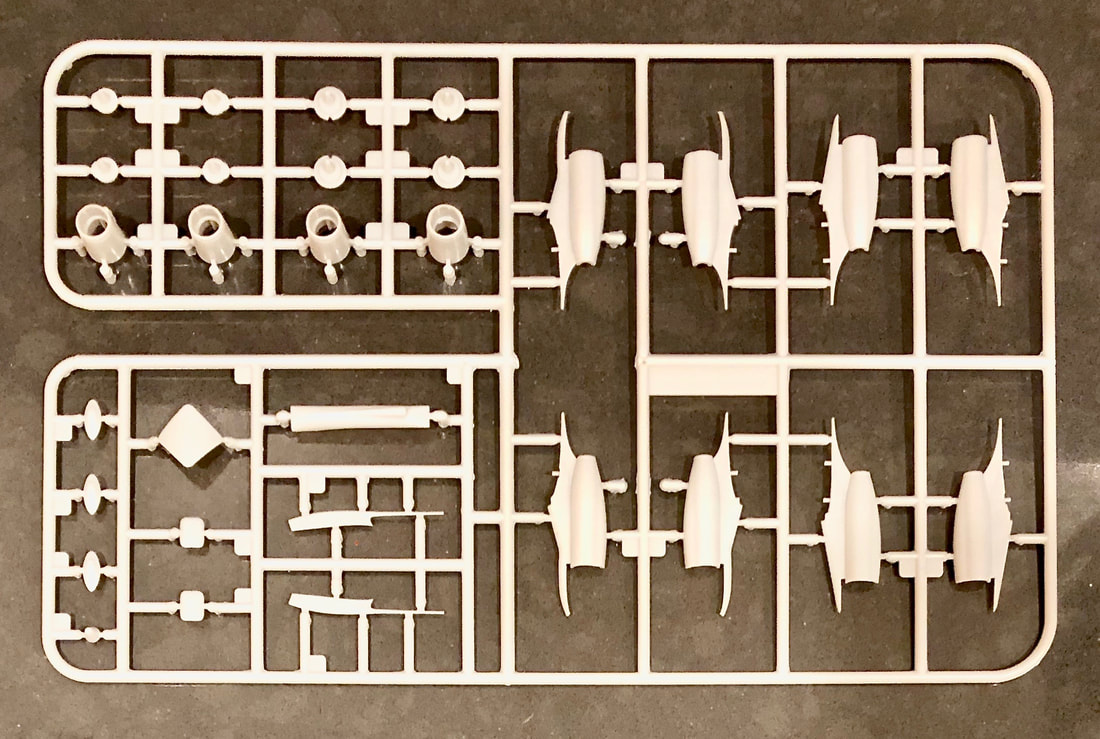
The open-box portion of our review will focus on the KC-135A. It is not the first kit in the series to be released, but the "A" is the initial variant of the KC-135 to fly. J-57 turbojet engines distinguish this version.
I wondered how interested I’d be in a new, injection-molded KC-135 once Minicraft announced that they were planning to release one. After all, I already had a stash of the Revell kits.
Once the Minicraft KC-135 was released and its details were divulged, I was excited to get one. Minicraft took serious measures to be sure that modelers would want the new KC-135! For starters, the model was extensively researched. Simply putting a refueling boom on a 707 and calling it a KC-135 did not fly here. The KC-135 has a narrower fuselage than the 707.
Once the Minicraft KC-135 was released and its details were divulged, I was excited to get one. Minicraft took serious measures to be sure that modelers would want the new KC-135! For starters, the model was extensively researched. Simply putting a refueling boom on a 707 and calling it a KC-135 did not fly here. The KC-135 has a narrower fuselage than the 707.

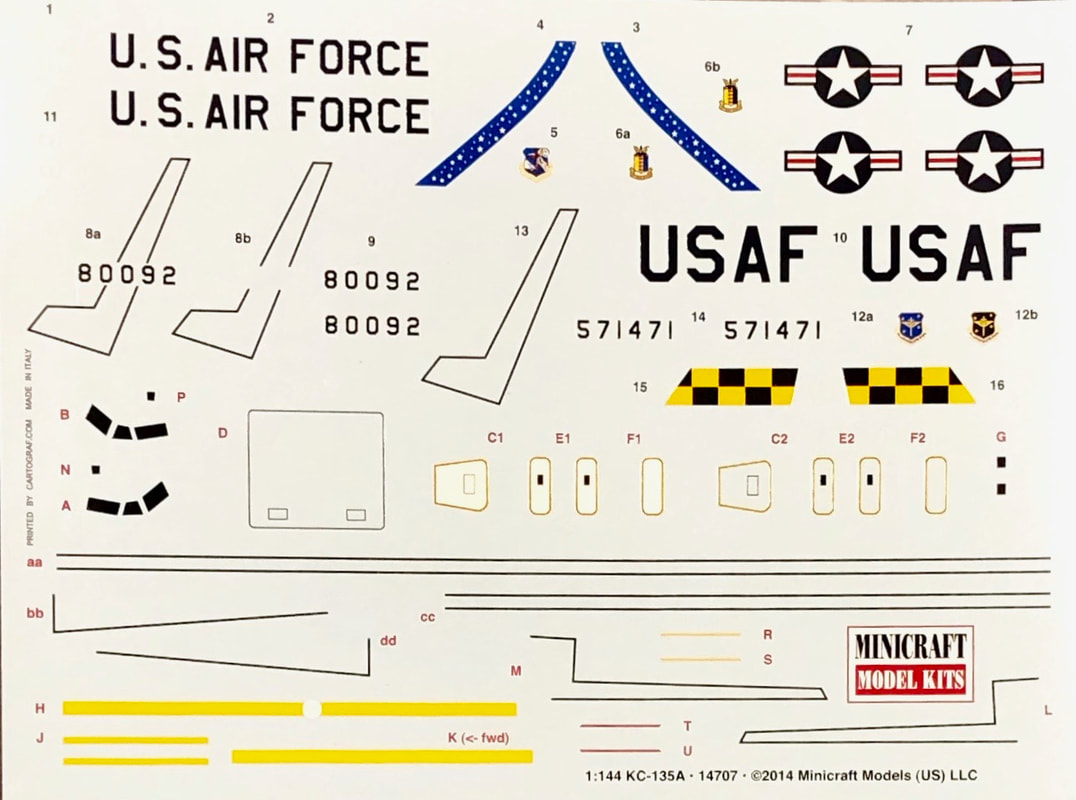
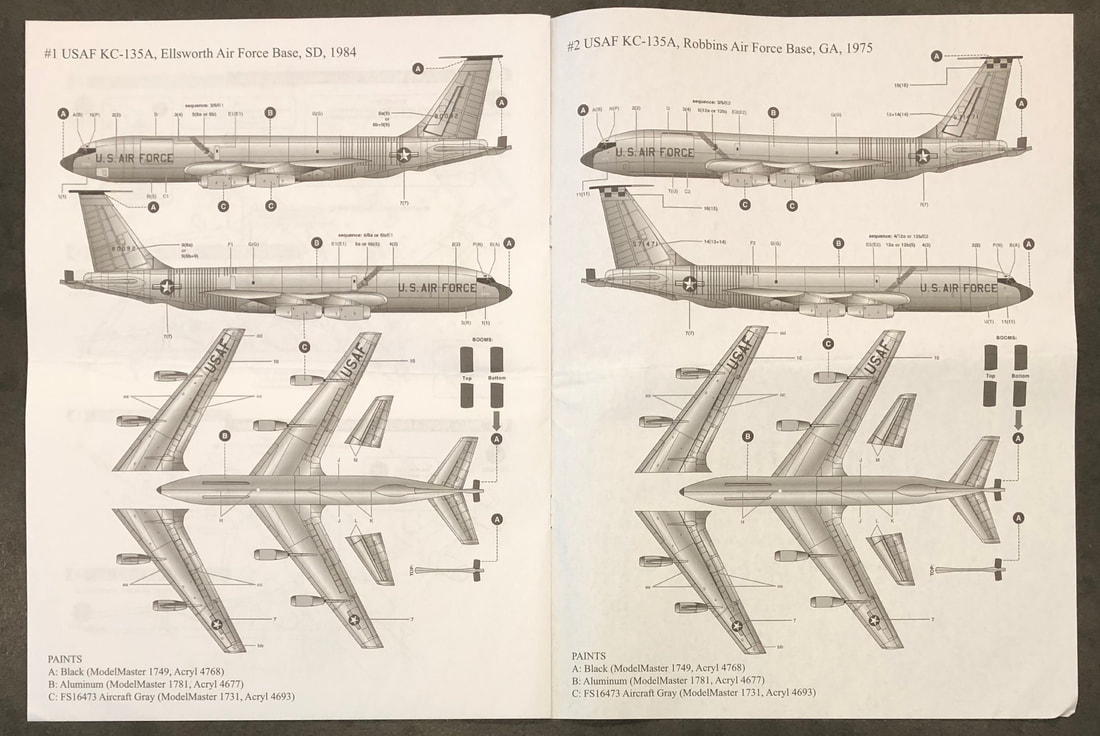
Your choice of two aircraft can be depicted with the decals included in the kit.
The prototype 707/KC-135, known as the 367-80, or "Dash-80," had a 132-inch fuselage width suitable for five-abreast seating in passenger-form. Boeing decided that six-abreast seating was a better choice, and the fuselage for both KC-135 and 707 changed to 144 inches. Tooling was cut, but in order to guarantee passenger version sales to American Airlines, the fuselage width on the 707 was changed to 148 inches in order to provide more shoulder room than the competing DC-8. Width for the KC-135 was left at 144 inches.
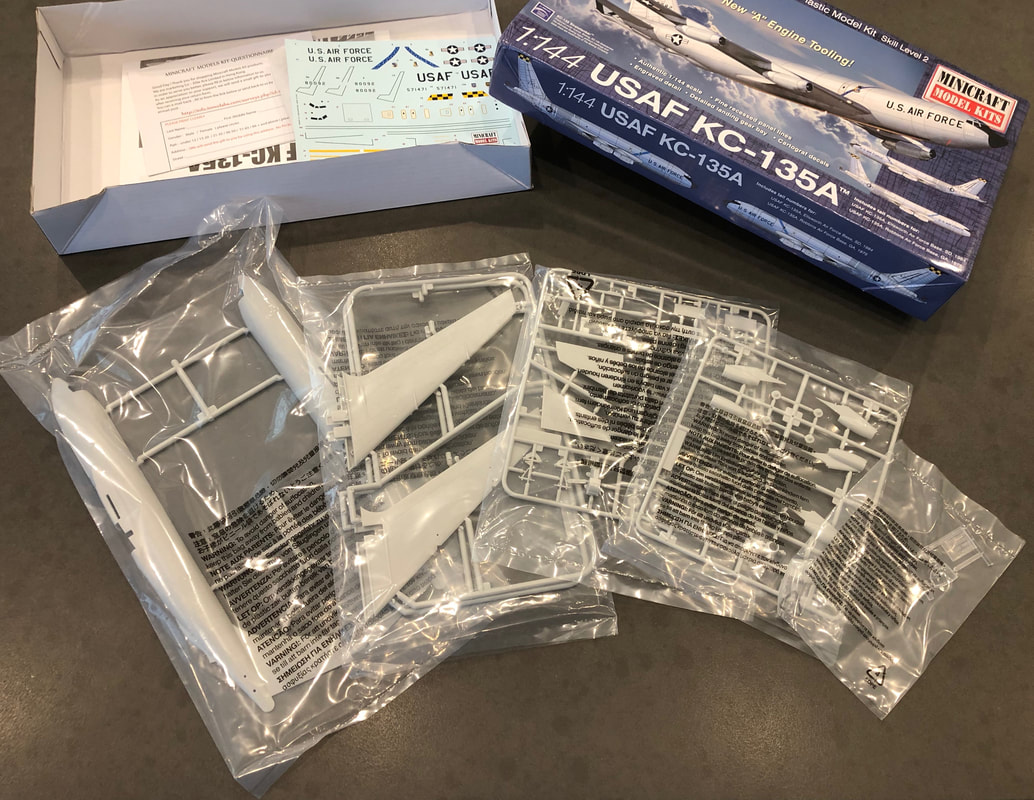
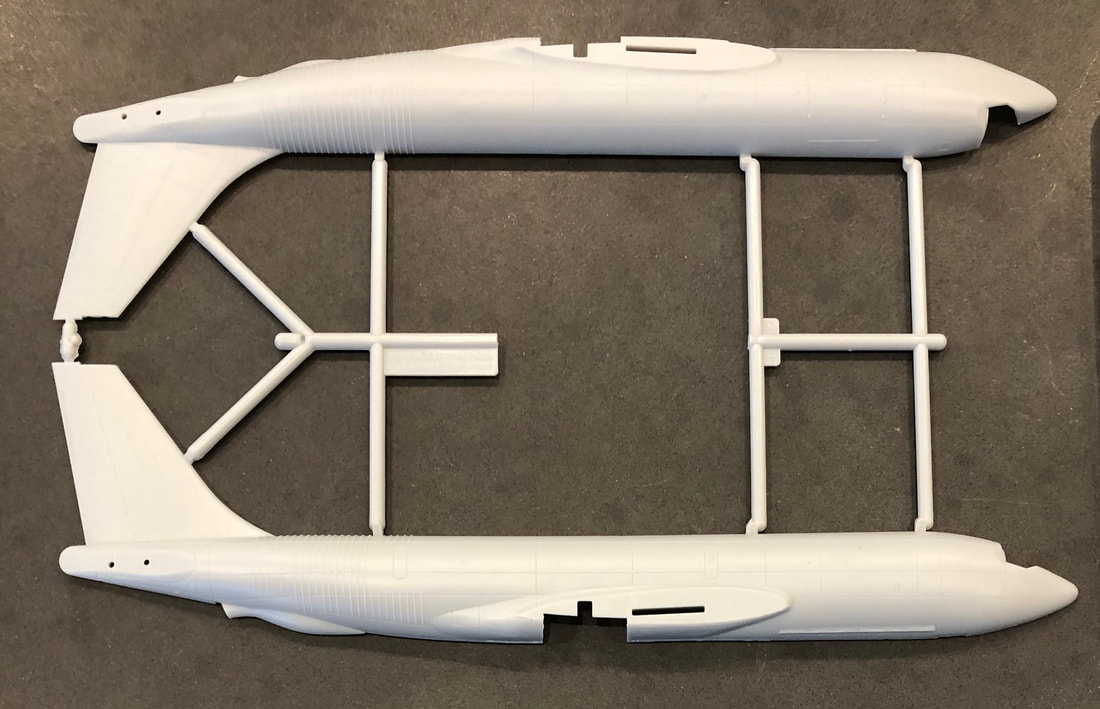
Every aspect of a Minicraft kit is first-rate quality. Kit contents are always protected in a sturdy box. Each sprue is bagged. You can be assured that all parts will be in factory-fresh condition when you start building.
|
|
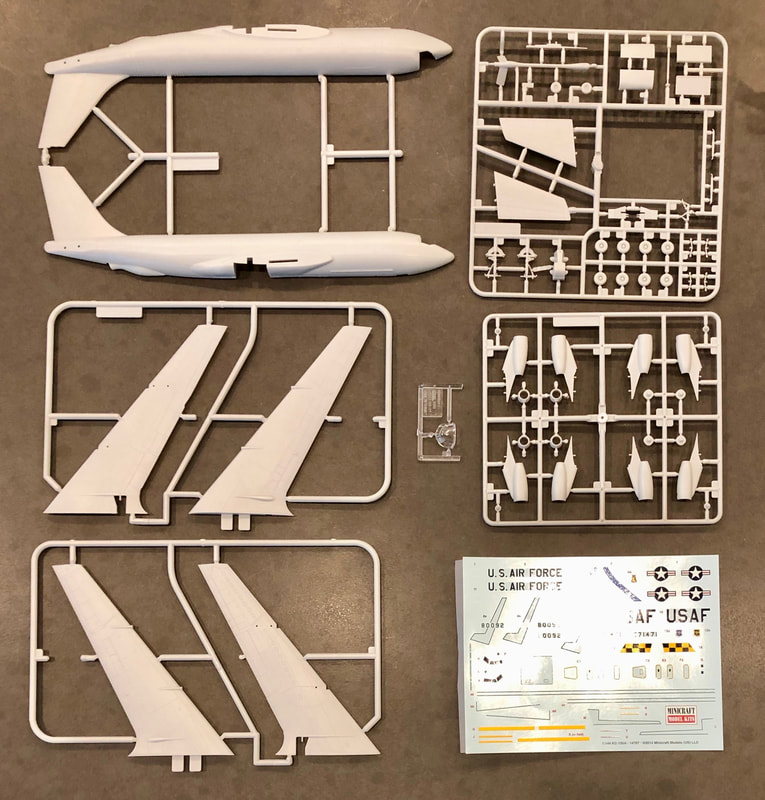
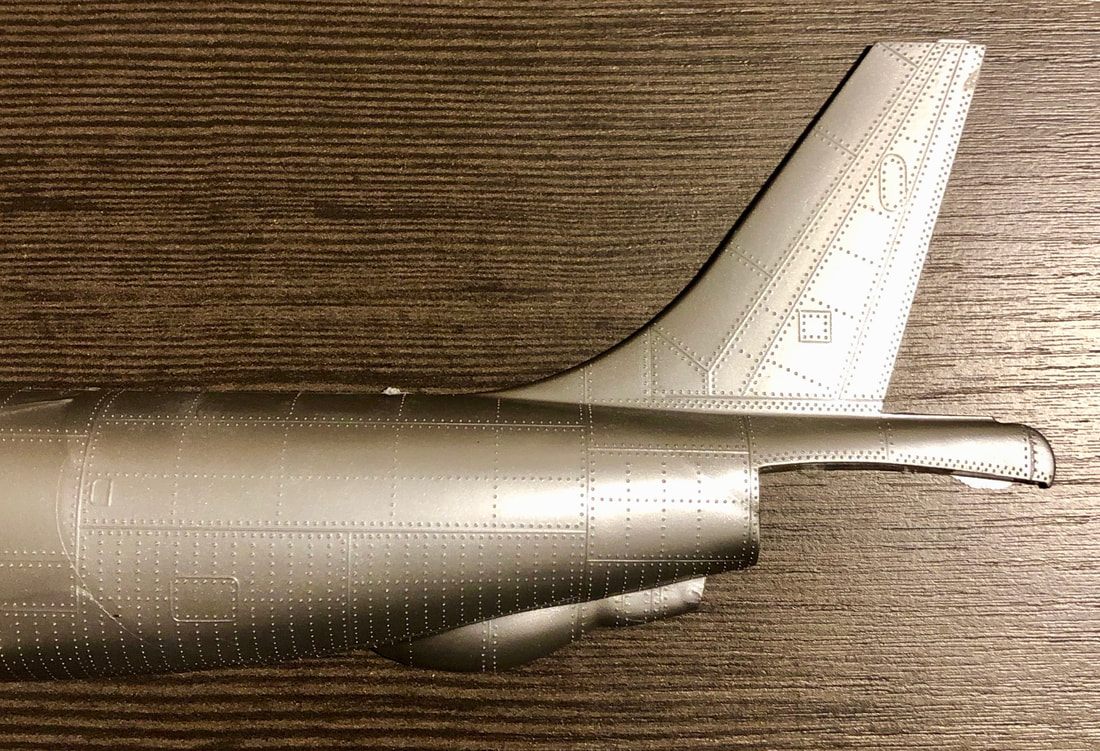
The Minicraft KC-135 has accurate detailing such as the stiffening bands around the rear fuselage. The under-fuselage “bubble” representing the refueling station is correctly proportioned. Engraved detailing is extensive and includes many features unique to the KC-135. Minicraft Models released their own Intercontinental 707 some years ago, and the new KC-135 kit shares no relation to that effort.
The fuselage appears to be spot-on in detailing and proportions. We like the PDL light bars depicted on the lower forward fuselage.
|
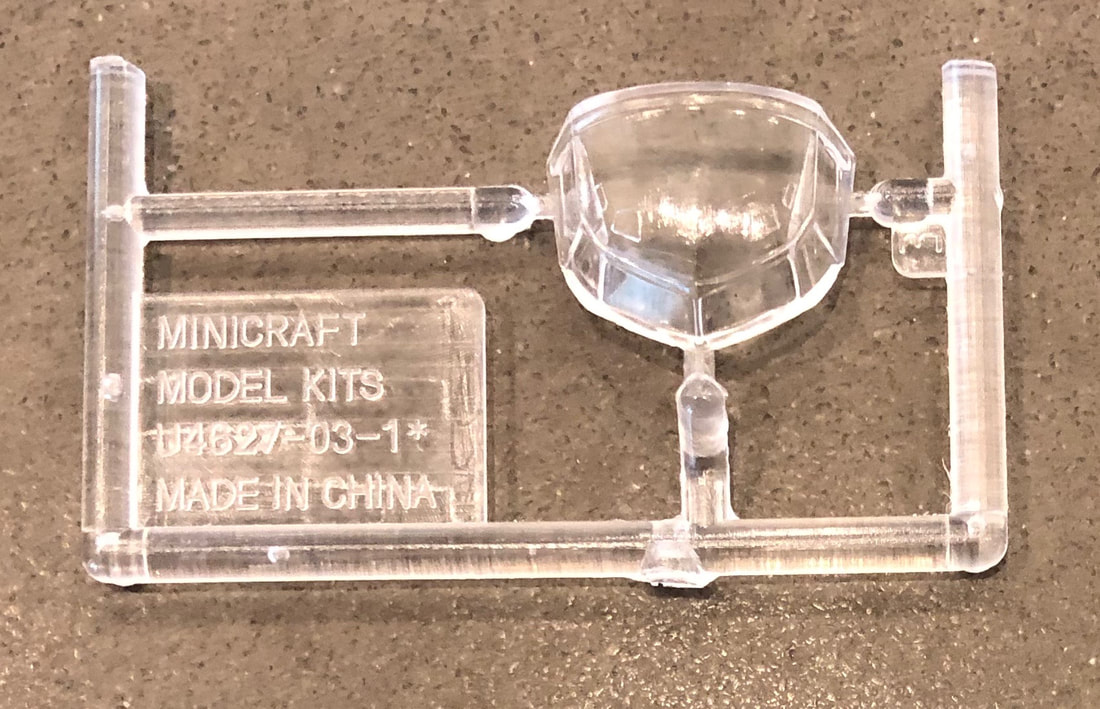
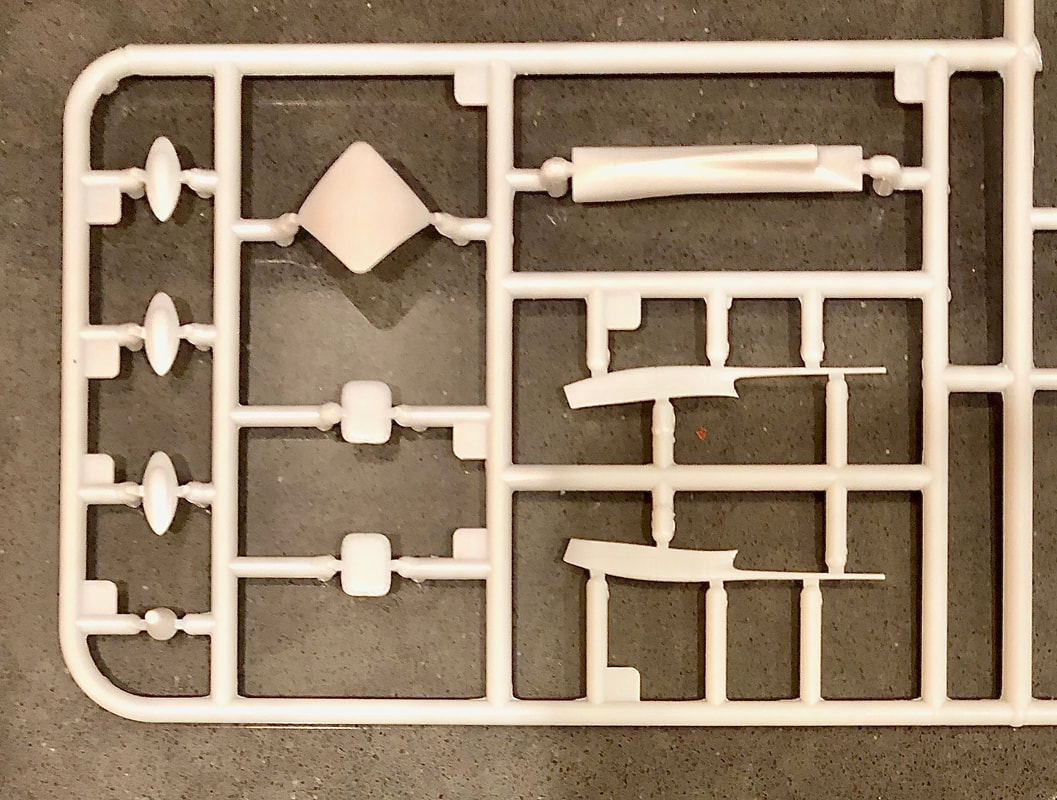
A cockpit cap provides the option of clear windows. You could scratchbuild cockpit details such as seats and instruments in there if you want, or simplify construction with decal windows instead--Minicraft gives you the option.
|
There is no interior, although Minicraft includes a clear cockpit “canopy” piece. The cargo door is molded-in, but includes detailing on the inside giving a scratchbuilder opportunities to cut the door open and add an interior. Doing so anywhere except in the proximity of the door will make it difficult to see any of that detail, however. If you feel the need to build the internals of a KC-135, like my Brudder Dick, AMT’s KC-135 kit has a fully detailed cockpit right out of the box in 1/72 scale. Most of that won’t be seen when the fuselage is glued shut, either.
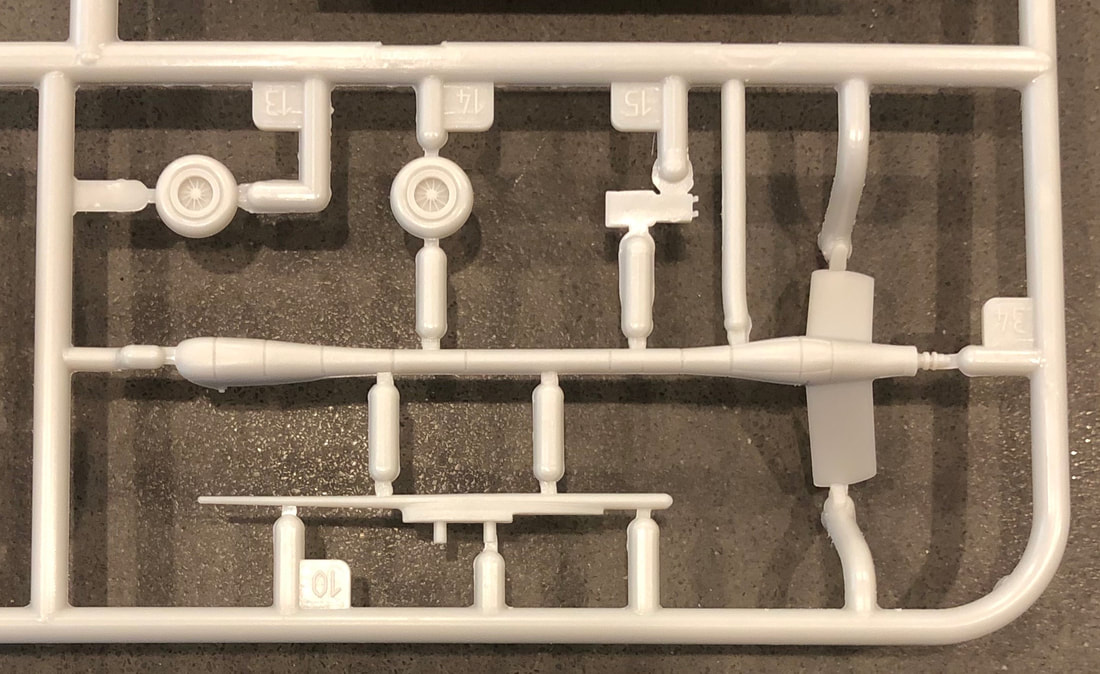
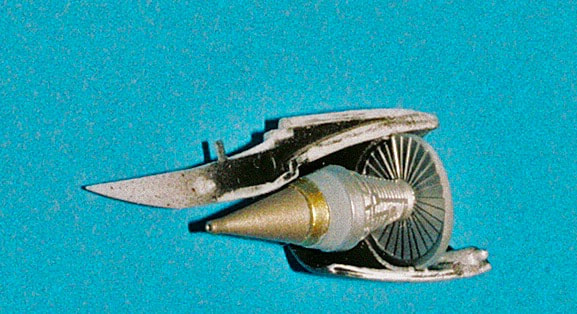
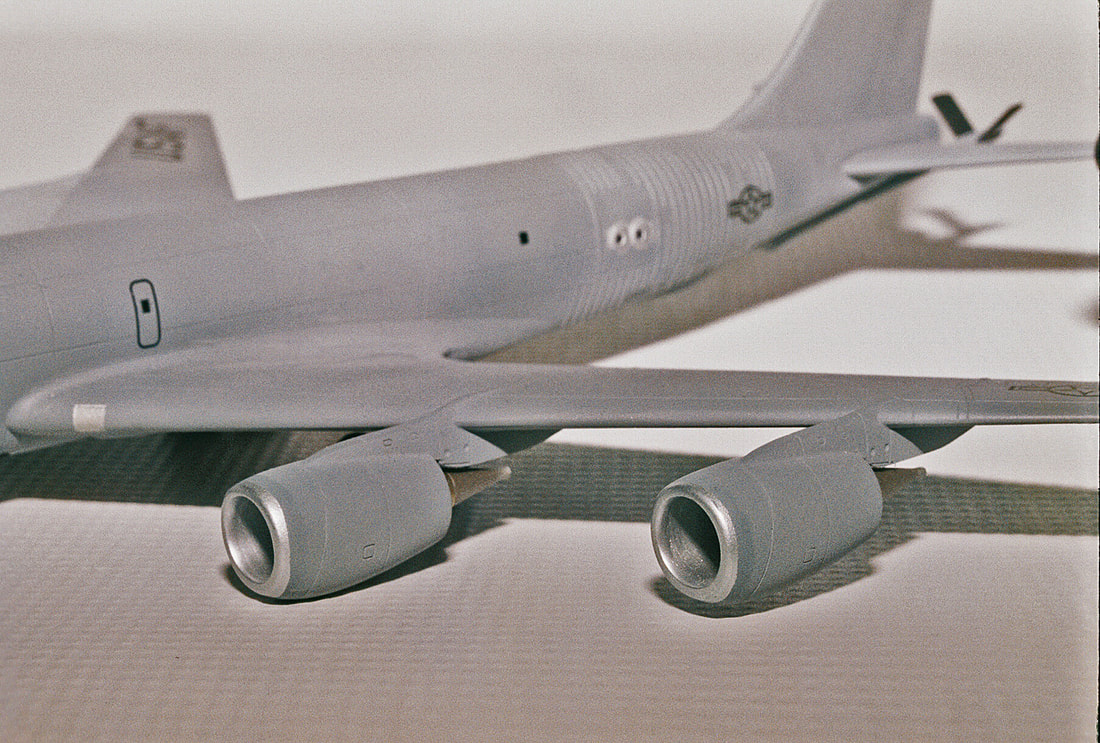
Front wheels, refueling boom, and HF probe antenna are nicely executed.
|
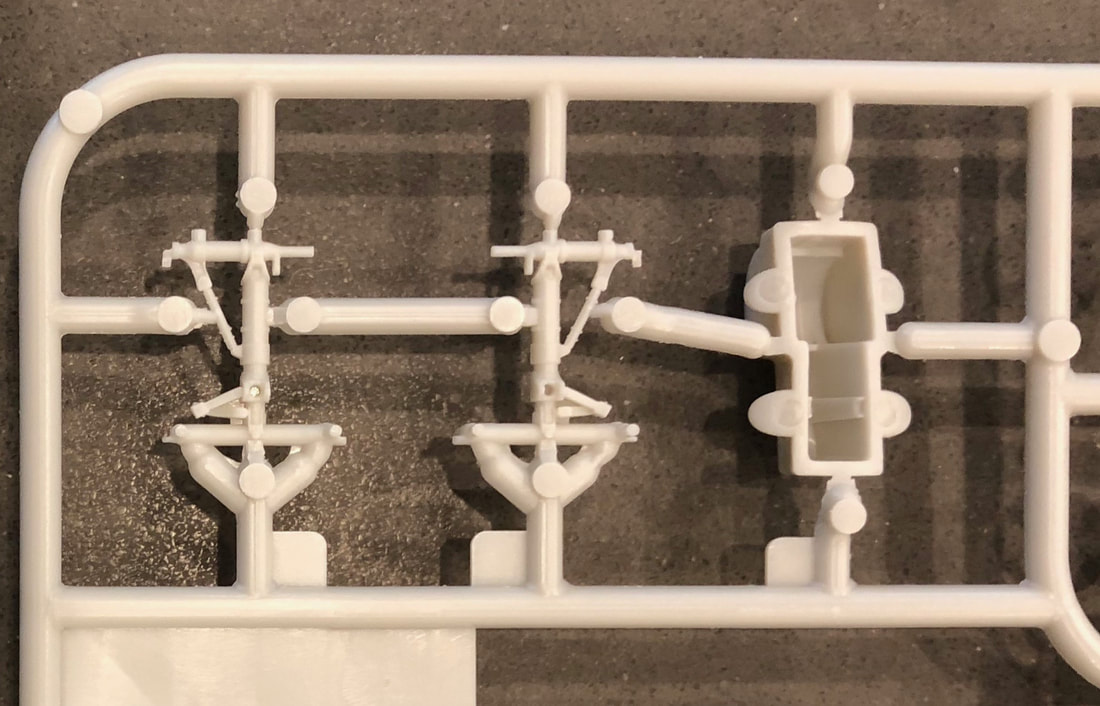
Instead of inaccurate, ridiculously shallow wheel wells like most other 1/144 kits, Minicraft went to extra effort to portray realistic depth here. Those struts have detail you don't even see on many 1/72 scale kits.
|
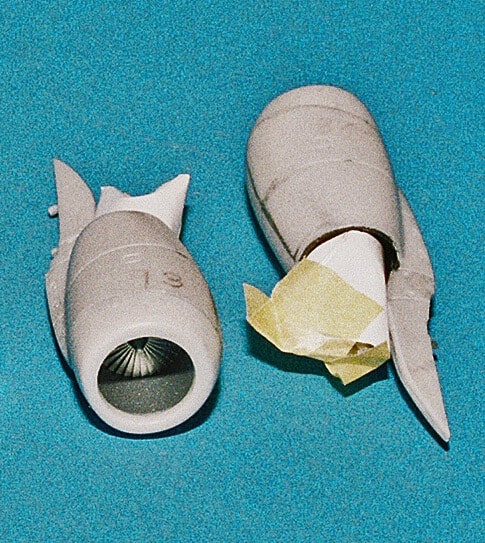
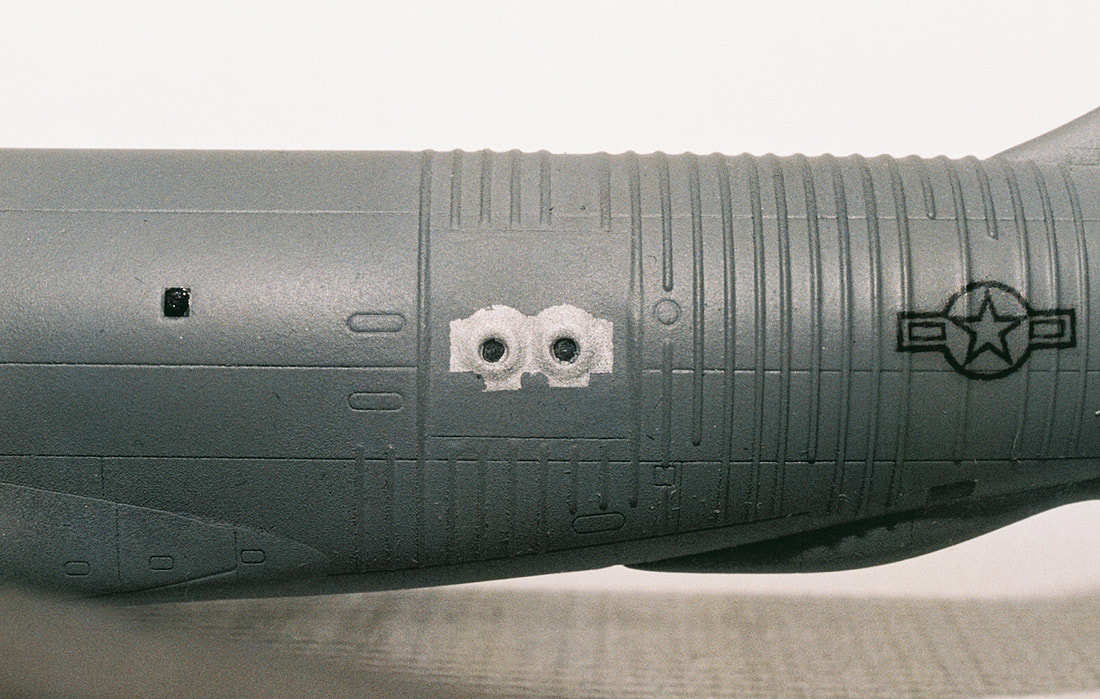
I found a few subtle sink marks that might not bother anyone except the persnickety contest modeler. Filling these should not hurt any detail. The engines on my “E” version have rather thick edges at the exhausts, but this was easily fixed with a few shaves with the hobby knife and sandpaper. The “A” version has nicely executed exhaust cones so no extra work will be needed there.
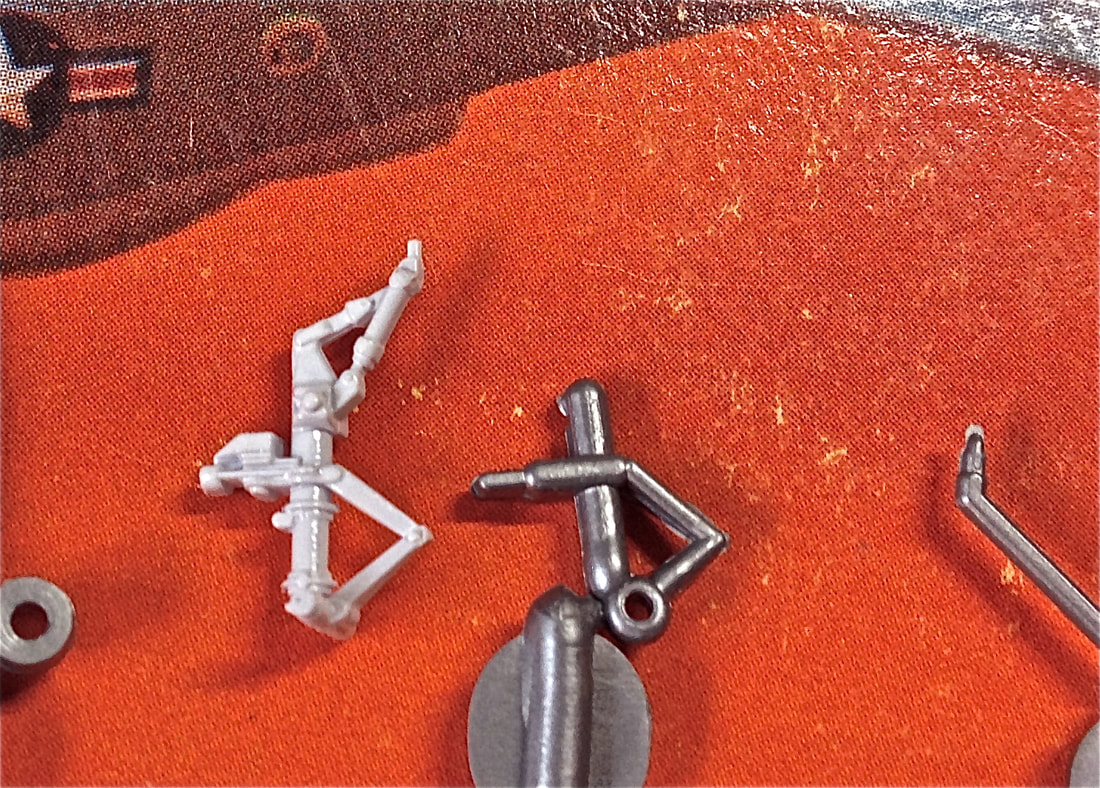
Minicraft's forward landing gear strut is at left. It has been painted and weathered slightly to enhance the details. Compare it to the Revell version on the right. That's what 50 years of technology and a lot of passion to produce an exceptional model kit will get you.
|
Fit of the wings is excellent although I’d recommend not getting any paint on the wing root attachment area. Wing fit is so tight, a layer of paint might make the wing not seat fully. Scraping it down to fit is easy, regardless, or just mask the wing if you’re doing any painting or priming before gluing on the wings.
Revell’s old KC-135 kit came only as an “A” model with J57 engines. You could borrow a set of TF33’s out of a Revell 707 kit to build a KC-135E, but Minicraft has produced their KC-135 in both of these versions. In fact, Minicraft released a KC-135R version with CFM56 engines (high-bypass, large diameter fans) and additional variants are in the pipeline. So, it’s pretty easy to build a KC-135 from any era! |
Minicraft’s decals are made by Cartograf. This means high-quality all the way. You’ll need a magnifier to see the fine details, and they’ll go on easily.
|
|
|
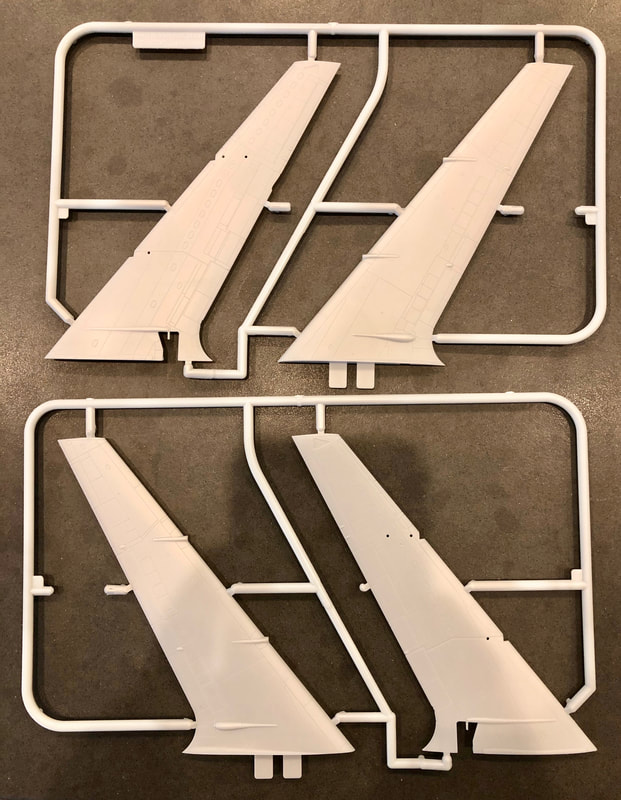
The wings were well-executed. We like how Minicraft captured the raindrop-like landing gear pivot fairing near the wing root. It's missing completely on the Revell kit.
|
The decal sheet to the KC-135A. Cartograf. Nice. That's all you need to know!
|
Other reviewers have commented on the heavy sprue attachment points on some parts. You do need to take some extra care while removing the parts. Note, however, that the ejector pin locations are on the sprues with fewer on the parts themselves. It's much better to have these sometimes pesky critters on the sprues instead of on the parts themselves, isn't it! Who fills ejector pin marks on the sprues anyway?
|
|
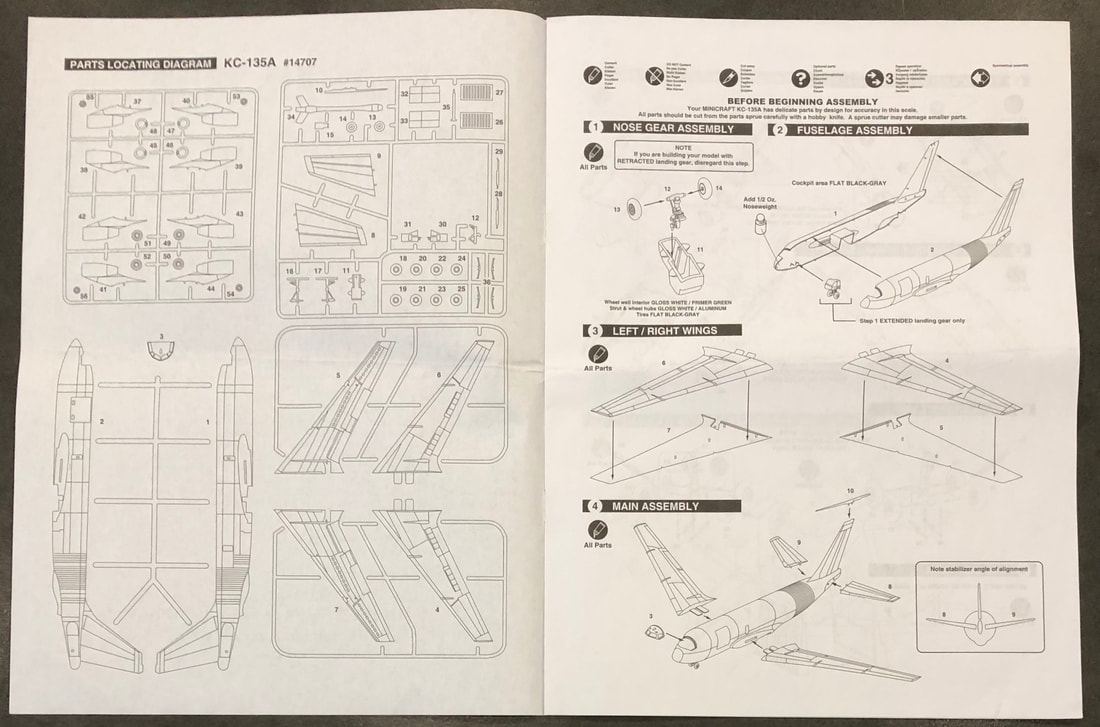
The instructions include a short history, and a parts locator map, which make it very easy to identify parts even if you've already removed them from the sprue. Assembly steps are straightforward. Don't forget to put weight in the nose to avoid a tail-sitter.

|
|
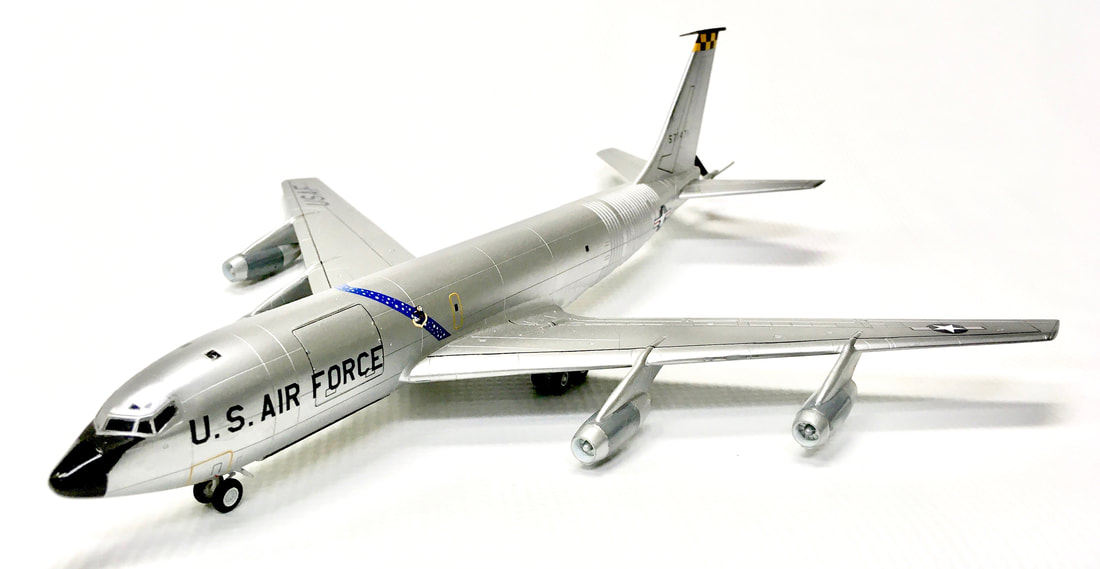
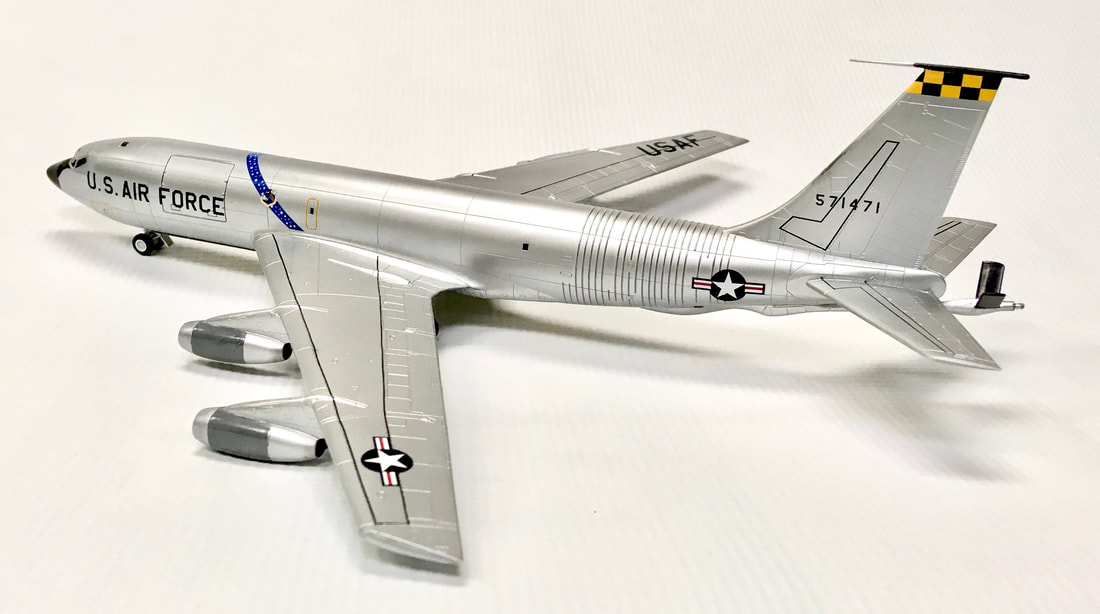
Brudder Dick's Minicraft KC-135A finished in silver guise.
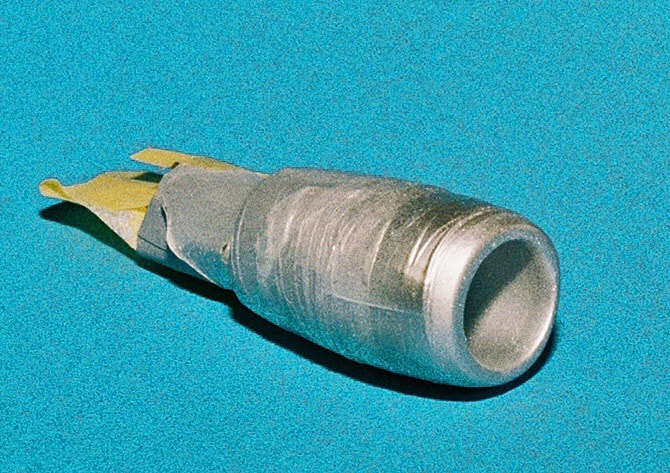
One of Minicraft's innovations that comes from their airliner line is a one-piece engine intake that avoids that horrible seam ahead of the fan that is practically impossible to fill. Those intakes are here in the KC-135A.
|
If the engines look a little close to the "ground" in some of these photos, it's because Dick's white photo background-drape had an upward bow in it where it drooped over the table he used to photograph these models. Don't worry; the stance and engine height on the Minicraft KC-135's is spot-on. Great efforts were expended by Minicraft to get everything right on this kit!
|
A lot has changed in the modeling world in fifty years. Minicraft took full advantage of the technological advancements during that time to create a KC-135 kit that is worlds better than the old Revell standby. The KC-135 is an important aircraft to the U.S. Air Force, still in service since 1957. This kit is a great tribute to this plane and may well be one of the best 1/144-scale kits out there. Dem Brudders endorse and recommend these kits with four thumbs up!
MINICRAFT'S KC-135E
|
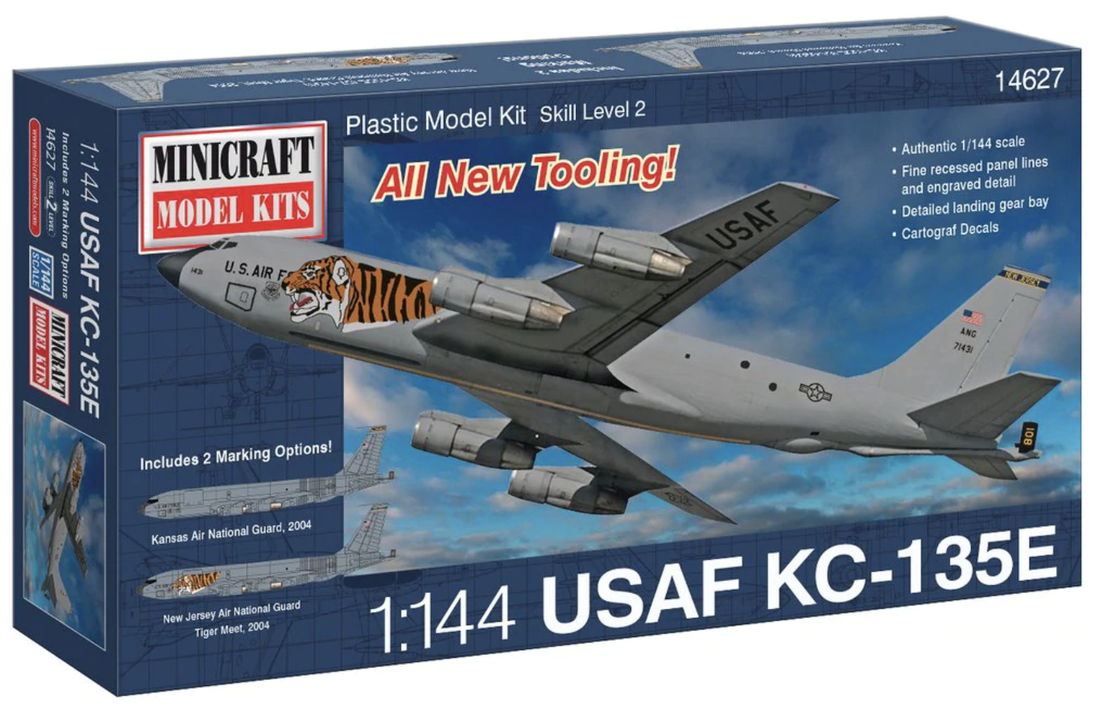
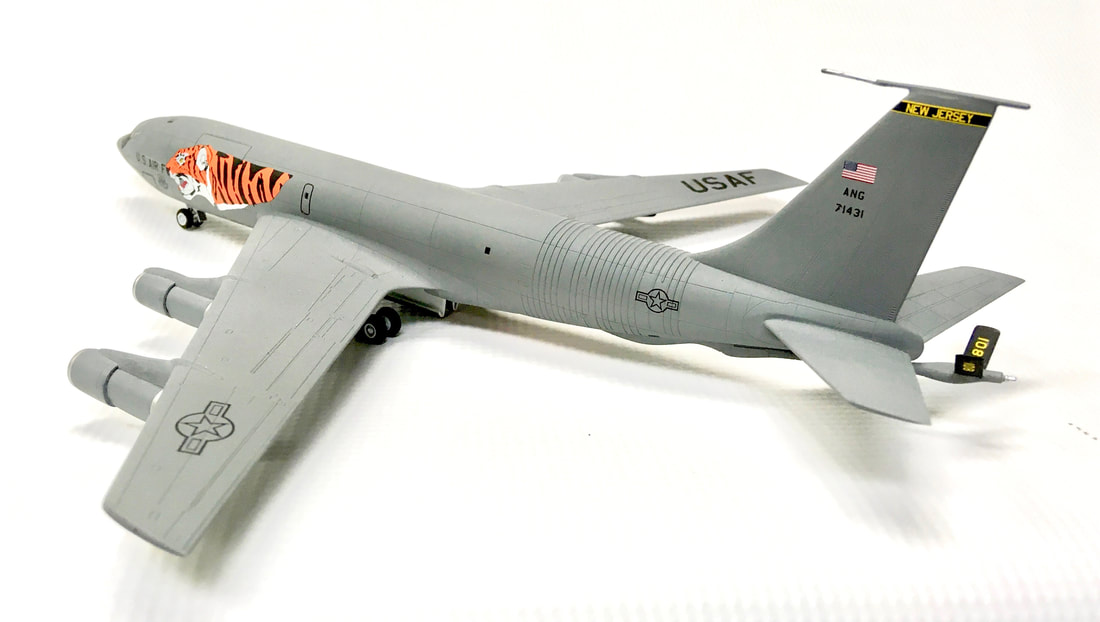
Minicraft's KC-135 kit first showed up in 2013 as the "E" variant. a striking Tigermeet decal spices up the standard AMC-gray decor. If you're feeling less adventurous, a standard Kansas National Guard circa 2004 is included.
P&W TF-33 engines distinguished the KC-135E from its older "A" version. The TF-33's increased power and efficiency over the original J-57's that originally came with the KC-135A's. We knew that Minicraft was planning additional variants of the kit when the KC-135E came with the engines on their own dedicated sprue. |
Minicraft's KC-135E was the first version of this kit.
|
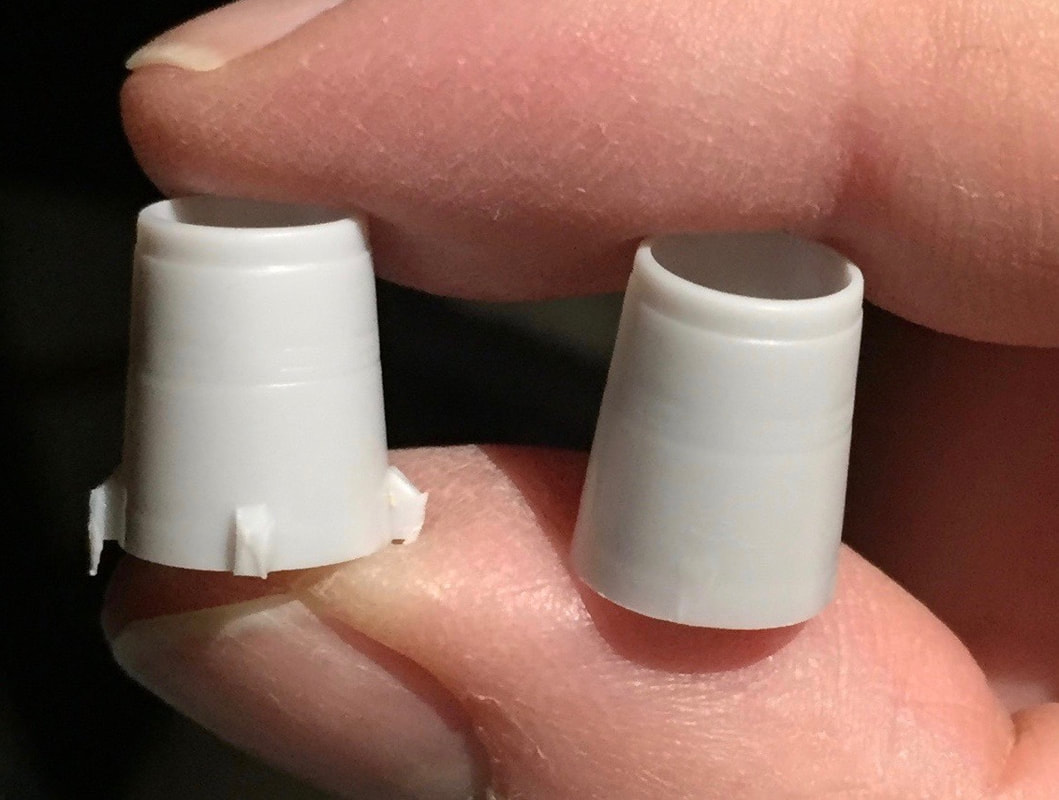
Intakes for the TF-33 engines on the "E." Note the sprue attachmment points. They're thick, but with the smallest amount of care, the parts clean up nicely.
|
The exhaust lip is a tad thick for my liking, but it was very easy to trim it open just a bit (right). A simpler fix would be to paint it flat black. The exhaust cone on the J57's that come with the "A" variant are perfect.
|
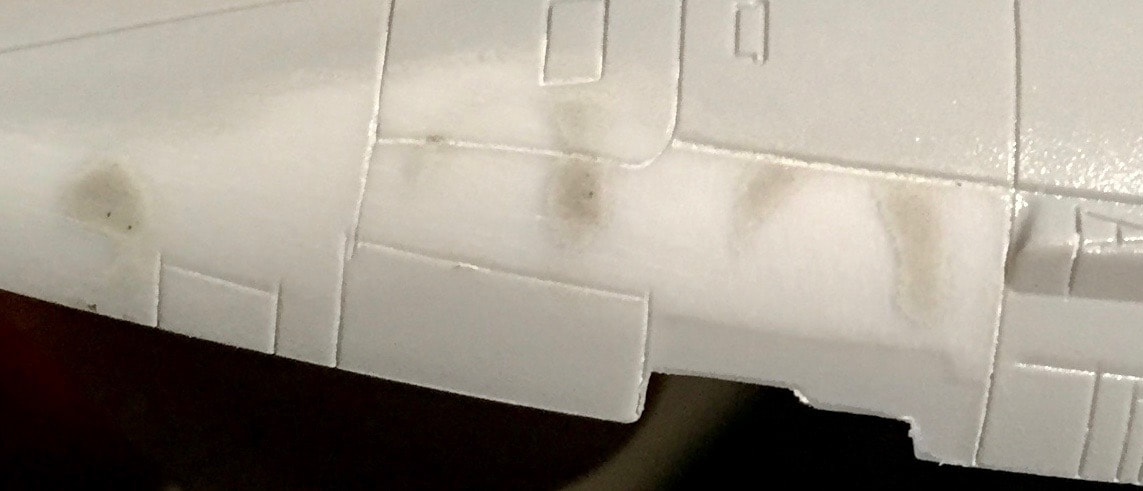
These minor sinkholes resided around the forward gear well. Most modelers might not care about them; they're just not that noticeable.
|
The KC-135E looks great in its AMC-Gray finish. Wing-walk stripes are included on the decal sheet.
|
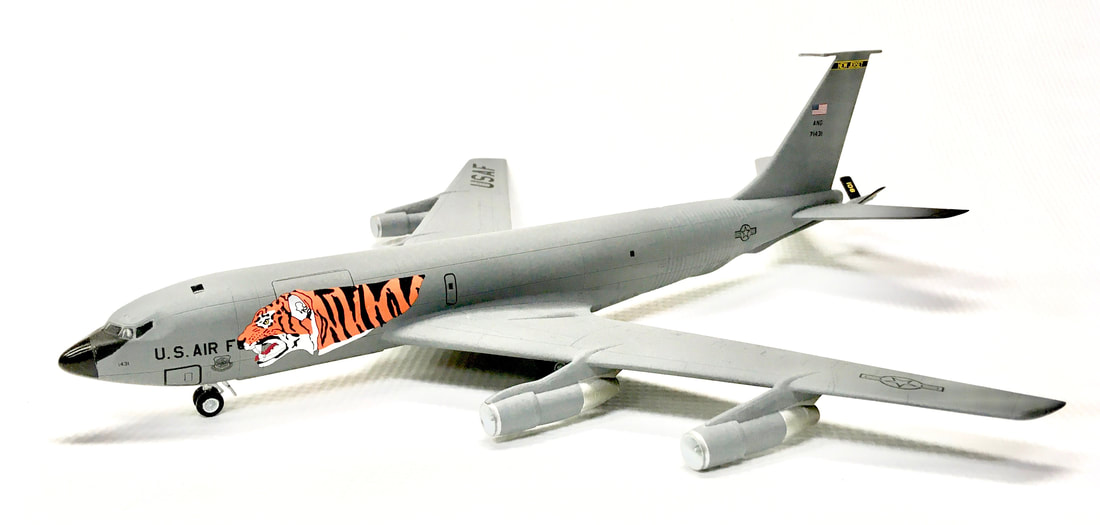
Dick's KC-135E in a Tiger Meet guise.
MINICRAFT'S KC-135R
The KC-135 was known for being underpowered in its early incarnations. Adding high-bypass turbofans to the KC-135 in the form of the CFM56 engine nearly doubled engine power compared to the early versions and some pilots referred to the KC-135 as a "hotrod" after this. Once the retrofit was completed, the KC-135's became known as KC-135R's.
Minicraft's KC-135R adds a set of CFM56 engines to the kit line.
|
Adding the big turbofans could create some dicey handling characteristics in certain scenarios, however. Thanks to the large frontal area, engine-out events, particularly on the outboard units, can make a pilot sweat thanks to a huge amount of drag caused by a dead engine. They also enhance the effects of crosswinds on the aircraft. An outboard engine failure combined with a crosswind landing will test a pilot's skill. Fortunately, such events are rare thanks to the exceptional reliability of the CFM56 engine--but pilots train for it anyway!
|
In 2005, Minicraft came out with an exceptional DC-8 kit, which included CFM56 engines (to make a DC-8 Series 71 aircraft). They actually sell the engines from this kit in a separate bag! So you could assume that the same engine sprue would be included to make a KC-135R, right? Nope! The engines to the KC-135R were newly-tooled for the "R" variant, and they are absolutely gorgeous!
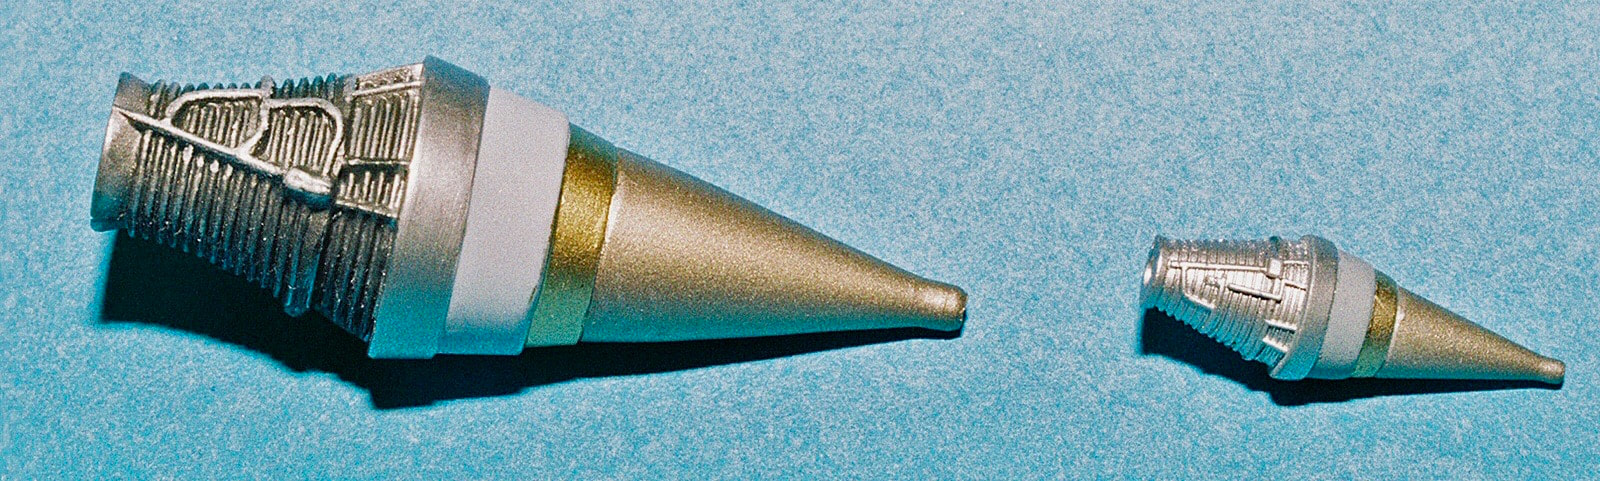
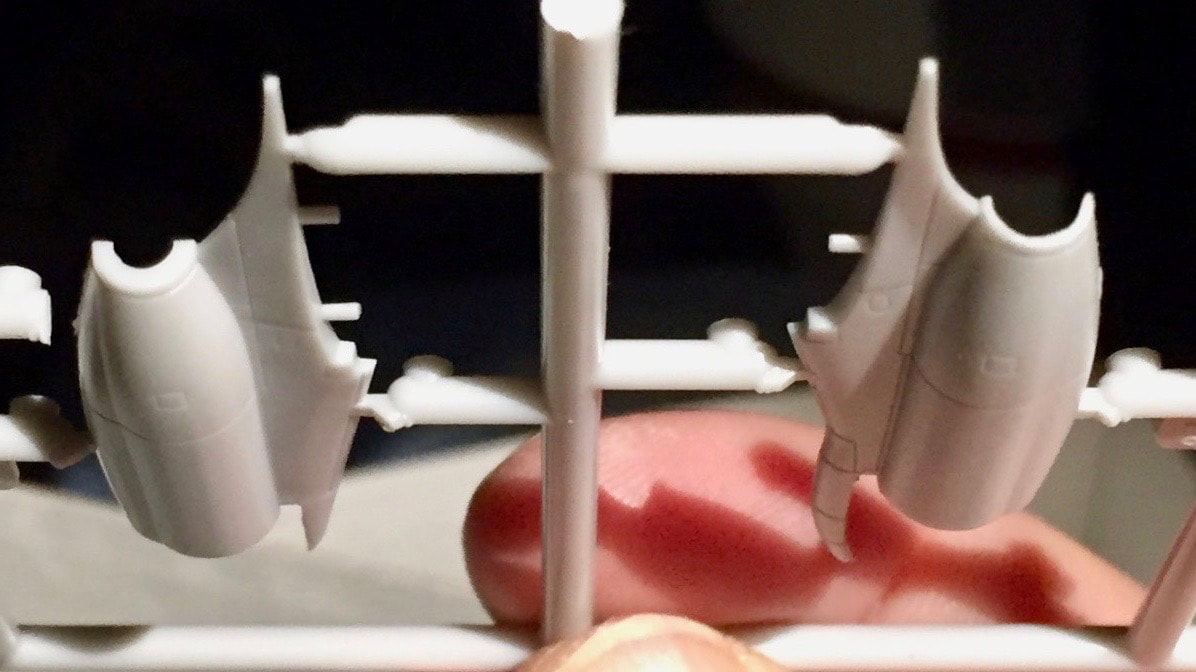
At left, the Heller/AMT hot sections. Minicraft at right. The Minicraft kit is just as detailed as the 1/72 kit.
|
The Minicraft engine prior to adding the nacelle half.
|
The intake is one piece without the split inside, just like the other KC-135 kits.
|
Dick uses Parafilm to mask the intake lip.
|
The APU on the "R" is a little different than on the A/E variants.
|
Here's the finished version.
|
Compare Dick's 1/144-scale Minicraft KC-135R to his Heller (AMT) C-135 FR, in 1/72 scale.
|
Here's a closeup of the engines of Dick's Minicraft KC-135R.
|
MINICRAFT'S EC-135C
The KC-135 was designed as an air-to-air refueling aircraft with cargo hauling a secondary role. The airframe proved effective and reliable and was soon adapted by the USAF for reconnaissance and command-and-control missions. Minicraft's latest member of their KC-135 family is the EC-135C. This aircraft has been called the "Doomsday Plane."
The KC-135 was designed as an air-to-air refueling aircraft with cargo hauling a secondary role. The airframe proved effective and reliable and was soon adapted by the USAF for reconnaissance and command-and-control missions. Minicraft's latest member of their KC-135 family is the EC-135C. This aircraft has been called the "Doomsday Plane."

Minicraft's "Looking Glass" EC-135C kit has new parts to depict its Cold War "Doomsday" mission.
During its Looking Glass role, at least one EC-135 aircraft was airborne 24 hours a day, from February 3, 1961 until July 24, 1990, an astounding 29 years. Minicraft Models has created new parts to depict the plane in its ominous role. If needed, the EC-135C was capable of relaying launch commands for the USAF's ground-based ICBM force if the normal launch control centers were disabled during an attack. While the continuously-airborne Looking Glass missions quit in 1990, the EC-135's stayed on constant alert whether on the ground or in the air. In 1998, the US Navy's E-6 Mercury, based on the 707, took over the mission. As stated earlier, the 707 is a close cousin of the KC-135 via its Dash-80 roots.
An "outrigger" on the "E" engine sprue has the new plastic for the EC-135. Those TF-33 engines, appropriate for the EC-135C, came with the original Minicraft KC-135E.
|
A closeup shot of the new antenna parts for the EC-135C. The TWA housing and drogue are there!
|
The EC-135C has some small "stick" antennas not portrayed in the kit. If a modeler wishes to depict these, the best way is to get some thin nails that are the right diameter. Notches can be cut in the kit centerline on both fuselage halves at the right locations, and the nails can be cut to the correct length (factoring for the thickness of the fuselage) and glued into one half with epoxy glue with the nail head even with the inside of the fuselage. When gluing the fuselage together, a dab of epoxy on the exposed half of the nail head will provide additional reinforcement. This method will make for very durable antenna that will not break off during finishing of the model.

Similar schemes for two Offut-based aircraft are included. Stay tuned for more from Offut AFB later in this article.
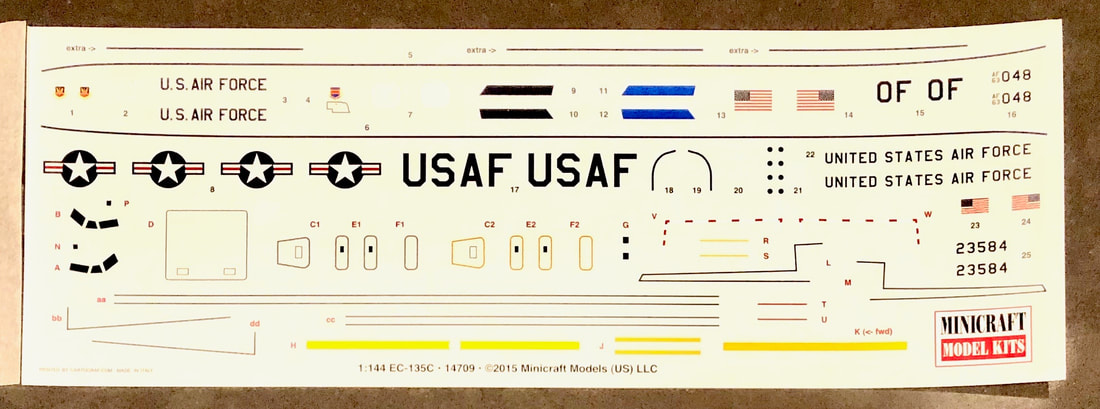
A large Cartograf decal sheet includes all markings needed to depict a historic Cold War "Looking Glass" aircraft in Minicraft's EC-135C kit.
One of the very cool components included with the new parts is the trailing-wire antenna housing and the funnel drogue for the antenna end. This system would unfurl a very long wire (2.5 mi/4 km) running a very low frequency signal capable of communication with submerged fleet ballistic missile submarines. The small cone piece is the funnel drogue; you can thin the trailing edge of this part from the inside of the cone to increase realism. Awesome!
|
DEM BRUDDERS WHAT-DOES-IT-HAVE-TO-DO-WITH-MODELING TECH-NERD TRIVIA: VLF (Very Low Frequency) communications work in the 3-30 kHz range. Higher frequencies generally are shielded by seawater. A submarine at a safe depth could raise an antenna on a tether to receive transmissions from an aircraft using this system. One of the downsides in the lower frequency range in particular is that the bandwidth to provide information in quantity is very limited due to the length of time it takes to send data packets via the long, slow wavelength.
|
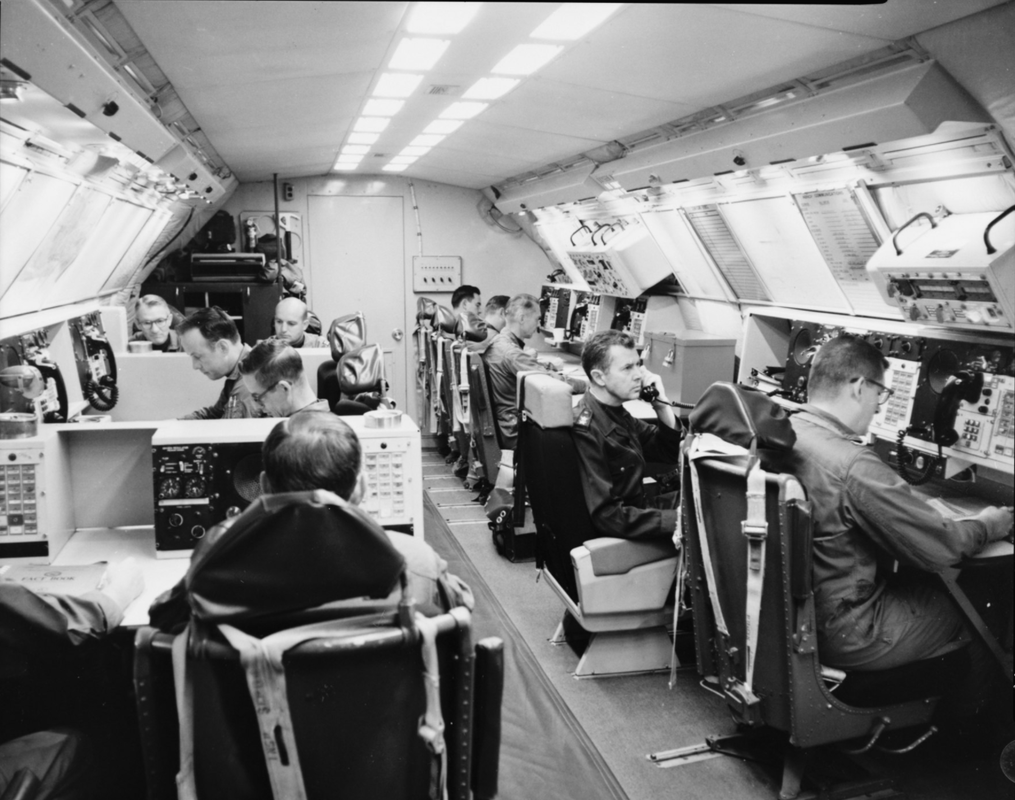
The cabin of an EC-135 during a Looking Glass mission.
|
So there you have it; Minicraft racks up another winner with a historically significant entry in their KC-135 family of model kits. Dem Brudders give this kit and the rest of the kits in the series an enthusiastic four thumbs up!
I asked Lewis Nace, president of Minicraft Models, if there are plans in the works to add additional variants of the KC-135 family. He said that for now at least, the series will stand at these four variants as he focuses on bringing you some other exciting new model kits. Of course, we know that plans could always change in the future, and there is nothing to stop the modeler from modifying Minicraft's kit into the version of their choice!
I asked Lewis Nace, president of Minicraft Models, if there are plans in the works to add additional variants of the KC-135 family. He said that for now at least, the series will stand at these four variants as he focuses on bringing you some other exciting new model kits. Of course, we know that plans could always change in the future, and there is nothing to stop the modeler from modifying Minicraft's kit into the version of their choice!
BONUS: KC-135 VARIANT PHOTO GALLERY
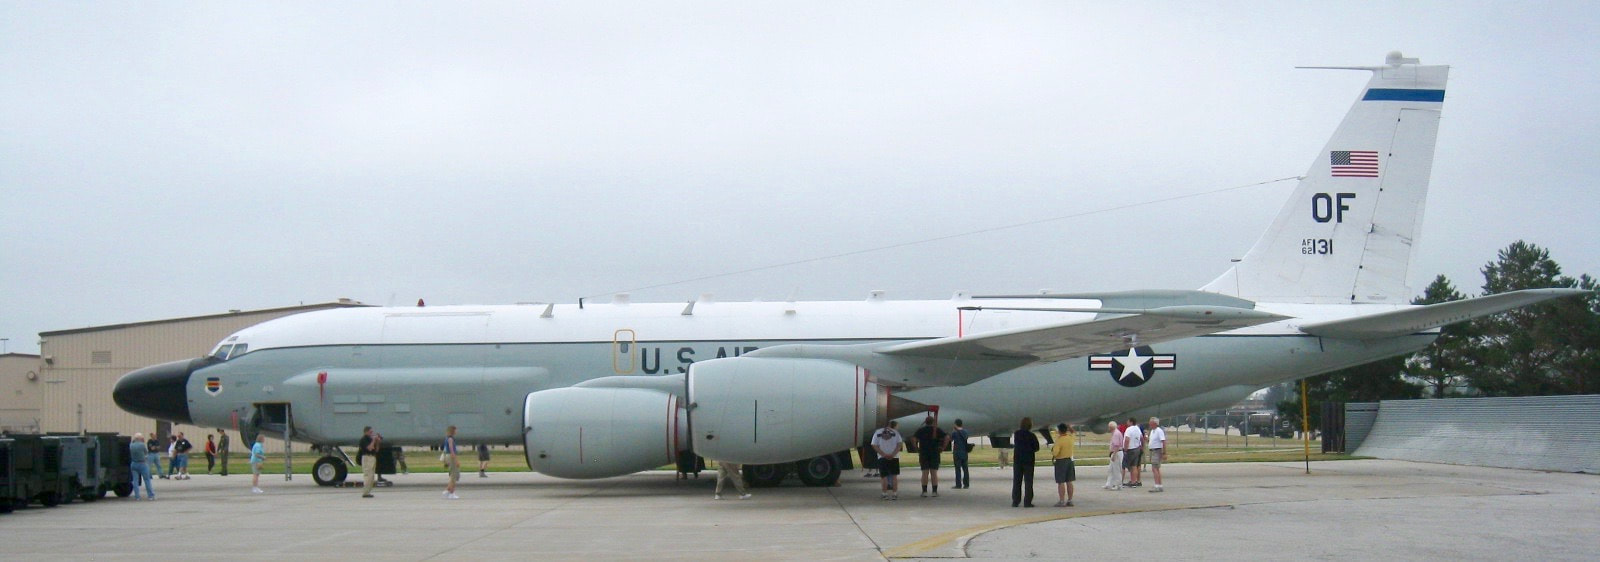
RC-135V
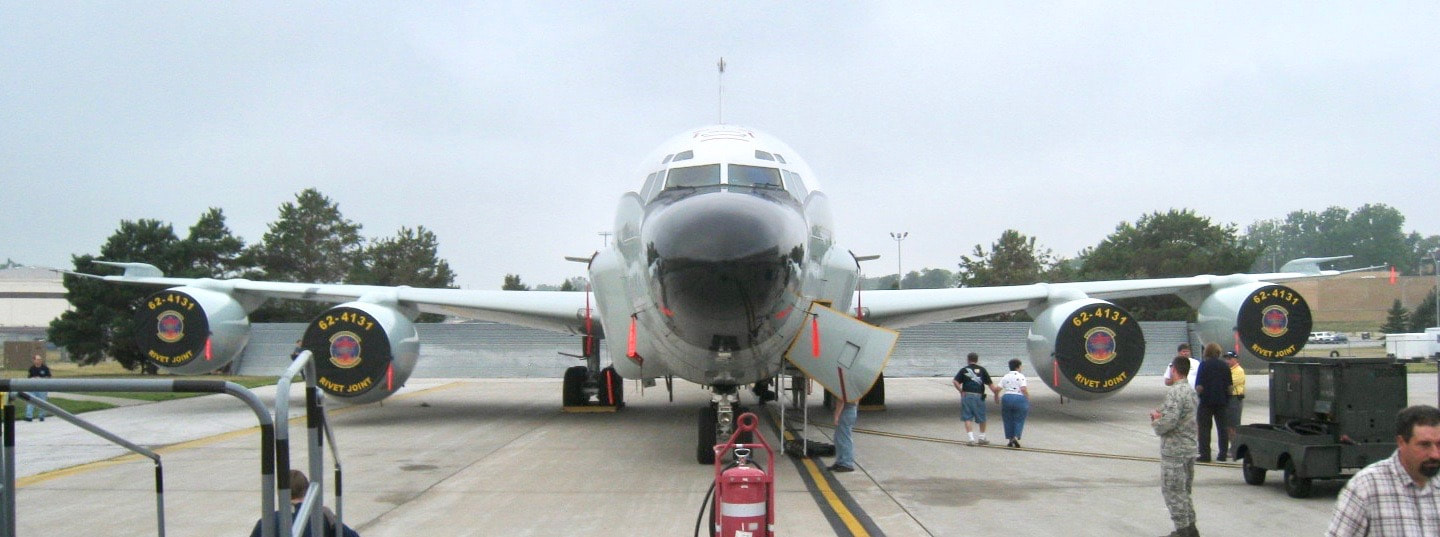
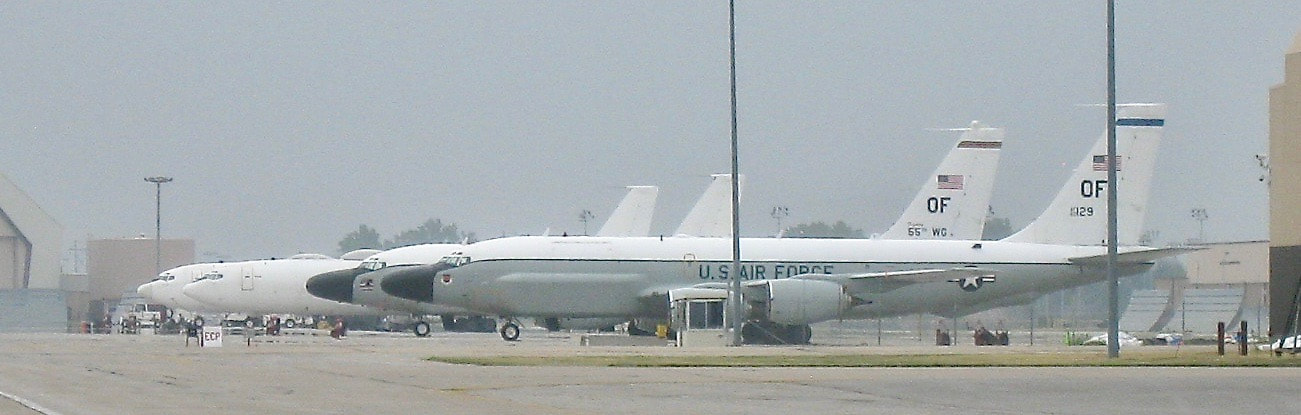
Dem Brudders attended the IPMS/USA National Convention in Omaha, NE in 2011. One of the great perks of attending IPMS Nationals is awesome tours! LT Col Winston Gould is a modeler and IPMS member who was working at Offutt Air Force at the time, and managed to pull some strings for an IPMS bus tour to Offutt with the highlight being an opportunity for us to photograph a pair, nose-to-nose, of RC-135V "Rivet Joint" aircraft! For Dick and me, this was a once-in-a-lifetime opportunity and we're grateful to Winston for his generosity in arranging this fantastic event. Why not join the IPMS/USA Today!
While Minicraft Models doesn't currently have an RC-135V kit in their extensive line of 1/144 kits, there is nothing from keeping the intrepid modeler from doing a conversion of Minicraft's KC-135R to the RC-135V conversion. We're providing some photos for you to get a start!
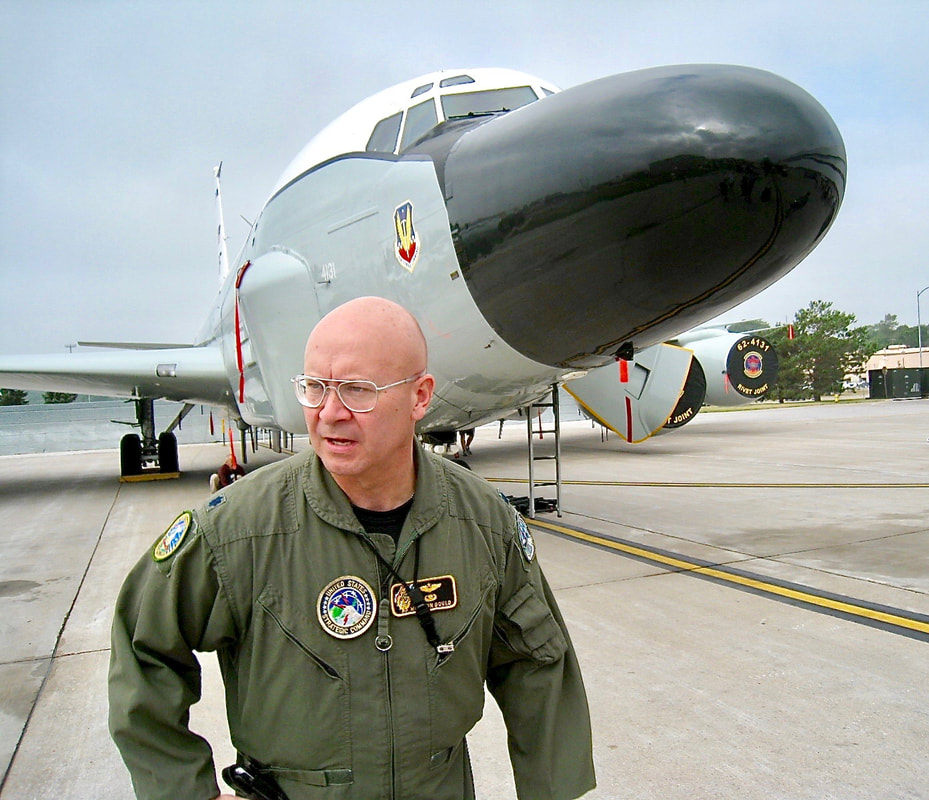
Winston Gould keeps a sharp eye on his IPMS tour group. Lt Col Gould had to be sure about three dozen-plus IPMS aircraft geeks didn't trip and get hurt, wander off and get lost, or damage the airplanes.
|
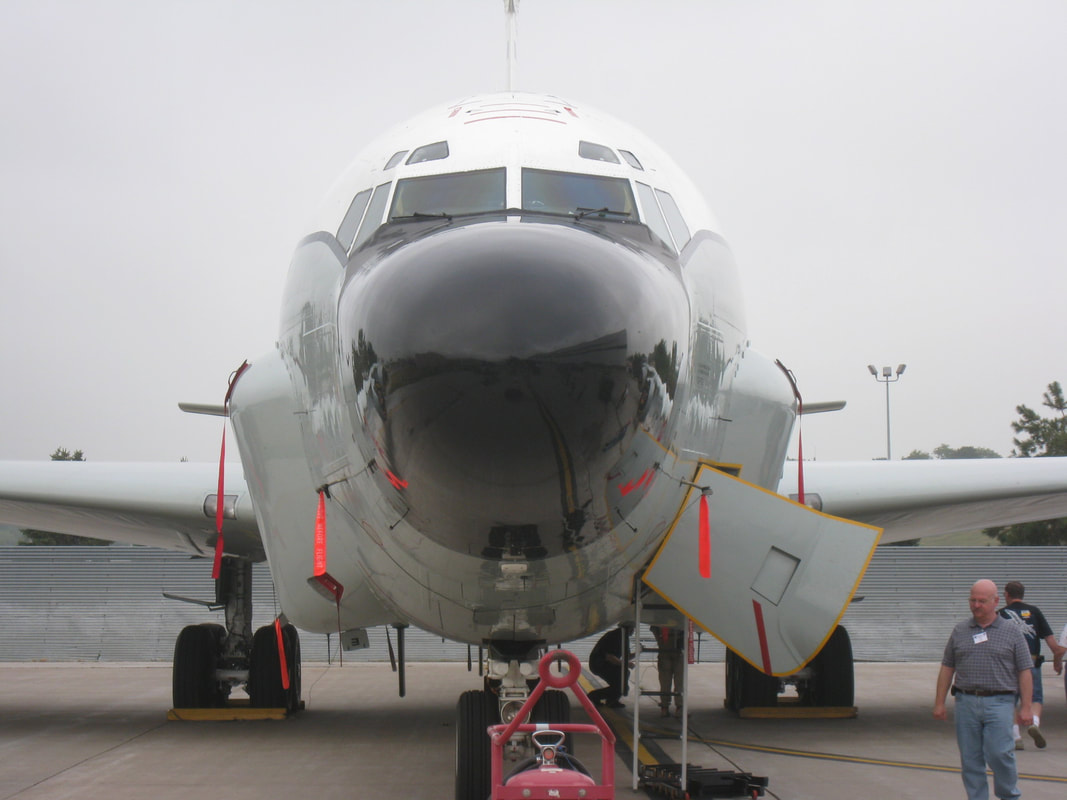
This head-on telephoto view provides a good look at the angle of those SLAR cheek-fairings.
|
One thing I noticed was that while these aircraft are decades old, they are meticulously maintained. Everything was spotlessly clean! If you decide to do this conversion, keep the weathering to a minimum.

Note how the cheek fairings intersect the leading edge of the wing at its root.
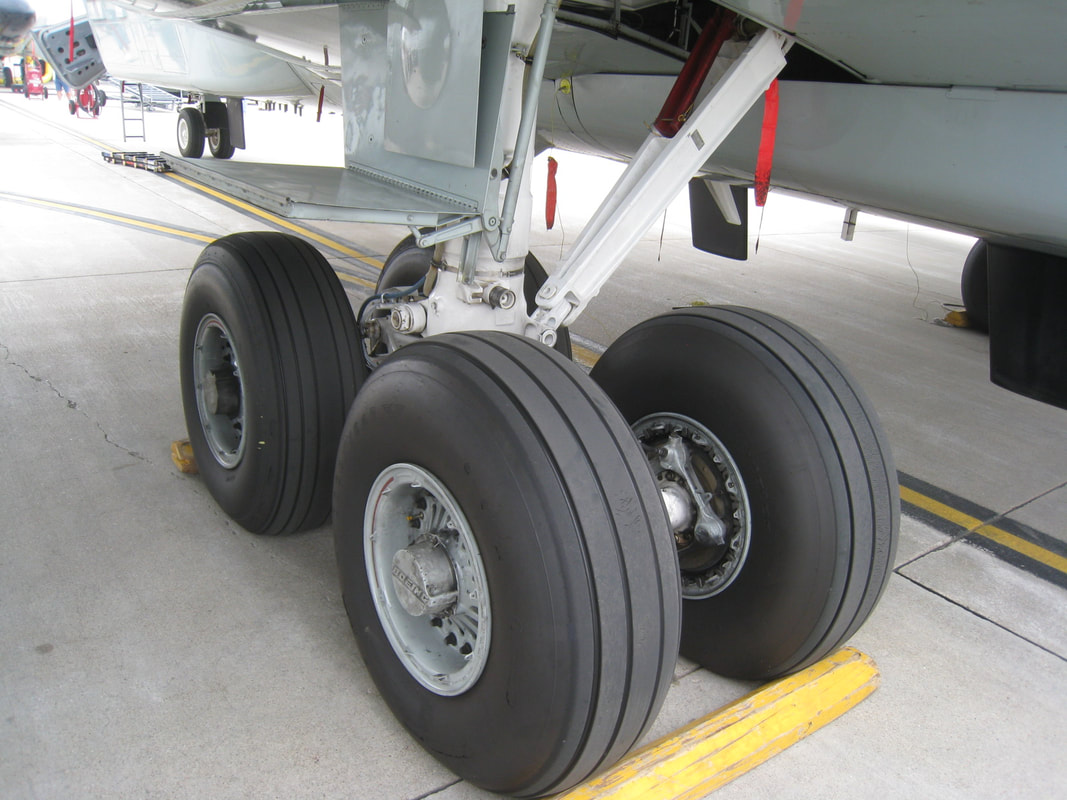
When we built landing gear components in the 1980's, we sent them out the door in a durable, glossy white finish. These rims look gray to me.
|
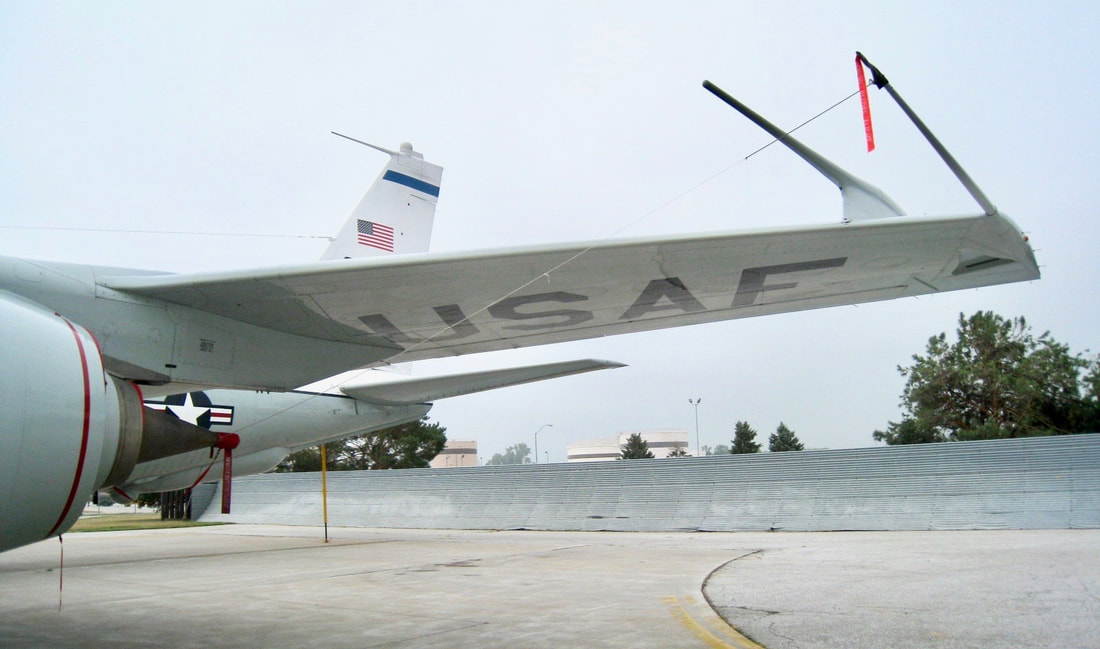
This photo should help with location of the port USAF under-wing insignia. Notice the extra probe-antenna on the upper wing.
|
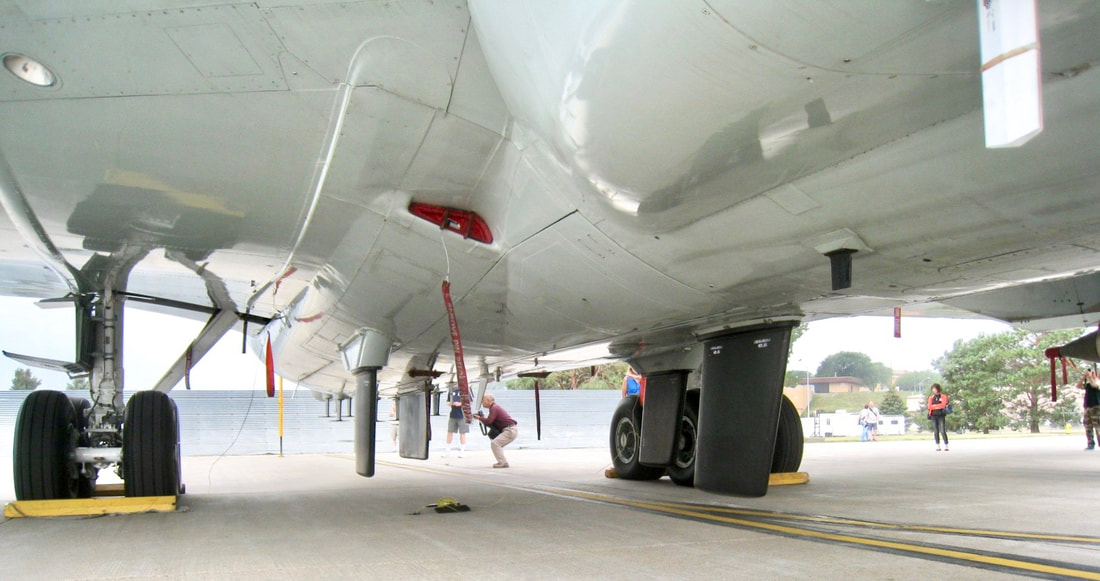
This underside view looking rearward shows some blade-antennas. Note the angle of those landing gear doors.
|
This view gives you a pretty good idea how the thimble-nose radar fairing intersects the fuselage.
|
This low-angle view shows the engine bleed vent.
|
The KC-135R has legs - the CFM56 engines increased range by 60%.
|
This view shows placement of the insignias, lower starboard wing. Note that the wing flap appears to have been swapped off of an aircraft that was tactical-gray.
|
Winston Gould snapped this picture of us! We'd like to say a big THANK YOU to him for arranging this!
|
Even on the ground on a cloudy day, these aircraft require some hefty air handling to keep everything cool. The port for the large air hose in this photo is actually the wing emergency exit!
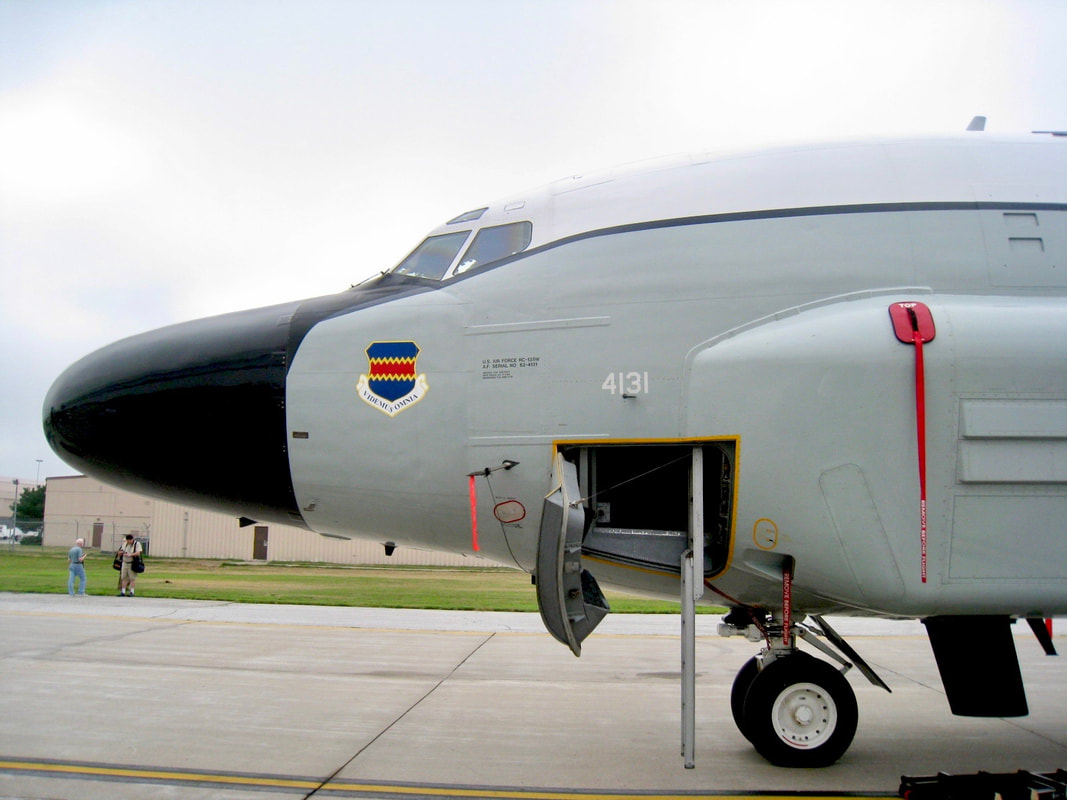
One of these things is not like the others - A KC-135 in this photo does not have a thimble-nose.
Those appear to be U.S. Navy E-6 Mercury aircraft in the background.
EC-135J
Brudder Dick and I took these photos at Pima Air and Space Museum in 2011 and 2016.
EC-135J
Brudder Dick and I took these photos at Pima Air and Space Museum in 2011 and 2016.
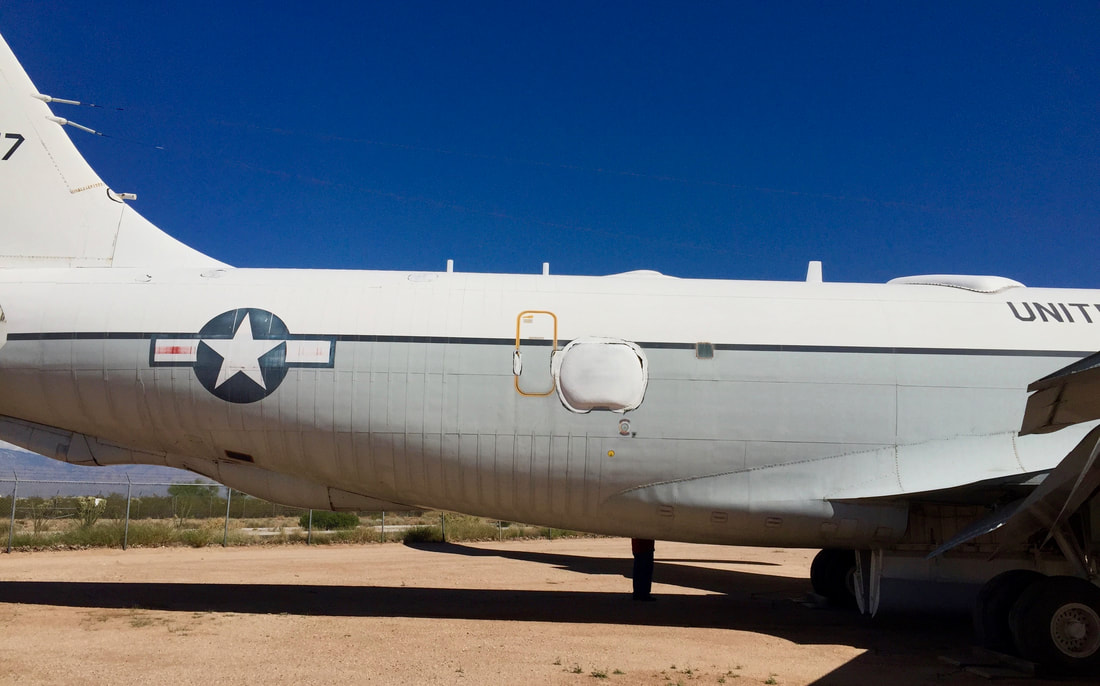
This EC-135J was in service from 1965-1992. Note that these aircraft retained their refueling booms, just like the Minicraft kit.
Here's a look at the aft antenna placements.
|
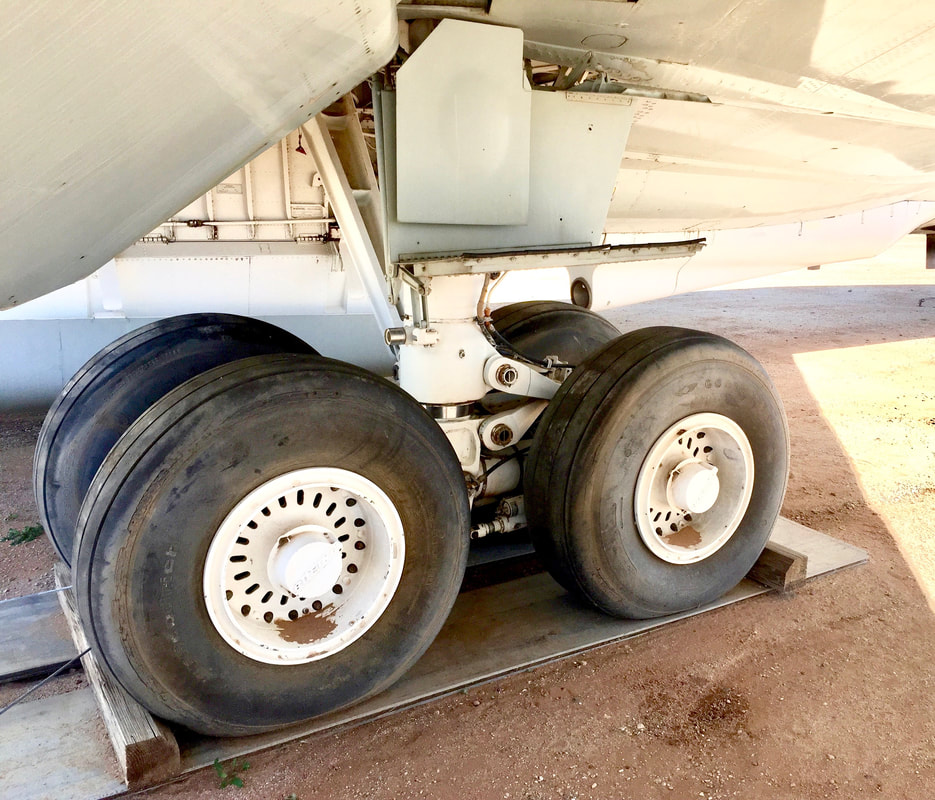
This aircraft has white wheel rims.
|
The center landing gear well doors are down in this photo. Normally, they were closed when the operational airplane was on the ground. If you'd like to see that nice ballast tank between the gear wells as depicted in the Minicraft KC-135 kit, it's perfectly fine to display them open if you want to.
This aircraft has three turbocompressors; this device is covered by the hump on top of the engine nacelle strut with the mini-intake just above the main engine intake. Note that the inboard starboard engine (left in the photo) does not have one.
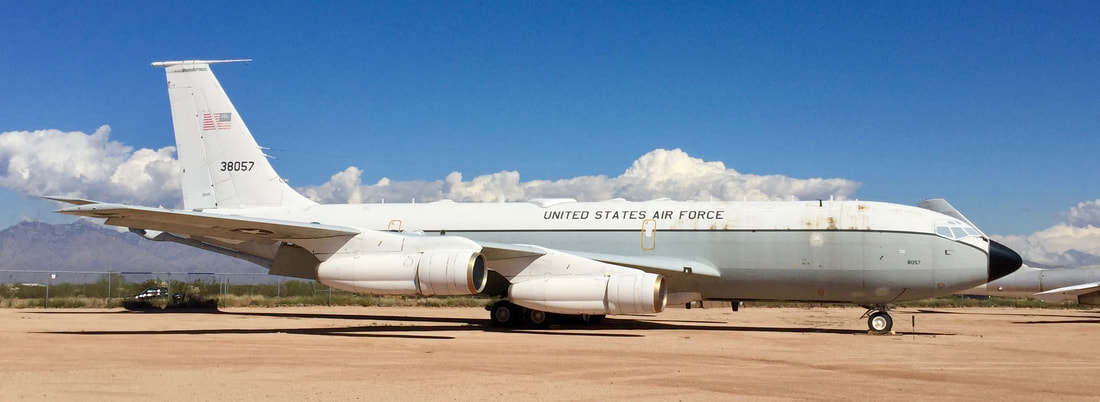
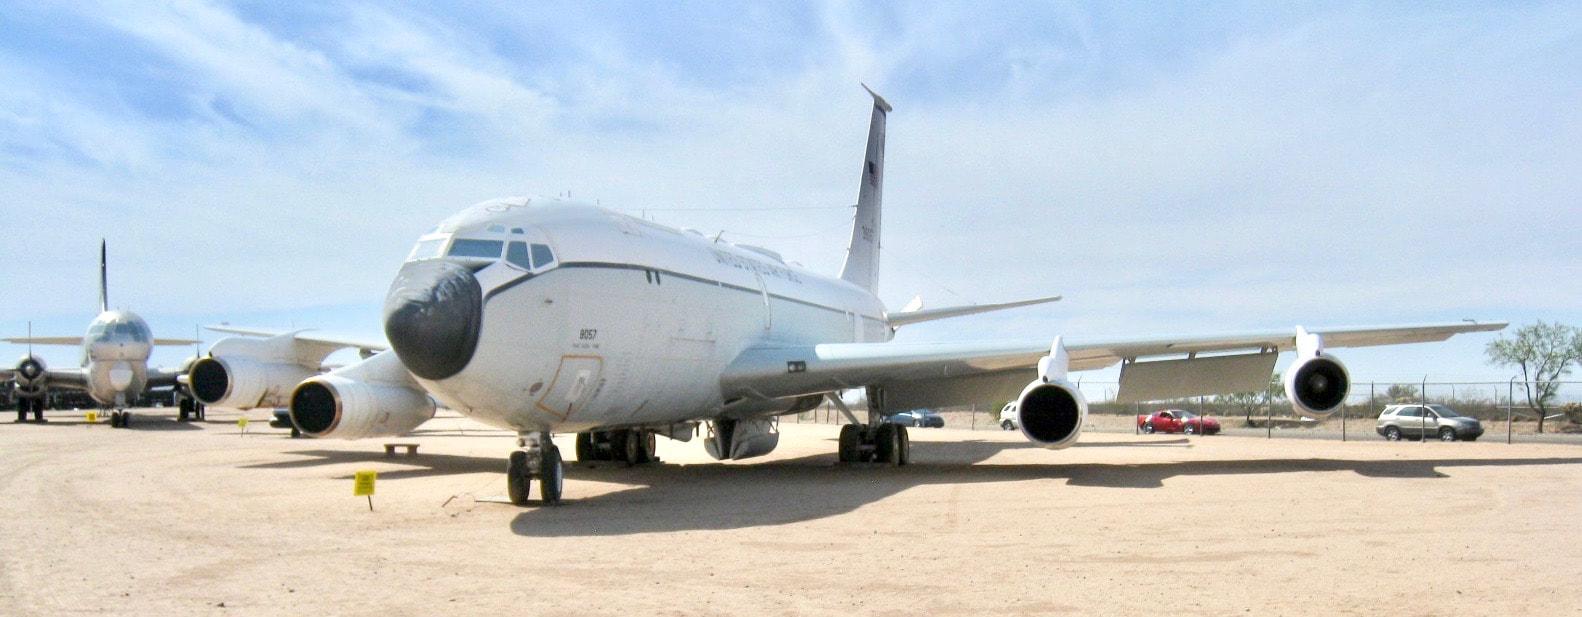
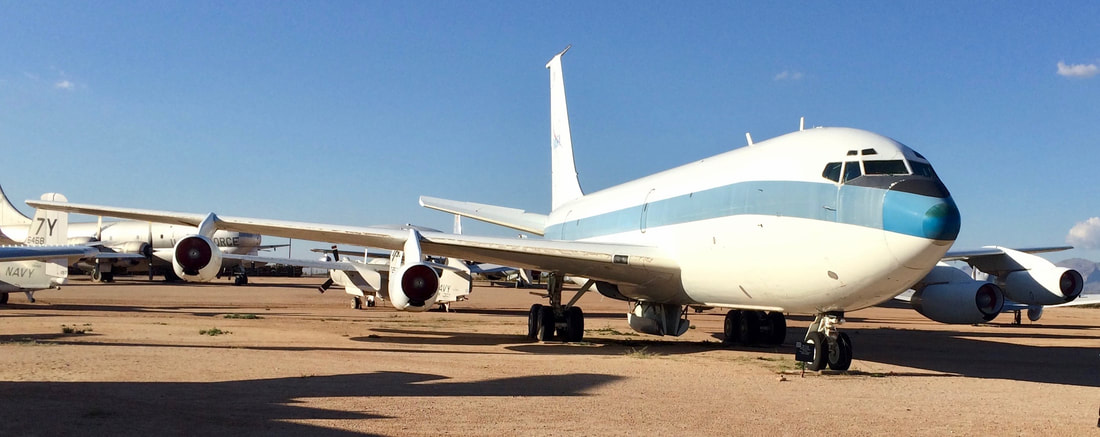
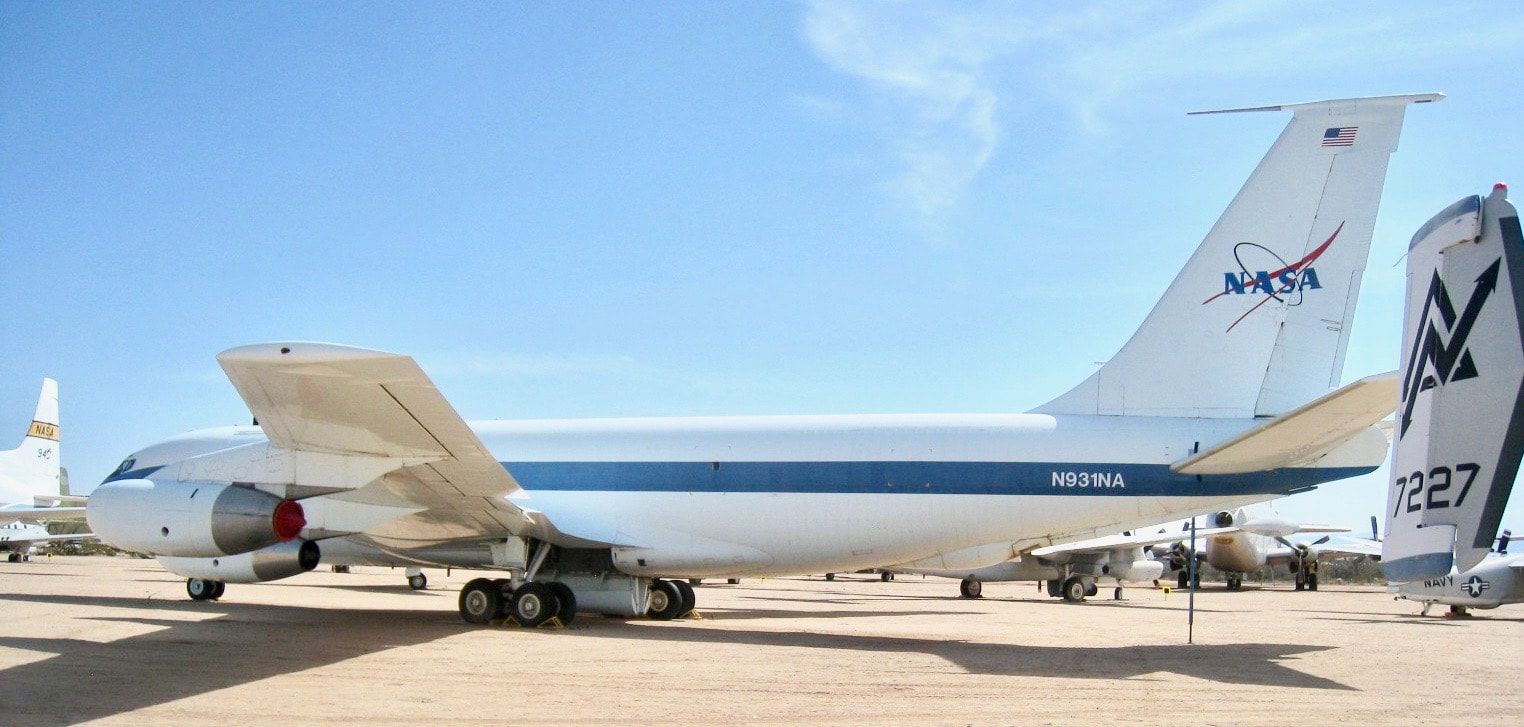
KC-135A N931NA "Vomit Comet"
Also at Pima Air and Space Museum, you can see one of NASA's "Vomit Comets" on display. This KC-135A N931NA (note the civilian registration!) was repurposed as a reduced-gravity training aircraft. This plane would fly a parabolic profile, and for about thirty seconds at the apex of the curve, the plane's motion would cancel out gravity for the inhabitants. NASA astronauts could get a good simulation of "zero-G" and during a training mission, the plane would repeatedly fly the parabolas. Lunar gravity, at 1/6 of Earth's, could also be simulated by flying a larger curve.

NASA's KC-135A's had their refueling booms removed to improve range and increase safety.
Other than deleting the refueling boom, this is a very simple conversion if you want to build a model of one of these aircraft from the Minicraft KC-135A kit. Masking and painting the "cheat line" shouldn't be too difficult and the NASA insignia decal shouldn't be too hard to find, or print it yourself.
DEM BRUDDERS CRAZY MODELING TIP: HOW CAN YOU PRINT WHITE DECAL LETTERING ON YOUR HOME INKJET PRINTER??? You'll have to make your artwork with white lettering, which will come out clear on your decal. The trick is to make the background to the lettering the same color as your cheatline, matching it as closely as you can to your paint. The area under the decal will have to be white so that it will show through the clear portions of the decal. just be sure your white region is smaller than the decal. You might have to experiment, as the color shade might change a little after applying the decal to the model. Another suggestion is to create your own cheatline decal using blue ink, with white lettering, and simply put the decal over the white airplane. Experimentation will definitely be in order as your decal might not fit the first time you put it on!
DEM BRUDDERS CRAZY MODELING TIP: HOW CAN YOU PRINT WHITE DECAL LETTERING ON YOUR HOME INKJET PRINTER??? You'll have to make your artwork with white lettering, which will come out clear on your decal. The trick is to make the background to the lettering the same color as your cheatline, matching it as closely as you can to your paint. The area under the decal will have to be white so that it will show through the clear portions of the decal. just be sure your white region is smaller than the decal. You might have to experiment, as the color shade might change a little after applying the decal to the model. Another suggestion is to create your own cheatline decal using blue ink, with white lettering, and simply put the decal over the white airplane. Experimentation will definitely be in order as your decal might not fit the first time you put it on!
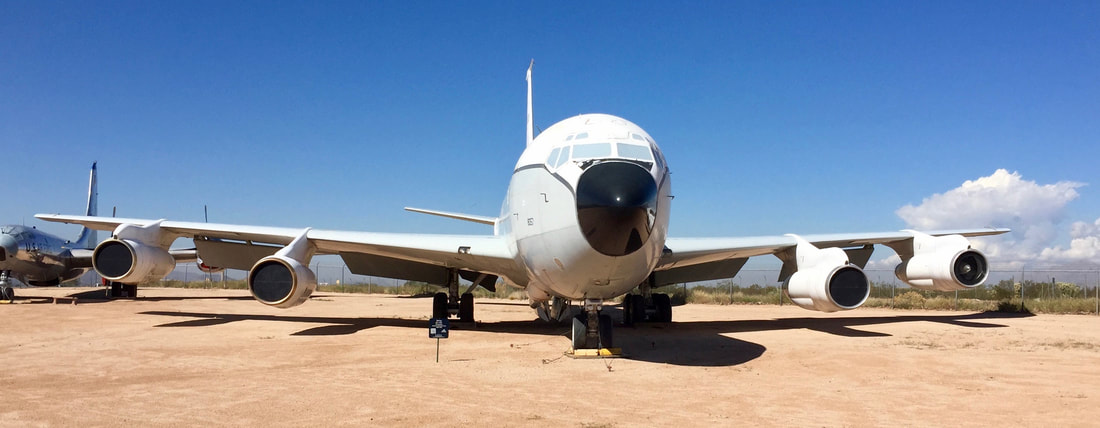
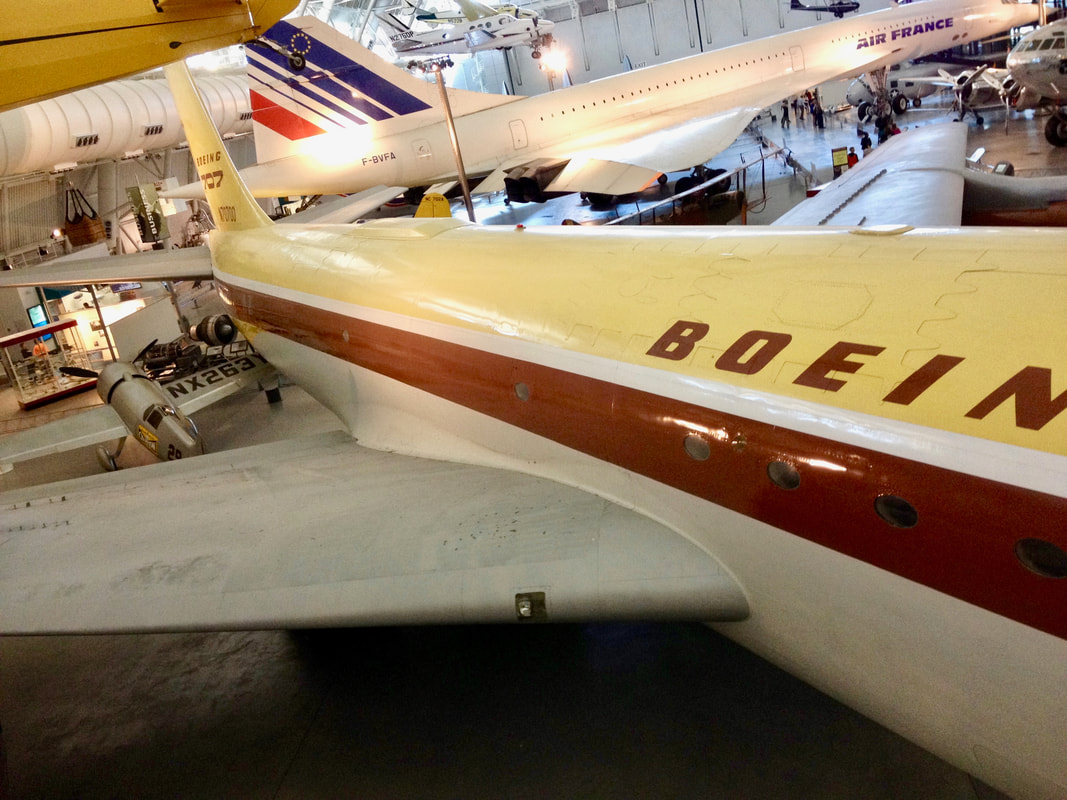
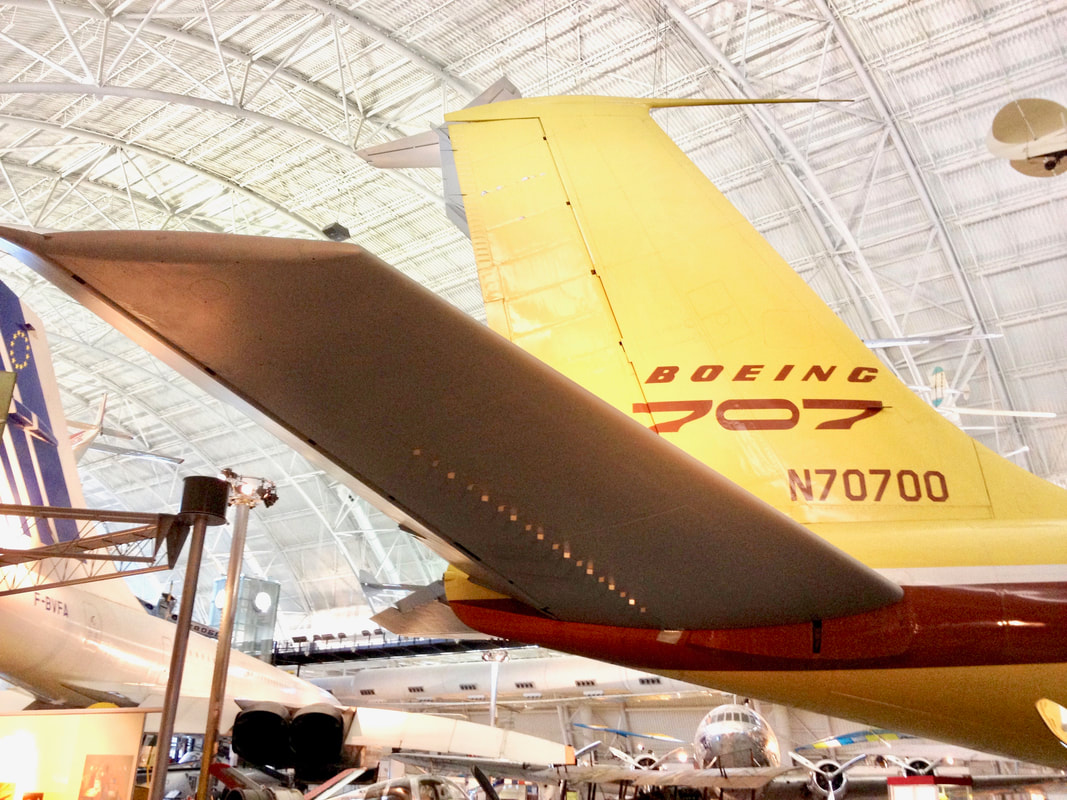
THE DASH 80: BOEING'S PROTOTYPE FOR THE 707 AND KC-135
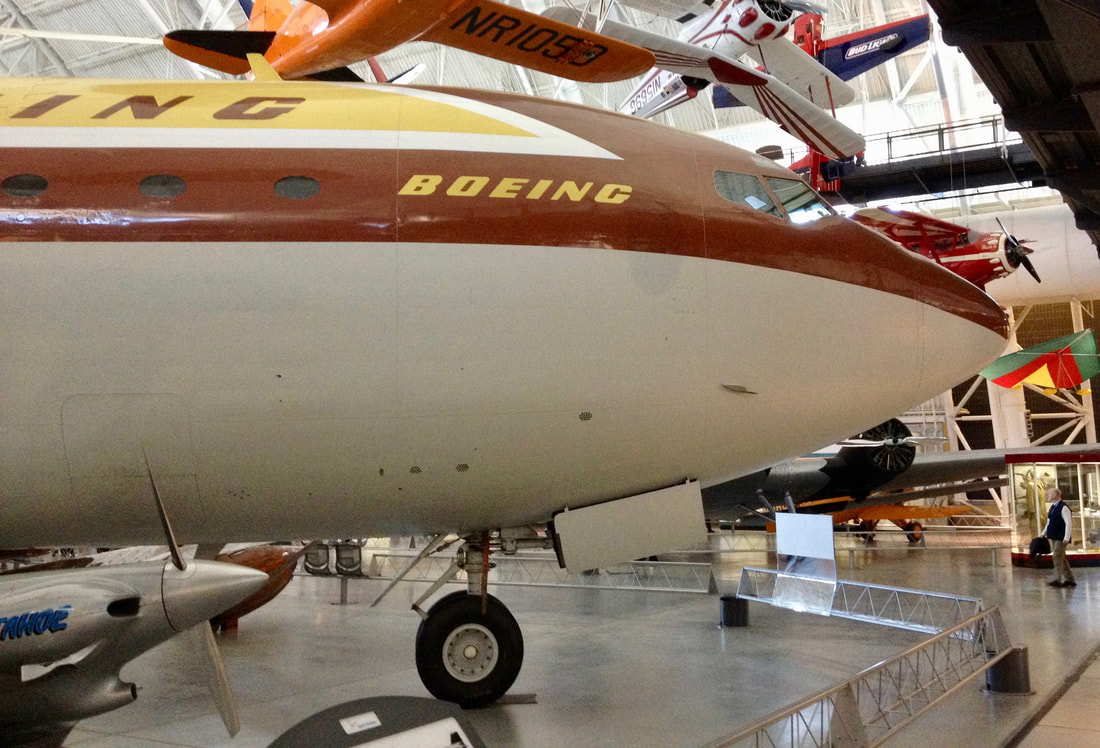
Boeing's Dash 80, or properly the Model 367-80, was the prototype for the KC-135. It first flew in 1954. The aircraft was an important testbed even after the KC-135 and 707 reached their full development. It made over 1500 flights during a quarter-century, finally retired in 1970.
The aircraft can currently be seen in the Udvar-Hazy extension of the Smithsonian Museum near Dulles Airport in the Washington DC area, where these photos were taken by me in 2015. It is important to point out that the Dash 80 had a number of modifications over its lifespan, and this should be taken into account if one decides to base a conversion of a Minicraft KC-135 kit on photos from the museum.
Major changes include an engine upgrade, larger nose radome, and wing trailing edge modification. I would highly recommend a visit to this museum to experience the Dash 80 in person. Having become somewhat familiar with the KC-135 and to a lesser extent the 707, it was interesting to see the Dash 80 up close, where I got the sense that it truly was a hand-built airplane, and fairly crude compared to the KC-135 and 707 that it spawned.
Building a Dash 80 in 1/144 scale is possible from the Minicraft KC-135A or "E" kit. There will be quite a few changes that will need to be made varying to the degree of accuracy that a modeler chooses, but the Minicraft kit will be a good place to start.
These are JT-3D engines, known as TF-33's in military applications. They are a later addition to the Dash 80, which originally had J-57's (JT-3C) engines. If you decide to do the conversion, start with the Minicraft KC-135A for early engines (J-57/JT-3c) or KC-135E for the later engines (TF-33/JT-3D).
|
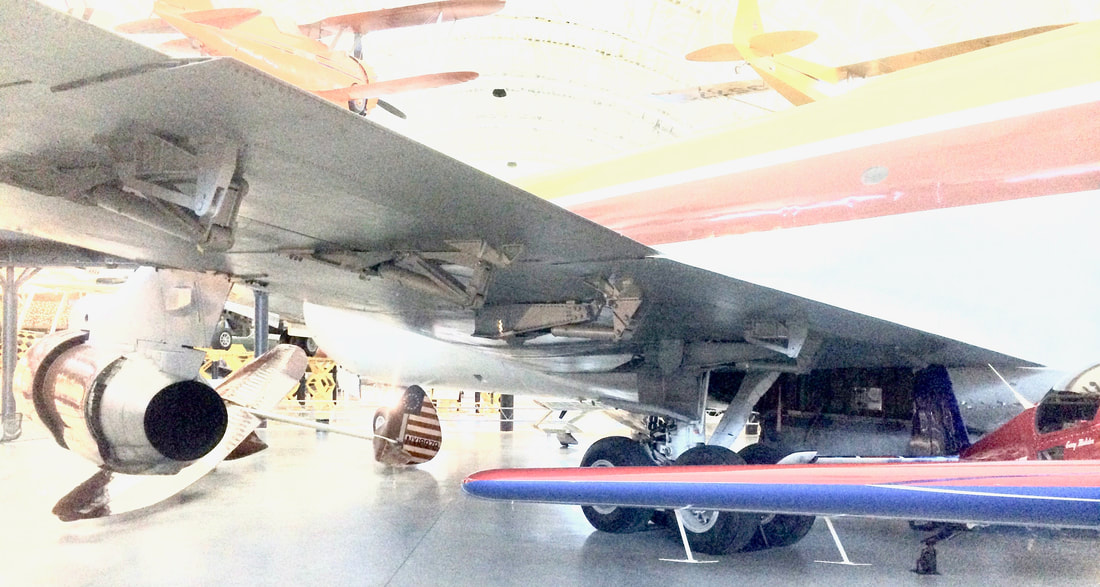
Note that both engines had turbocompressors here (pylon extension with small intake at the front tip). Normally, on the KC-135's, the outboard engines did not have the turbocompressors and the extended fairing. Note also that the wing root fairing is different than on the KC-135 or 707 airliner.
|
This overhead shot provides a good look at the windscreen and eyebrow windows. Note the larger radome that was a later addition to the Dash 80!
|
Another shot that includes the upper wing root area. Compare the wing leading edge airfoil see here to the rollout picture below.
|

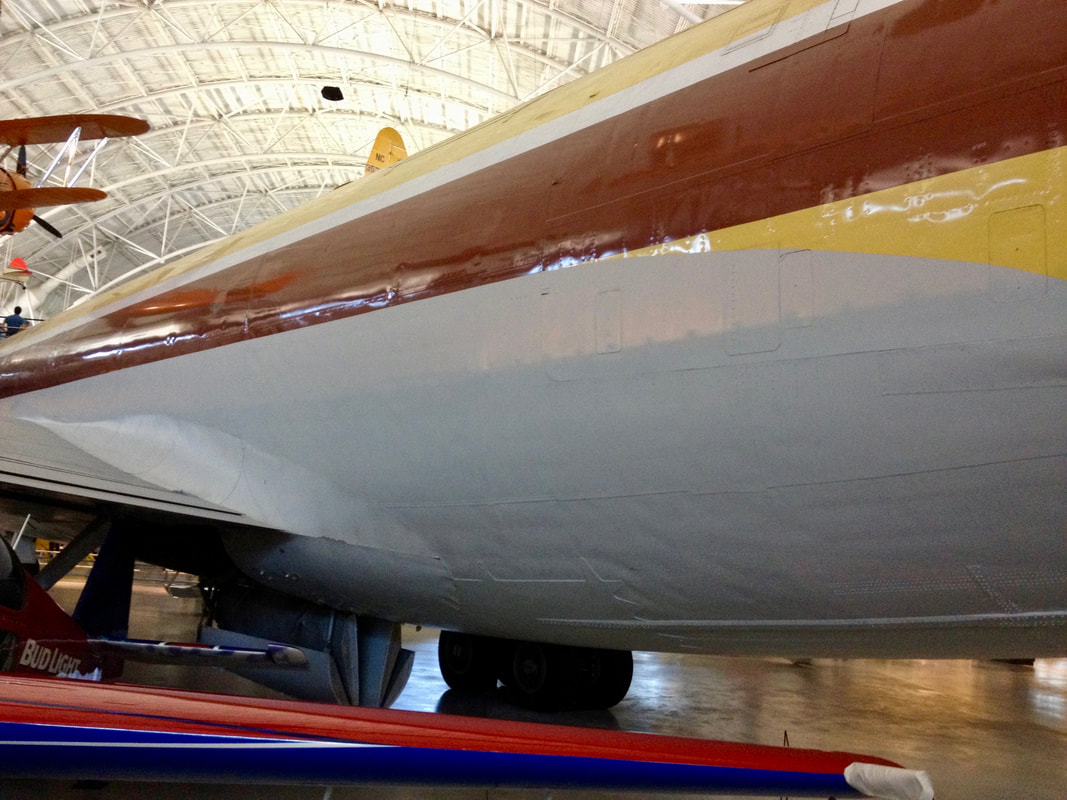
The Dash 80 at rollout in 1954 shows short radome, early J-57 engines, and curved trailing edge wing. Note that the fuselage below the brown cheat-line is natural metal. At debut, the wings were brown-white-yellow, just like the fuselage.
This picture shows to advantage the newer-style trailing edge of the wing with the squared-off transition to the fuselage. Note that wings and lower fuselage now appear in light-gray. This modification was apparently made at some point early in the Dash 80 testing program.
The empennage with a view of the trim pivot plate.
|
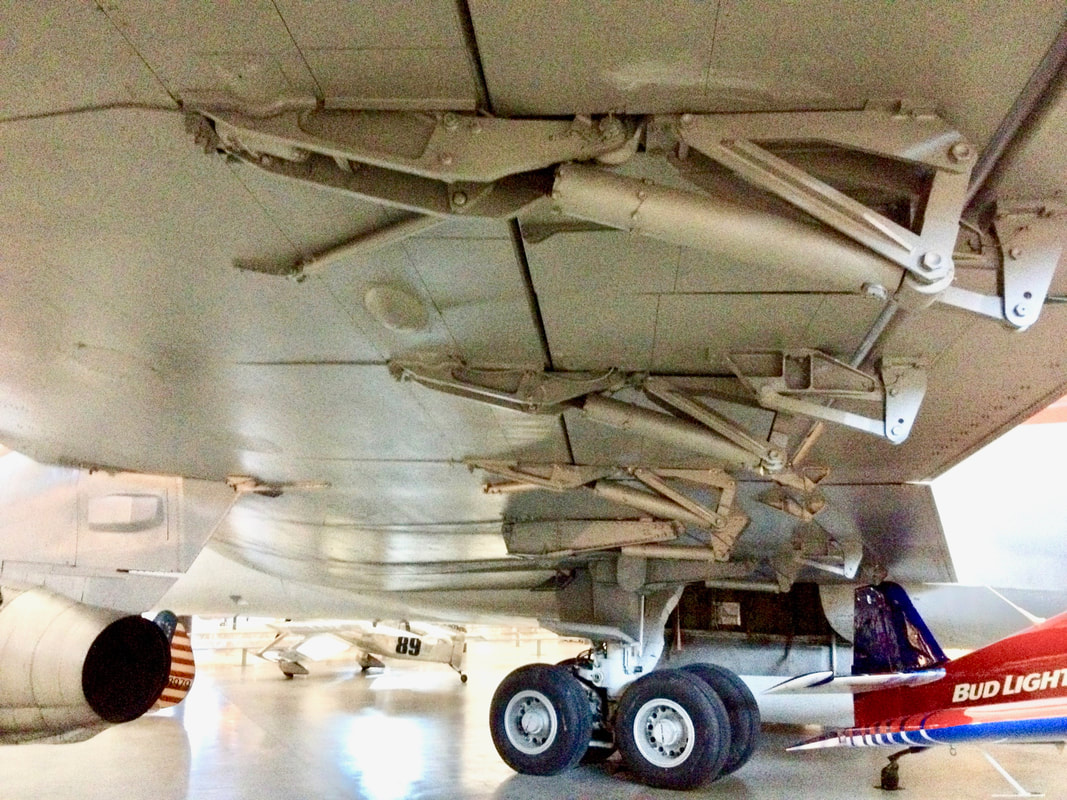
The Dash 80 had a much smaller wing root fairing than either the 707 or KC-135. It appears to have remained unchanged since rollout.
|
Another tricky thing to consider if you want to do a Dash 80 conversion from a Minicraft KC-135 kit is the difference in fuselage width! The KC-135 had a fuselage 144 inches in width. Width of the Dash 80 was 132 inches! In 1/144 scale, we are talking a shade less than 3/32", or about 2mm. So it's not a huge amount, and of course it's up to the modeler to decide if this is worth the effort.
|
|
The Dash 80 had rather clumsy-looking flap actuators that were exposed. Both the 707 and KC-135 ended up with a wing that was much cleaner aerodynamically than what you see here. While many aircraft have their flap actuator mechanisms on the outside of the wing, they are generally arranged in the direction of airflow and covered with a fairing (the DC-10 is a good example.)
SCROLL DOWN JUST A BIT TO SEE WHAT ELSE IS NEW AT DEMBRUDDERS.COM -- KICK UP YOUR FEET AND STAY A WHILE!