|
UPDATE: We've added photos of another lost-but-not-forgotten atomic-powered model kit!
|
|
JOIN US AS BRUDDER DICK REFURBISHES A RARE MODEL FROM A 1960'S HAWK KIT
"BETA"-I ATOMIC POWERED BOMBER XAB-1: REBUILDING A RELIC FROM MY EARLY DAYS OF MODELING
BY DICK ENGAR
"BETA"-I ATOMIC POWERED BOMBER XAB-1: REBUILDING A RELIC FROM MY EARLY DAYS OF MODELING
BY DICK ENGAR
Weird-oh World by Mark Cantrell and published by Schiffer Publishing was recently reviewed on this website. The book features artist Bill Campbell who came up with the Hawk "Weird-ohs" model kits. I thoroughly enjoyed the book not only because it had very detailed information about the Weird-oh models I built and wished I’d built, but also because it covered other modeling concepts Hawk pioneered. These included multi-textured plated kits and “Authent-I-Plated” aircraft that came with bright chrome finishes. Campbell commented that “there were very few subjects they wouldn’t try.”
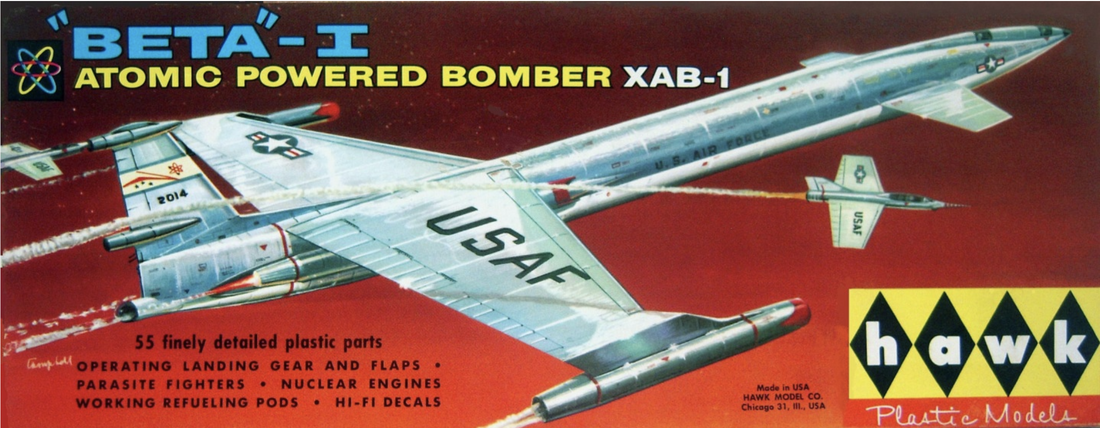
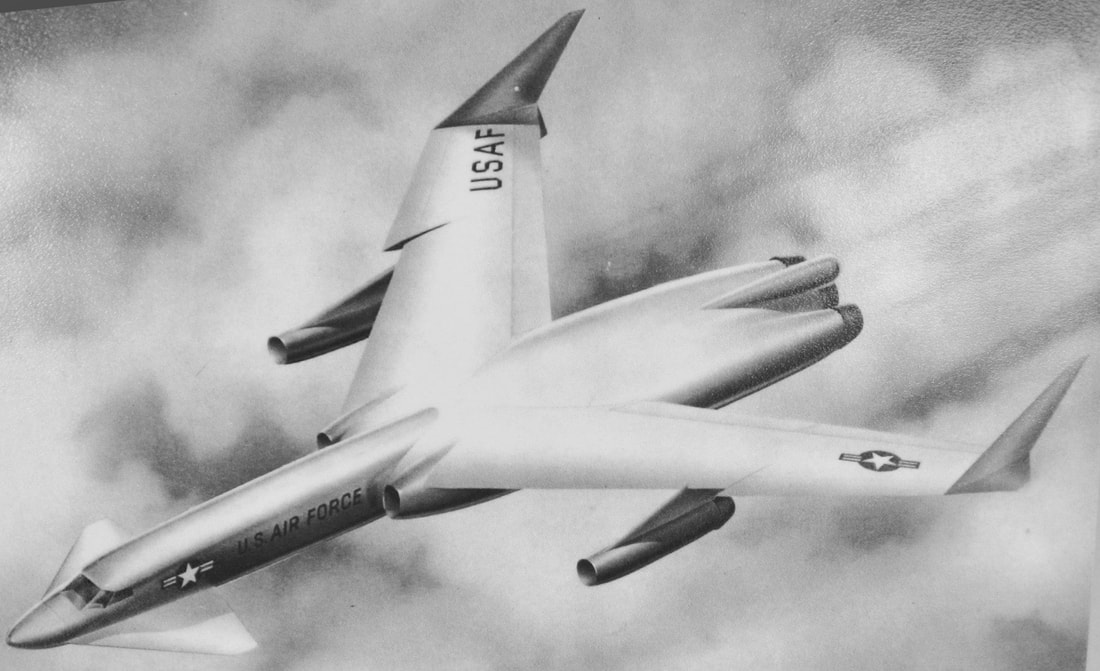
Dick's box to his Beta I is long gone, but here's some box art from Scalemates.
I was very pleased to see that pages were devoted to a model called “Beta 1,” which was supposed to be an atomic powered aircraft “possibly” on the drawing board. According to information written about Beta One by Fred Boucher with Alan Bussie in December 2014 I found online, during the Cold War several aerospace companies including Convair, Lockheed and Northrop developed proposals for a nuclear powered bomber to carry nuclear weapons and reactor-fuel concept engines were built. The thought was, “They work for big aircraft carriers, why not big aircraft themselves?”
Dick's original model as-found. Other than missing some parts, it was the same as built in 1966 when Dick was 13 years old. Note that the model has raised panel lines.
The Soviet Union also explored the concept of a nuclear powered bomber and Aurora Models produced a kit called the “Russian Nuclear Powered Bomber which looked a lot like the Myasishchev M-50 Bounder. Competing Hawk produced Beta I, the Atomic Powered XAB-1 kit in 1959 after drawings of nuclear powered bombers supposedly appeared in magazines.
|
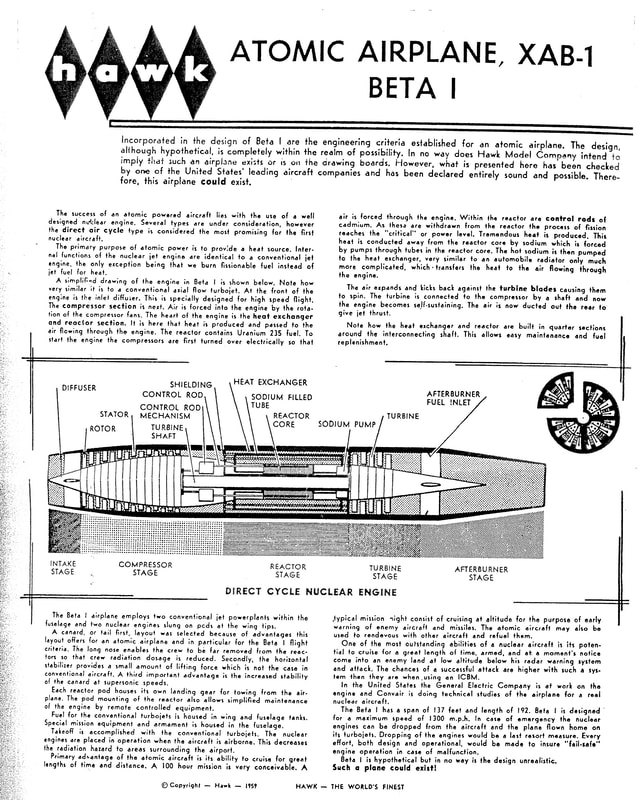
The box scale (1/188) Beta I model had instructions which featured a detailed drawing of a direct cycle nuclear engine showing the intake stage, compressor stage, reactor stage with a heat exchanger, sodium filled tube, reactor core, and sodium pump, a turbine stage and afterburner stage. The engineering criteria section of the instructions explained that “One of the most outstanding abilities of a nuclear aircraft is its potential to cruise for a great length of time, armed, and at a moment’s notice, come into an enemy land at low altitude below a radar warning system and attack.” The argument was made that the chances of a successful attack are higher with such a system than they are when using an ICBM.
|
This view shows the clear plastic "flames" included in at least a few Hawk kit at the time. Also note the dual propulsion including conventional air-fed turbojet engines in the fuselage and the outrigger nuke engines.
|
The instructions further explain that Beta One employs two conventional jet engines housed within the fuselage and two nuclear engines slung on pods at the wing tips. A canard or tail-first wing layout was selected because of advantages this layout offers for an atomic powered airplane. The long nose allowed the crew to be far removed from the nuclear reactors so crew radiation dosage is reduced. The canards also furnished the aircraft with additional lift and increased stability at supersonic speeds.
|
The aircraft would take off strictly with jet power and the nuclear engines would begin operating once the aircraft was airborne. The nuclear engines would allow long missions of at least 100 hours. Nothing was mentioned about the aircraft’s ability to carry a relief crew and nothing was said how the parasite fighter pilots could endure such a long mission.
|

Putting the engines at the wingtips somewhat reduced the complexities of radiation shielding in the main fuselage.
|
Dimensions of the airplane were listed with a wingspan of 137 feet and a long fuselage at 192 feet. Maximum speed was expected to be 1,300 mph. In case of emergency the nuclear engines were designed to be dropped from the airplane (which was considered to be done at a last resort) and the plane would fly home on its jet engines. Every effort would be made, it was written, with both design and operational protocols, to ensure”fail-safe” engine operation in case of malfunction.
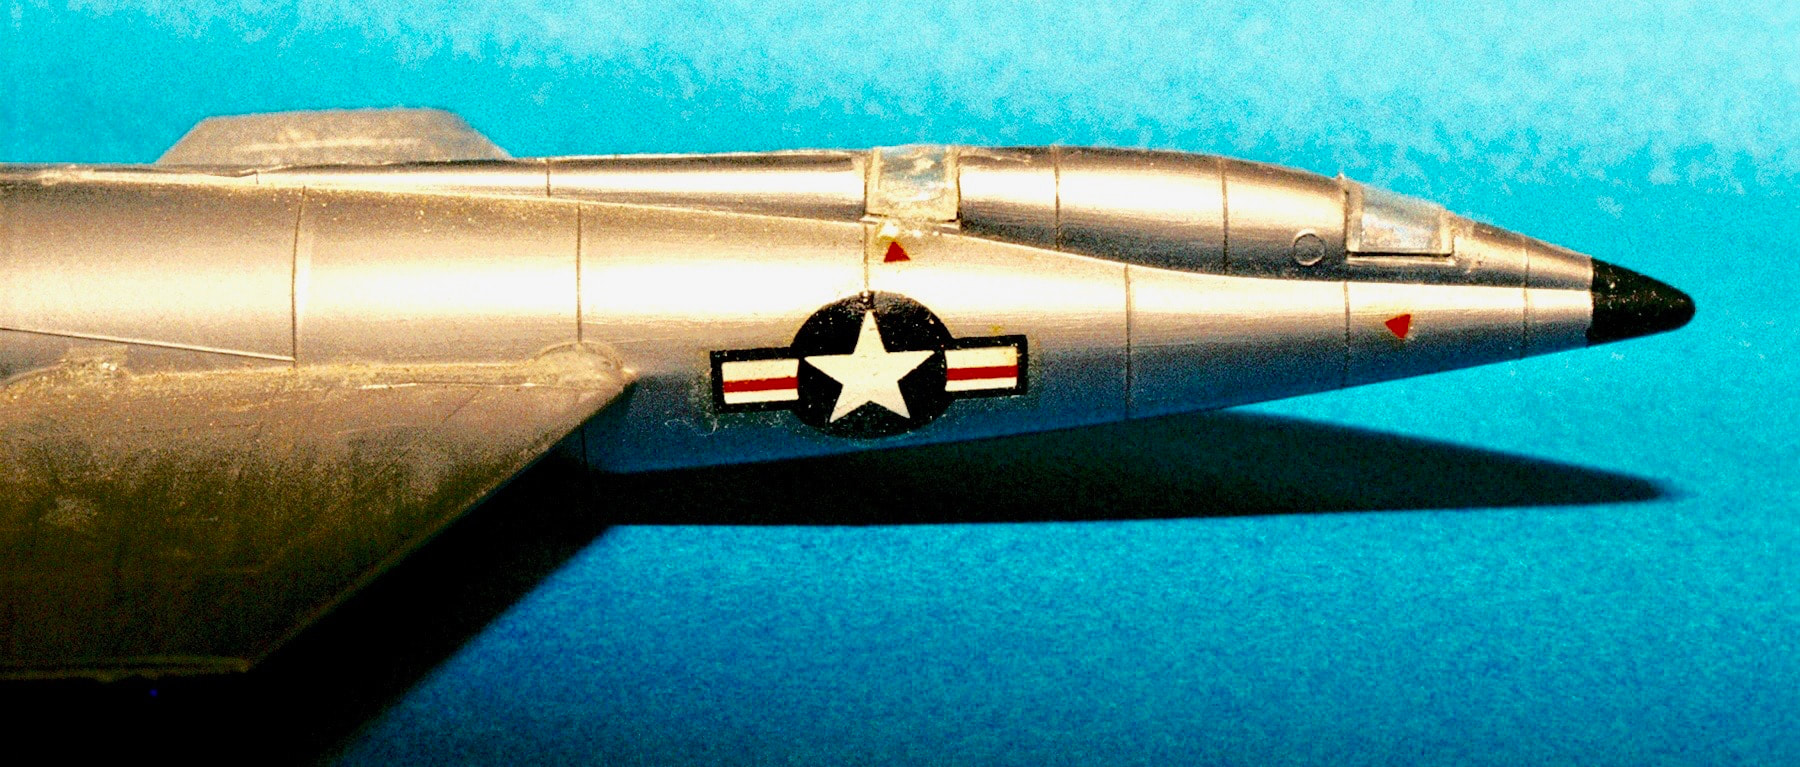
The concept has a tandem-cockpit with no doubt heavy leaded glass canopies explaining their relatively small size.
|
Interestingly, the instruction sheet explained that General Electric was at work on the engine and Convair was doing technical studies for creation of a real nuclear aircraft. Of course, in large type was the explanation: Note the disclaimer, “In no way does the Hawk Model Company intend to imply that such an airplane exists or is on the drawing boards.”
|
|
Beta One The Model was was reissued a few times including the initial issue in 1959, a second time in 1961, the third issue in 1964, and a final issue in 1966. That is the year I bought one at summer’s end and built it just before I began my 8th grade year in school. There were two box illustrations, one with a dark orange background and the second and last with a dark blue background. I can’t remember which box illustration was on my kit, but whatever it was motivated my immediate purchase from the neighborhood drug store where I bought most of my models as a kid.
|
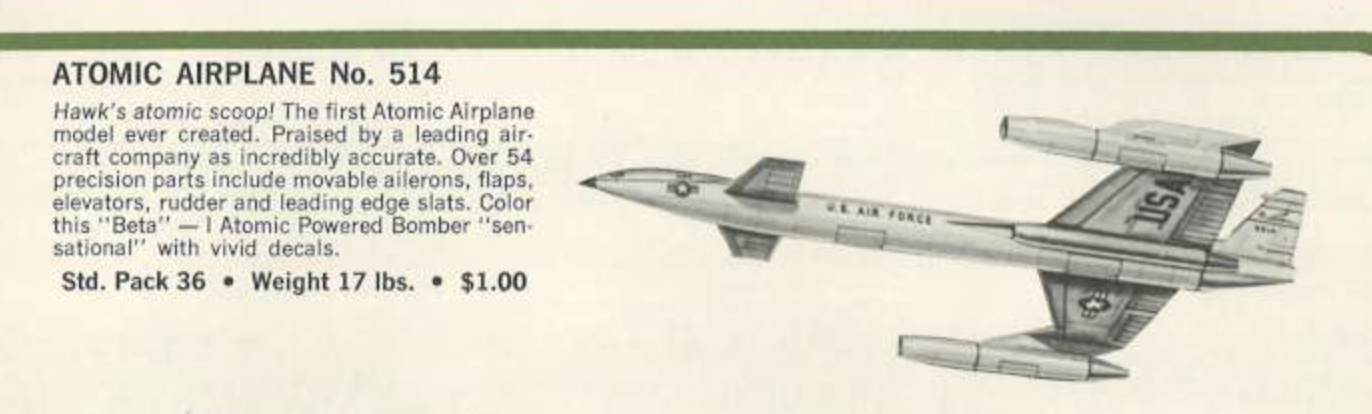
From the Hawk 1968 catalog. Remember when $1.00 would buy you a brand-new model kit? BoxArtDen image.
|

|

|
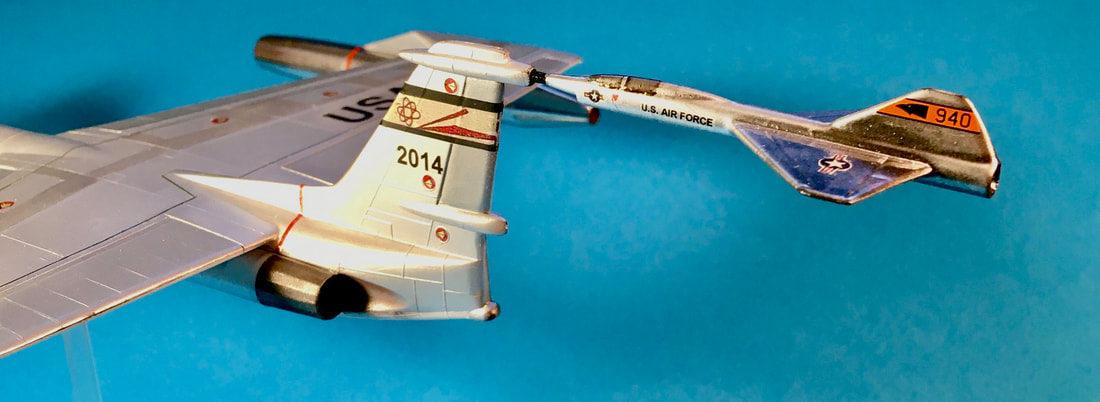
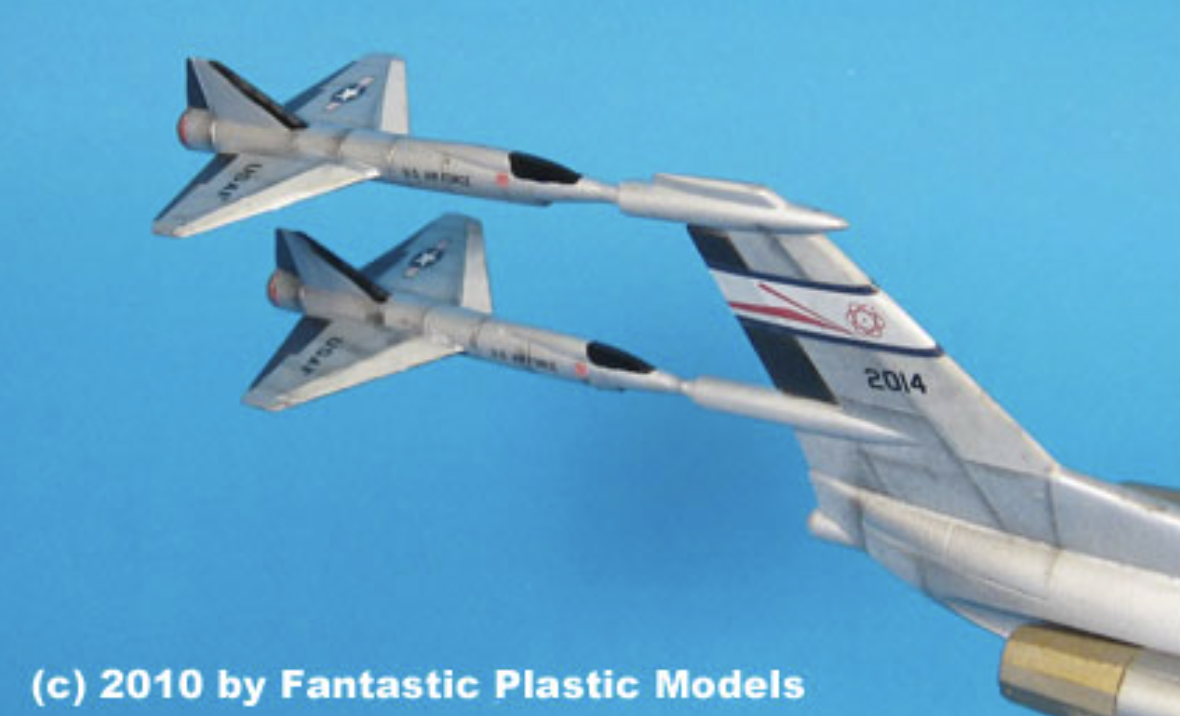
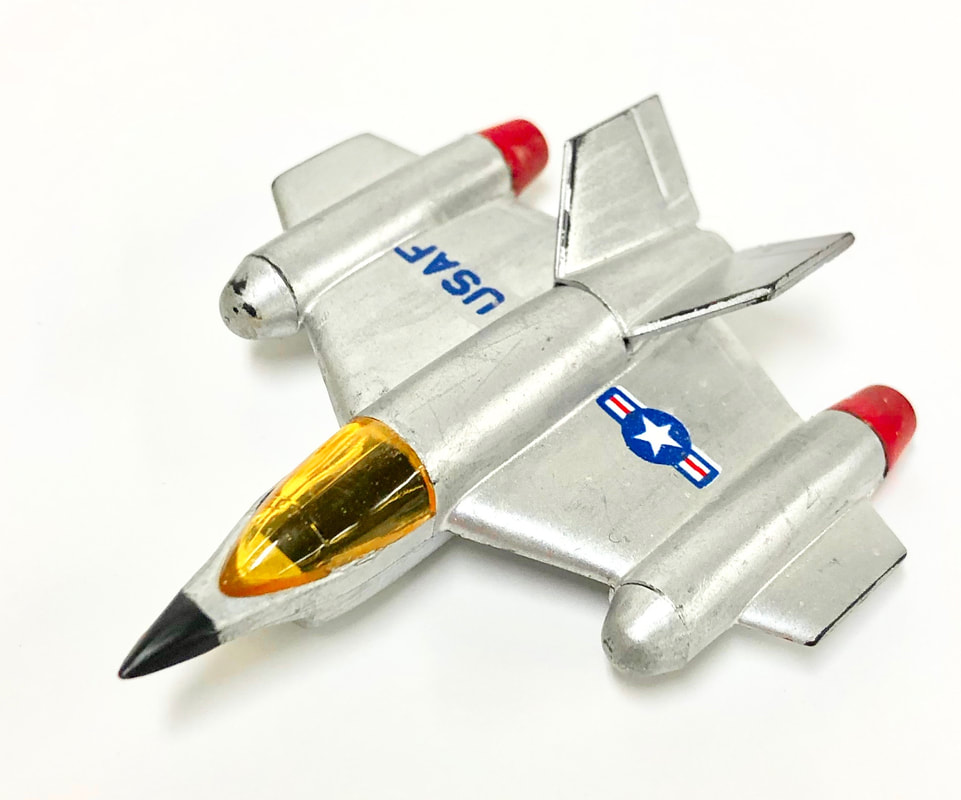
The parasite fighters depicted are obviously a purpose-built design to accompany the proposed XAB-I project. They would take off separately and rendezvous with the Beta-I in flight, linking up to be towed to hostile airspace. Once there, they would separate as needed to provide air defense. Two of these small fighters were included in the Hawk kit, but one of Dick's was missing. It's quite probable that Brudder Bill swallowed it.
I HAD to buy one on sight! I can’t recall much about the build except it went pretty quickly and I liked how the model turned out. That is probably why it survived the firecracker purges of my junior high summers and I had no idea what I might do with it in the future when I boxed it up the fateful day my models came off the ceiling and were put away. And then I lost track of it.
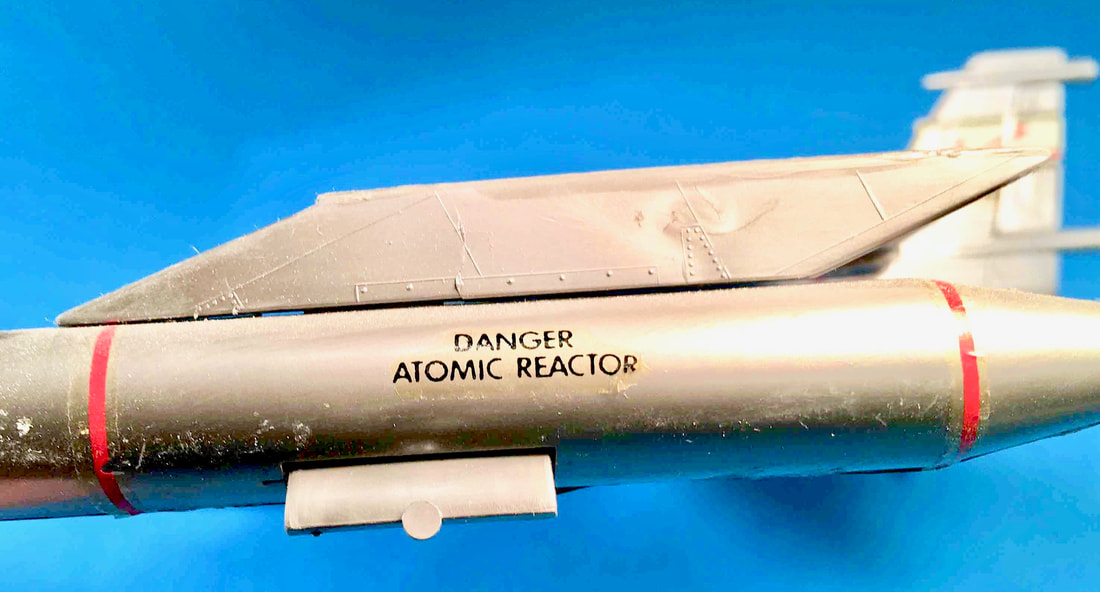
Two separate atomic reactors would have been required for this aircraft, one in each engine.
|
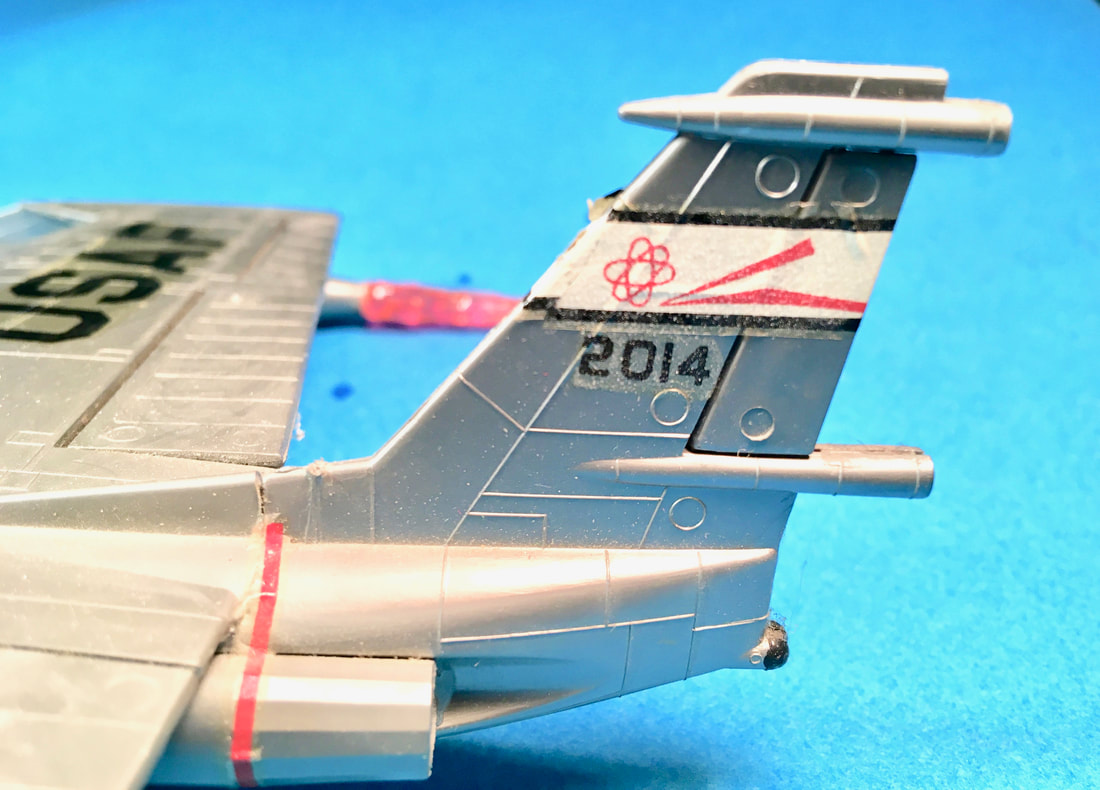
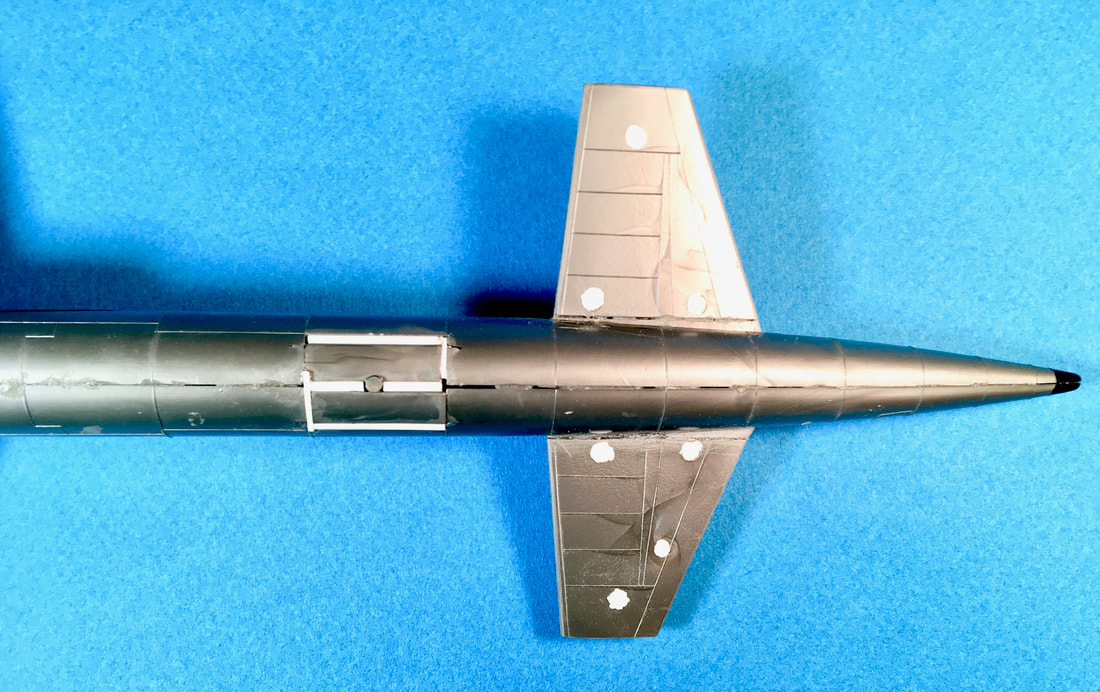
The fairings in the tail were intended to tow the parasite fighters.
|
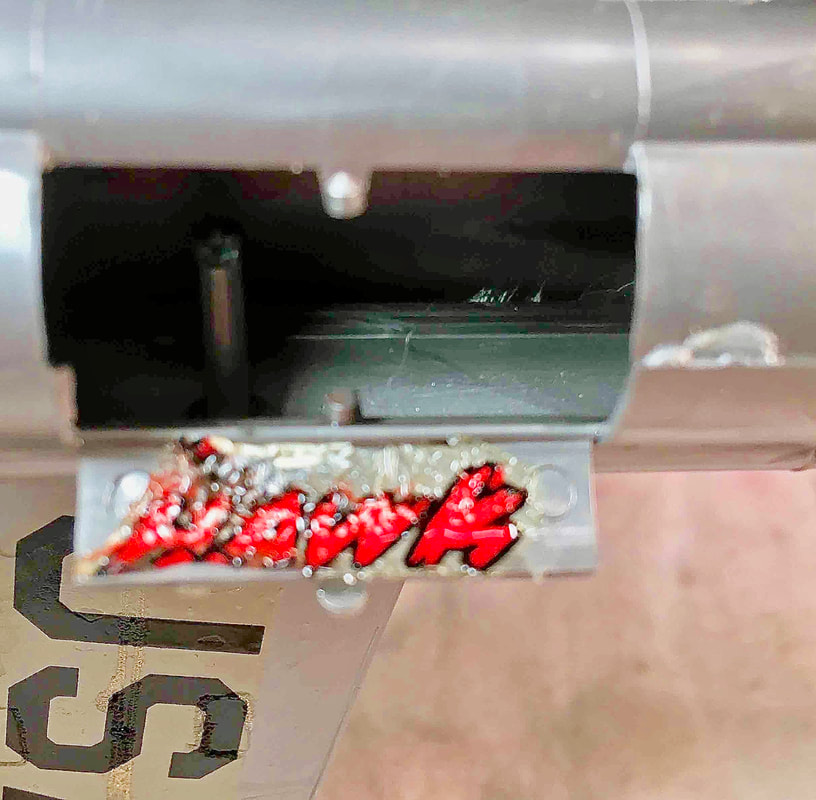
Dick put this Hawk decal inside a landing gear door. He took the picture just after applying decal remover.
|
But recently, in early May 2020, we had a minor water leak which found its way into my kit-stash crawl space and I had to move a bunch of models to safety and make way for the plumbers to repair the problem. While doing that, I noticed an old box in a funny place and lo and behold--in that box was my childhood model of Beta 1! The model was in pretty good shape considering it had been built by a 13-year old and languished in that box for who knows how long!

The model wasn't painted to any great degree, so prepping the plastic wasn't too hard. Note that flaperons had some mold ejector pin rounds that needed filling. Cleanup can get a little tricky around raised panel lines.
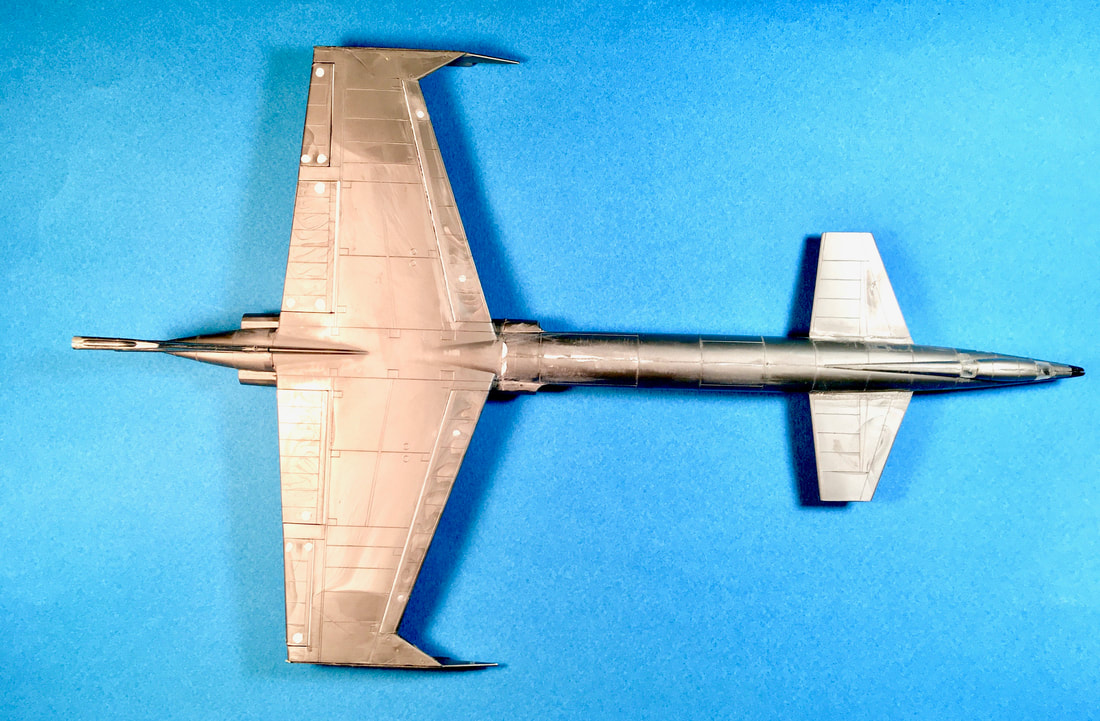
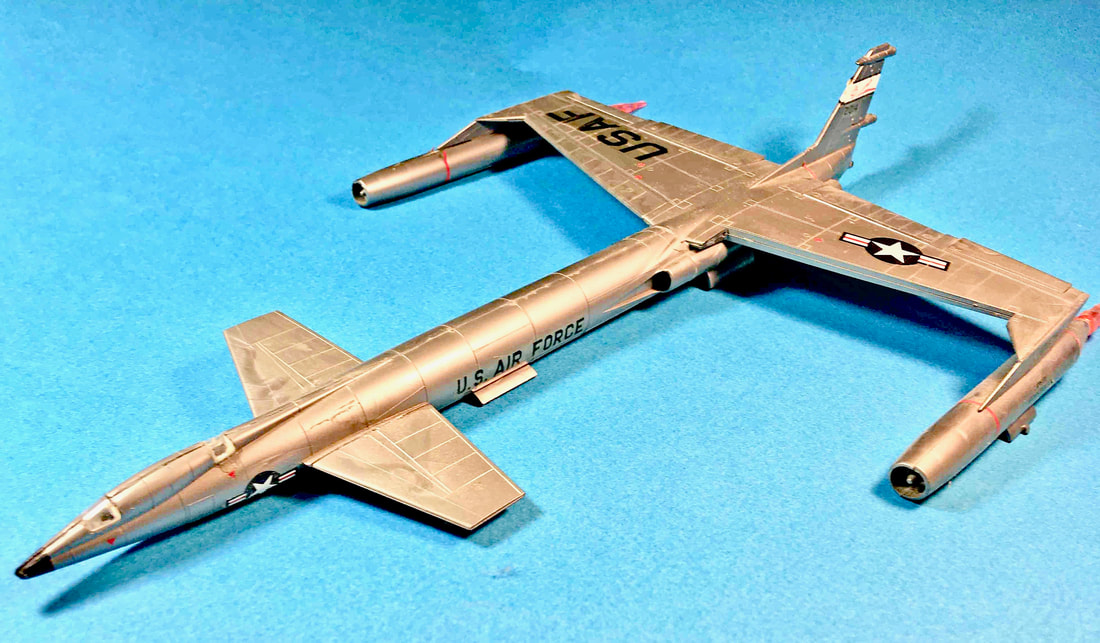
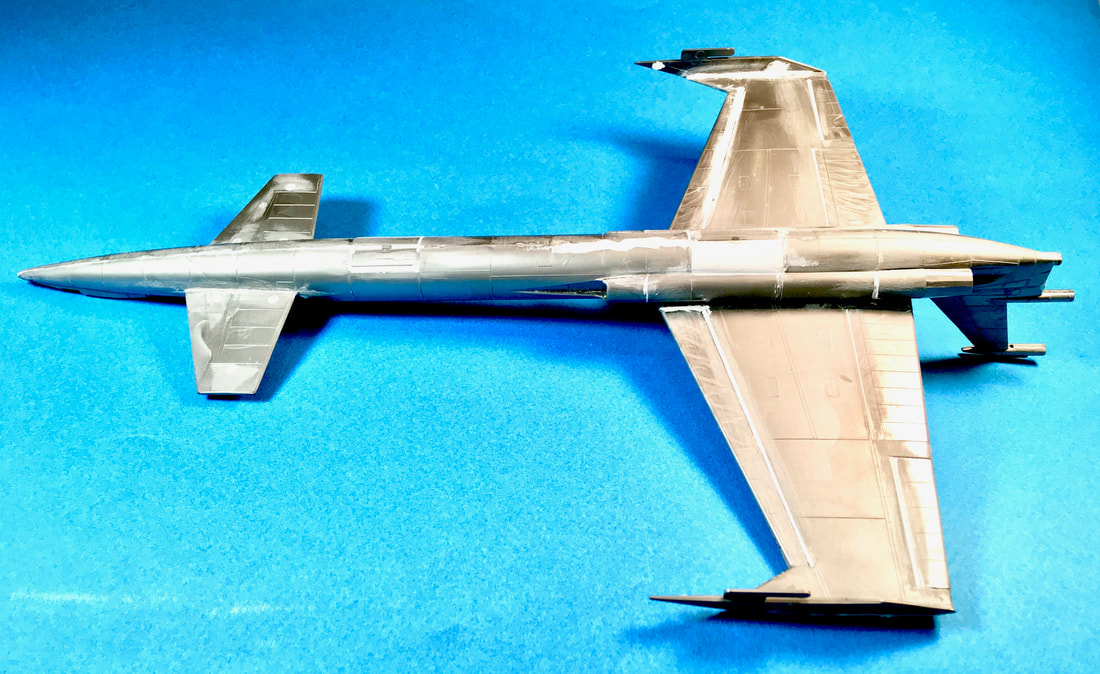
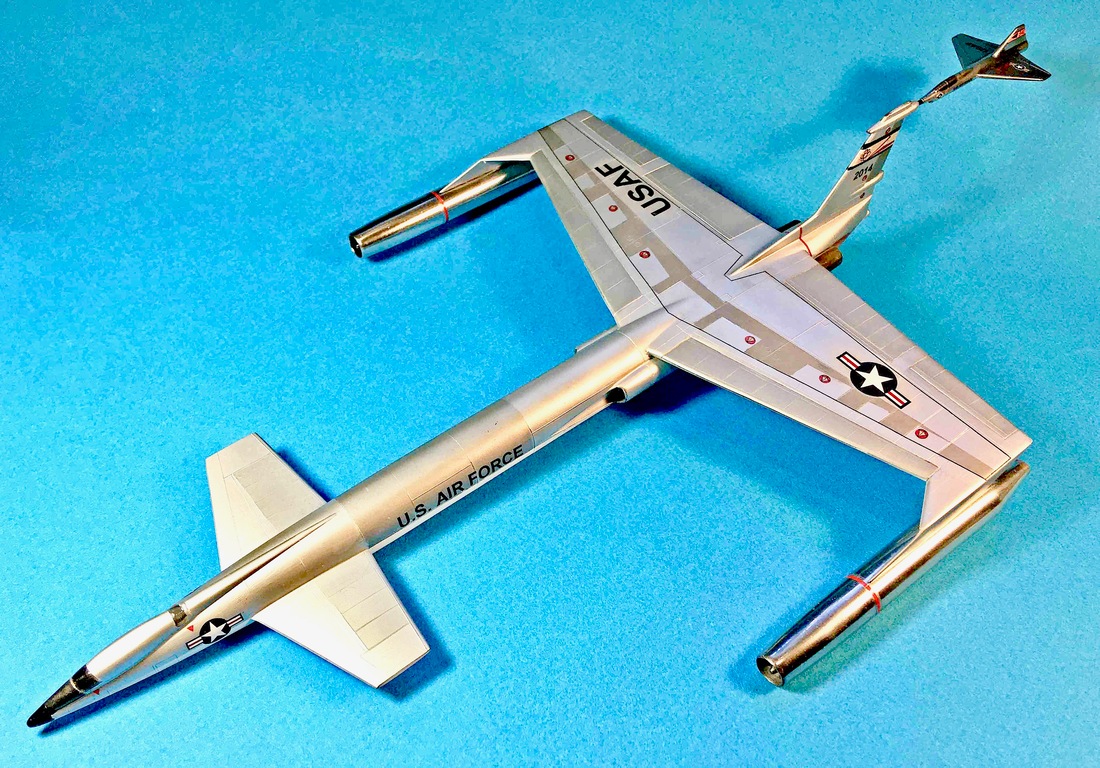
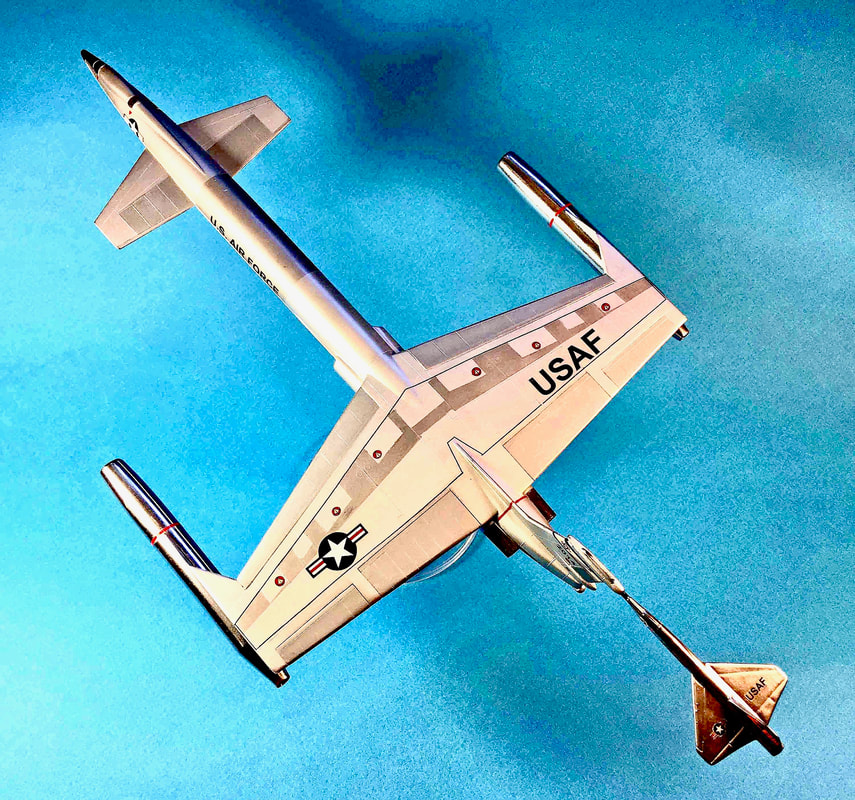
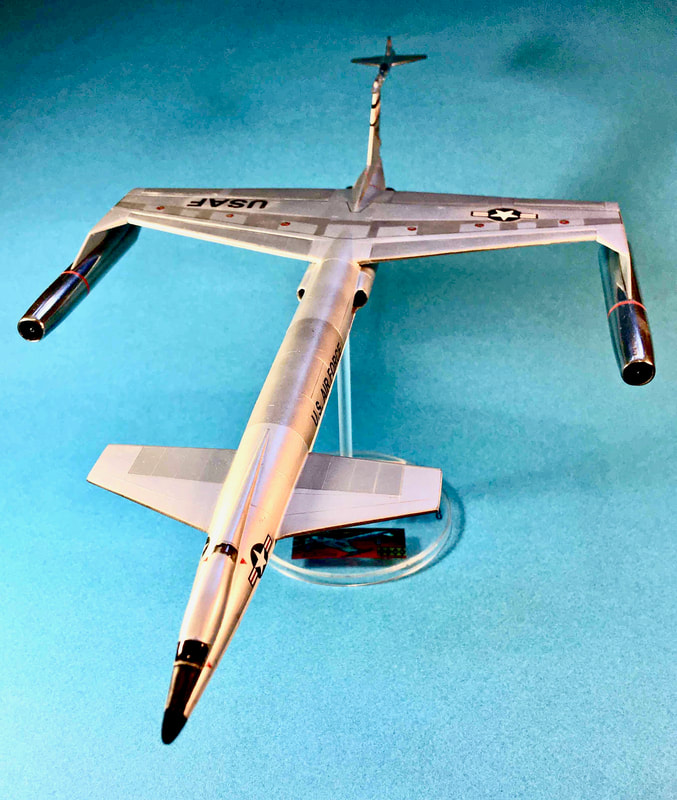
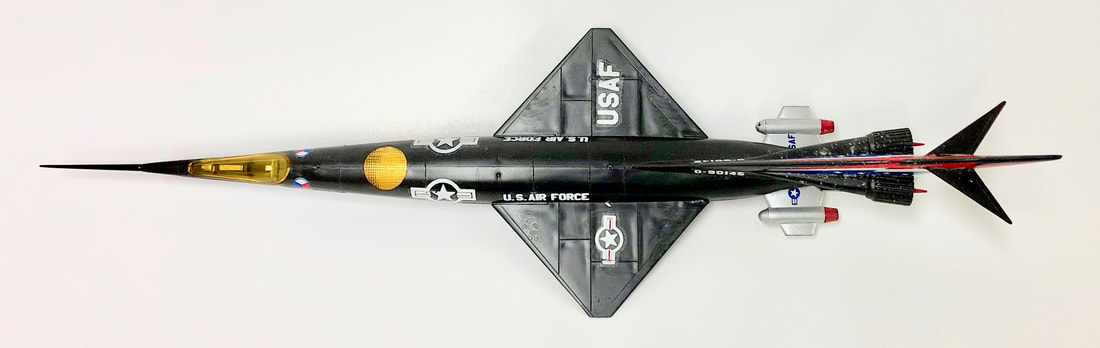
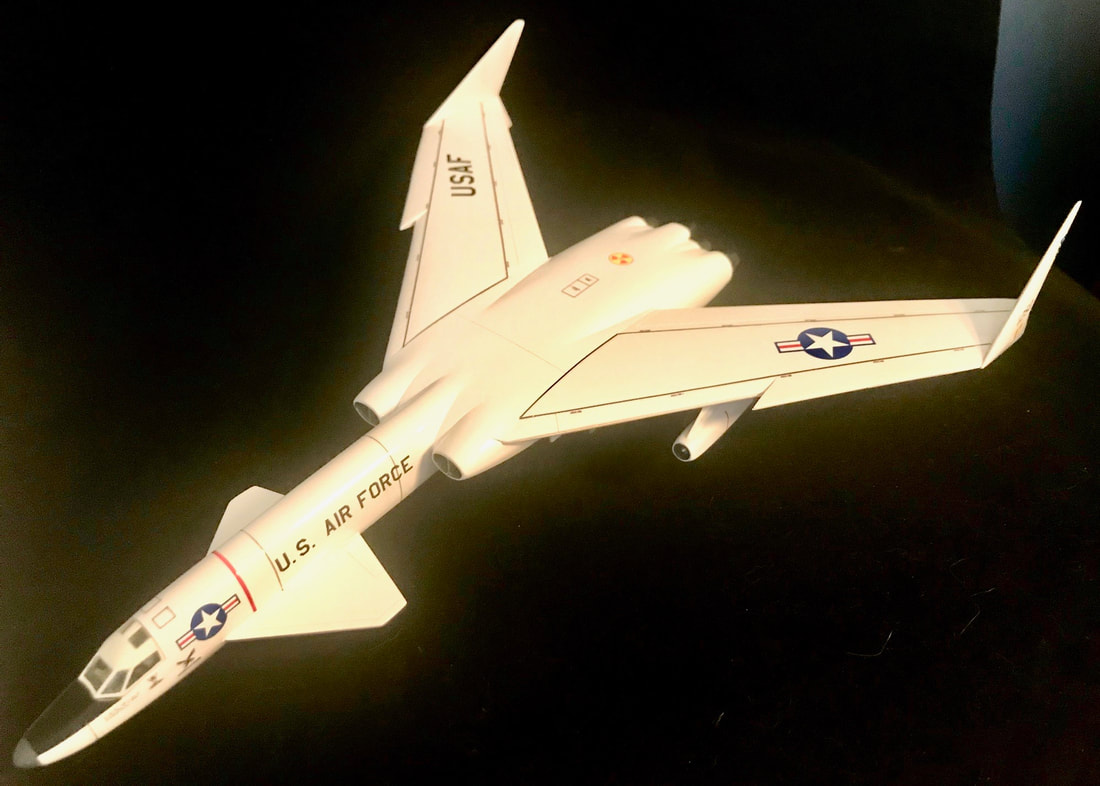
This top view shows to advantage the outline of the design.
|
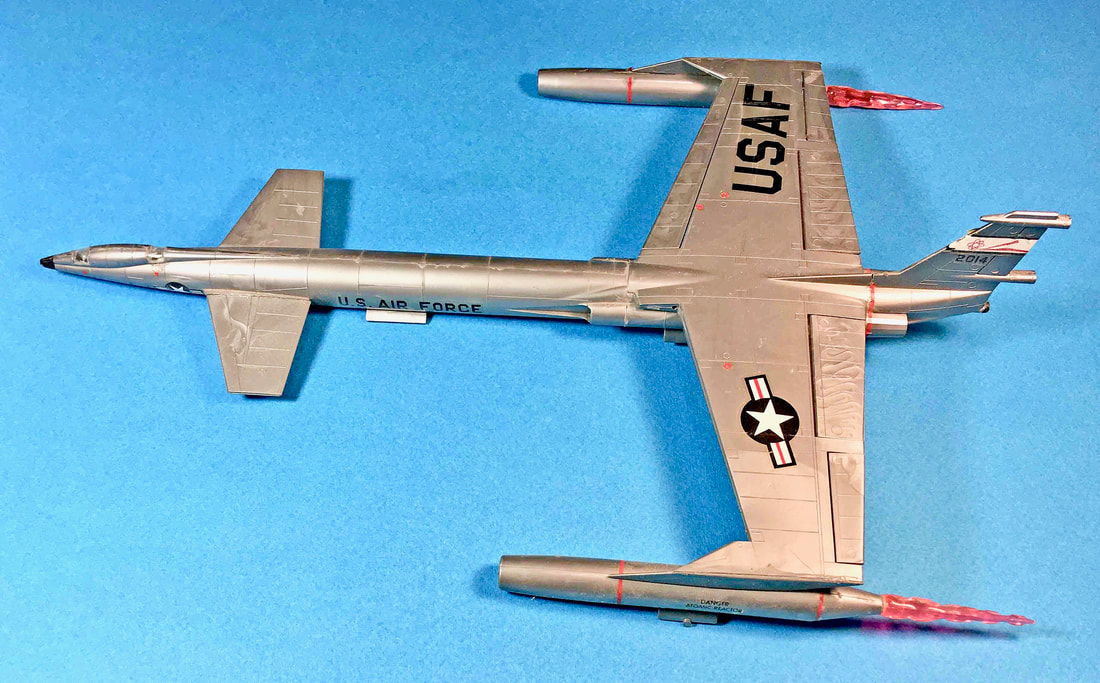
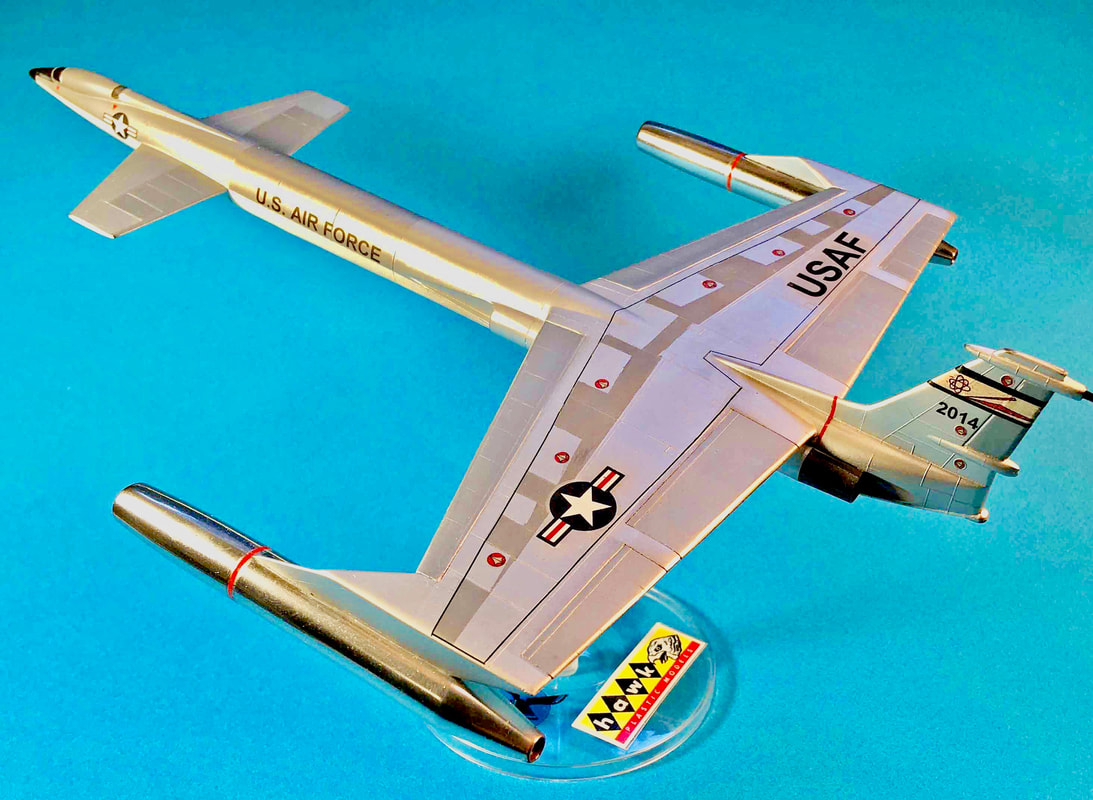
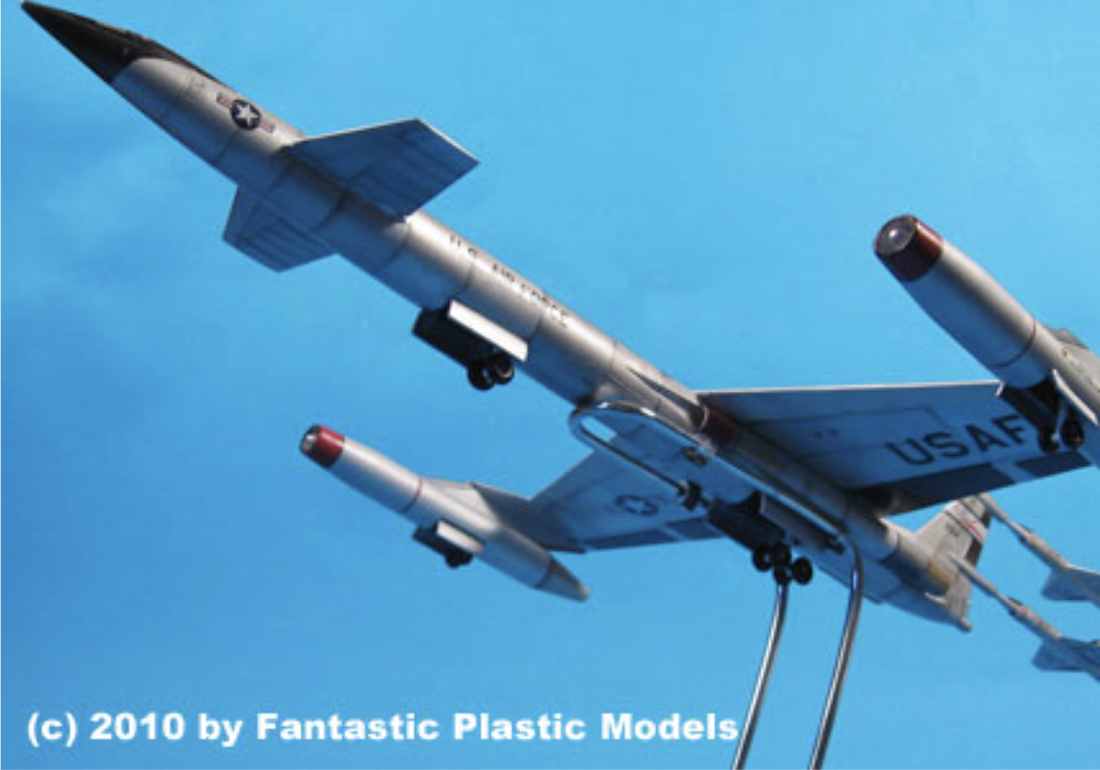
Bottoms-up shows landing gear wells that Dick has filled as well as the twin turbojet fairings on the fuselage.
|
The article had rekindled my interest in some of the Hawk kits I had built in my youth and I decided to see if I could take Beta 1 and rebuild it to contest standards and “Come and Make it” in time for IPMS Nationals in Texas. Of course this was before COVID-19 forced that event to be delayed three years but I thought it would be worth a try and blow people away when they saw the model on the contest table.
The underside of the nose shows some shimming needed to fill gaps in the forward landing gear doors. As kids, we never cared about those ejector pin-rounds, did we?
|

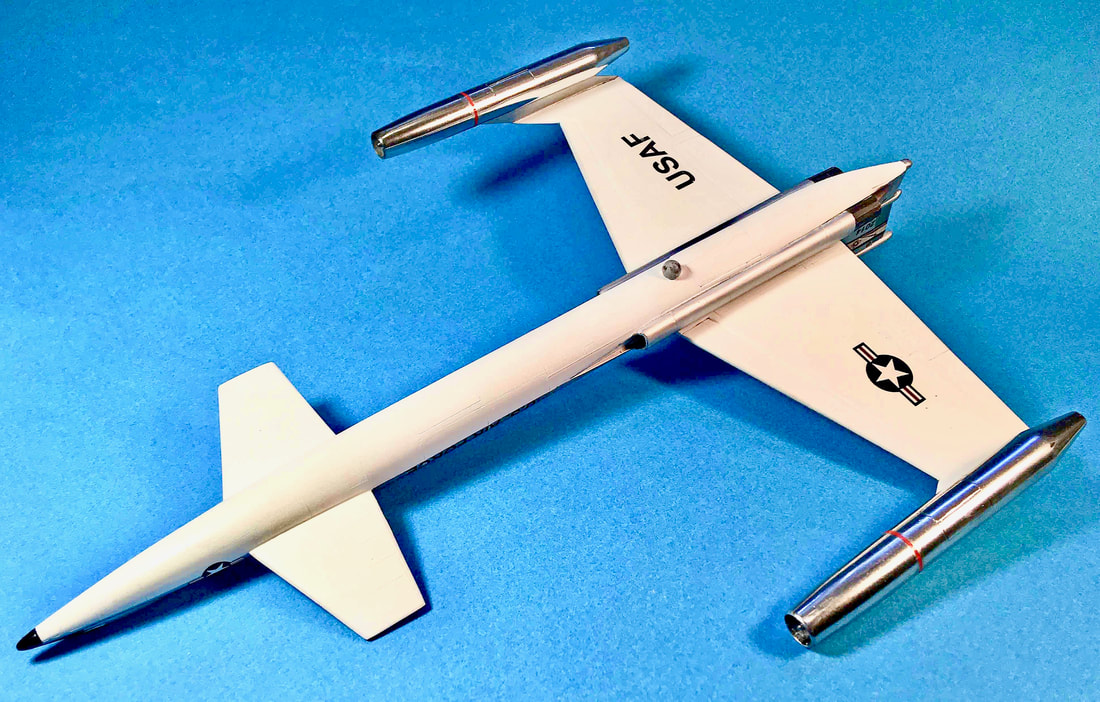
Outrigger atomic engines with their landing gear installations. The Beta-I had a landing gear configuration similar to the B-52.
|
There were a few parts missing and I had displayed the model “in flight” hanging from my acoustic tile ceiling in the 1960s so the landing gear doors were open but not all of the landing gear parts were still with the kit. So I decided to build it with landing gears closed and place it on a Clear Minicraft stand, once again in flight like my Lindberg B-70, which received a similar treatment.
These engines are reminiscent of the B-58, another design by Convair that was actually built.
|
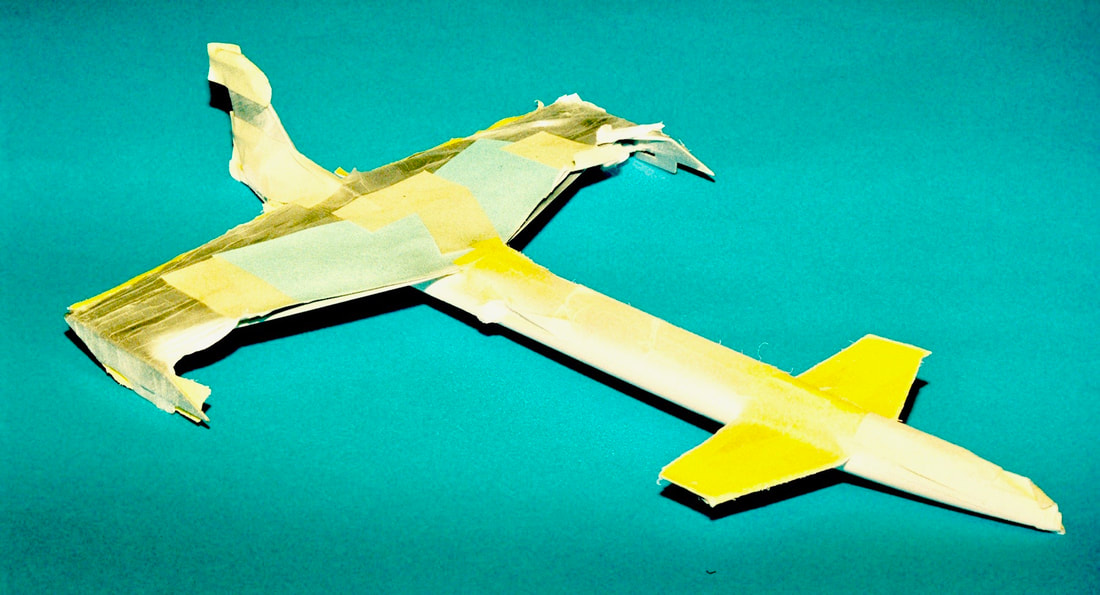
The secret to getting different shades of metal on an aircraft model depicting a natural metal finish is low-tack masking to avoid pulling up that fragile metal finish. Dick uses Post-It Notes and Parafilm.
|
The first step was to take several pictures of the decals, to help determine the original placement since the instructions were vague, telling you to use some small black and white photographs or use the box cover. I also wanted a way to replicate some of the original decals and I figured the easiest way to do it would be to photo-shop my close-up decal photos to the right size and use white and clear decal paper to print them myself.
The finished model. This work took a lot longer than the afternoon it took to build the model originally in 1966.
|
Once that was done, I used some Polly S Easy-Lift-off Paint and Decal Remover. It is less toxic than oven cleaner and has worked well the times I have needed to use it. I wish I had taken a picture of the Hawk decal I placed in a landing gear door before I applied the Decal Remover. In any event, the decals came off well without any etching or other problems with the plastic and I cleaned off all of the residue and decal remnants with alcohol wipes.
The next step was to remove the clear red-orange atomic engine exhausts. I had originally intended to use them on the finished product, but I still cleaned out the back of the engines and removed a broken end of one of the exhaust plumes. |
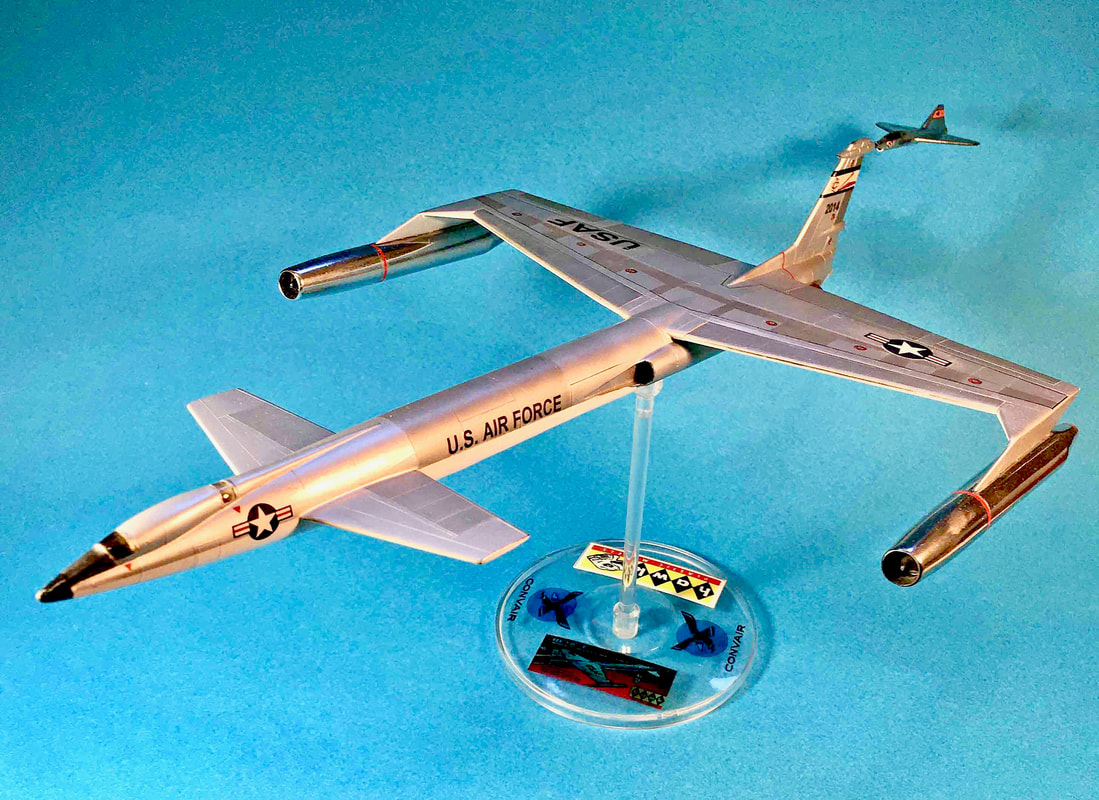
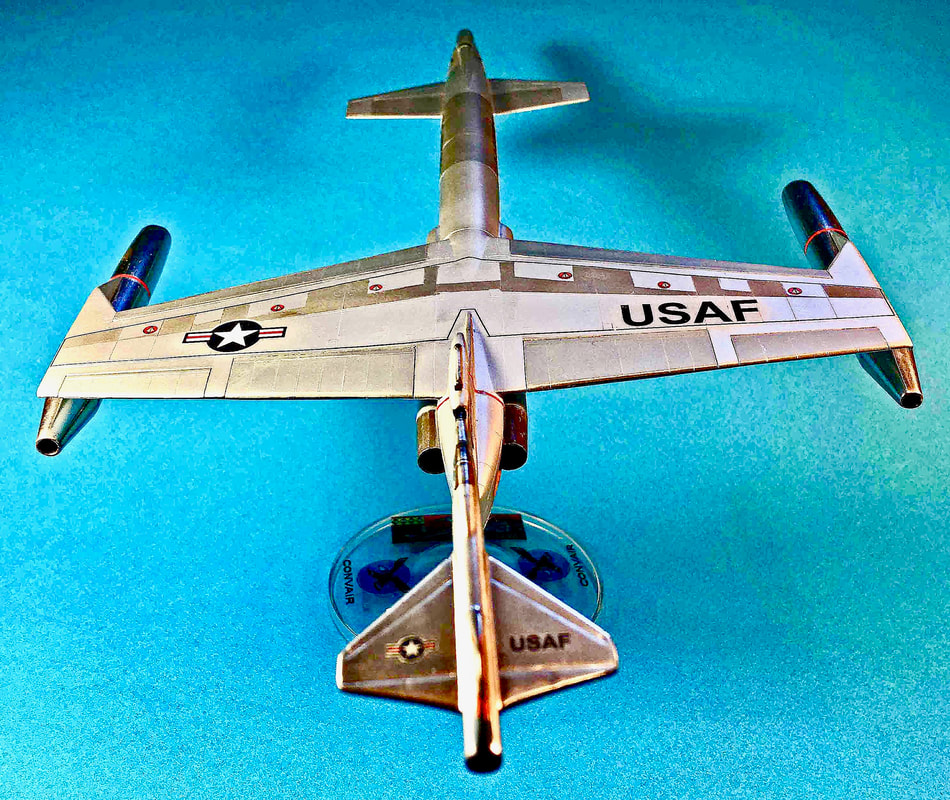
The model on its Clear Minicraft Stand. Dick printed unique markings and decals on the base using his own printer. Who'd a thought you could do this a few years back!
|
There were some bad seams inside the atomic engine nacelles so I had to add some plastic shims to fix them and smooth them out, then used some primer to help detect any remaining irregularities that needed to be adjusted. Next I had to fill and refine the gear door seams on the atomic engine nacelles after they were glued to place. The trick is to have a uniform door space in scale.
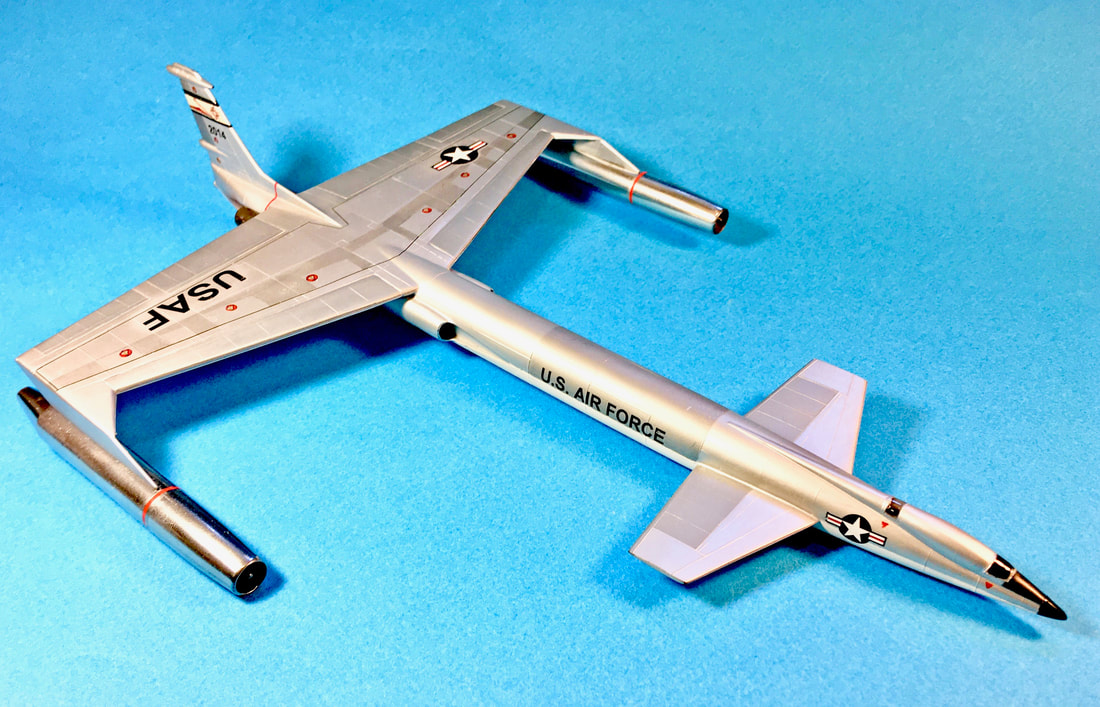
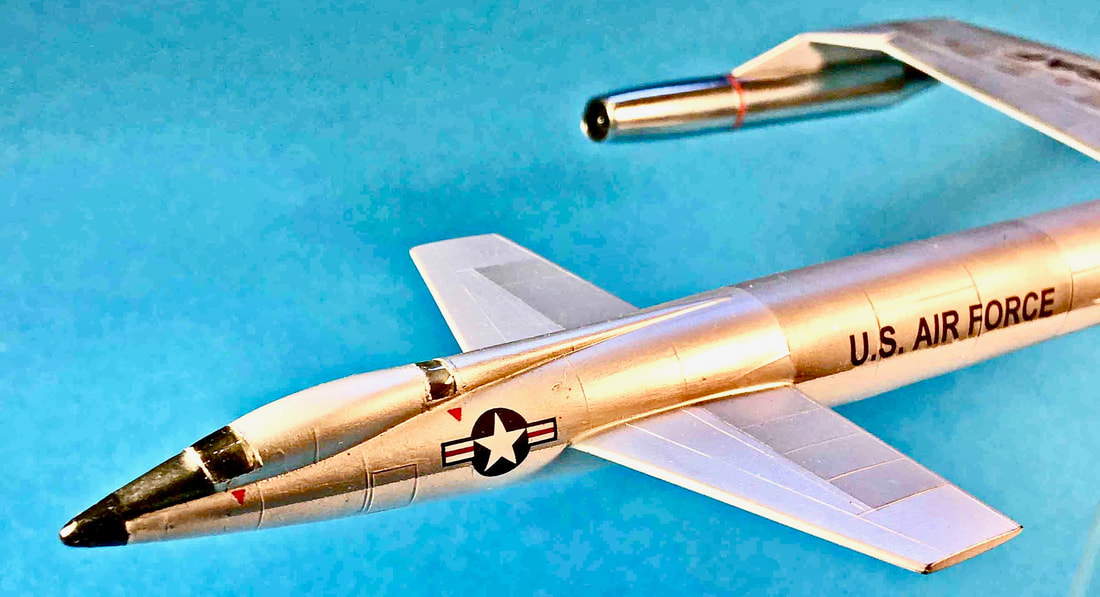
Dick retained the white-bottom with natural metal scheme common on strategic bombers in 1959.
|
Next I had to decide what to do with the several moving parts with wide openings on a small scale large atomic jet. The front of the wings have some large flaps and the back of the wings have two sets of flaps. The gaps were way out of scale so I had to determine the best way to fill them but allow some scribing to allow a proper opening between the flaps and wing. I used a combination of sheet plastic shims, Acryl white filler and CYA glue. It took a lot of effort to get the right result including some primer application to help even out the necessary opening between parts and wing. The canards in front had some bad tube-glue smears and were not even so a lot of work had to go in getting them on straight and filling in bad seams.
|
A lot of work with filler also went to several mold marks on both the top and the bottom of the canards and wings. Remember this model was molded in 1959 for kids to build, not contest modelers! The fuselage gear doors needed a lot of shims and fillers and I had to make a new rear gear door out of sheet plastic to replace one that was long gone.
Dick's depiction of the wing-top followed a strategy he used on his Monogram 1/72 B-36. Check that one out in his 1/72 Large Aircraft Gallery elsewhere on the site. The B-36 is another Convair design, of course.
The canopies were not in great shape since they were applied in my youth with tube glue and not cleanly. They required careful removal and polishing followed by baptism in Future acrylic floor wax--the modeler's best friend from the grocery store soap aisle. Careful application still needed filling and even a shim but even that was not enough to clean them up to nitpicky contest standards and they eventually needed smoke acrylic paint to make them presentable.
The underside shows "Nuclear Flash White" paint that would have been common on a B-52 of the day.
|

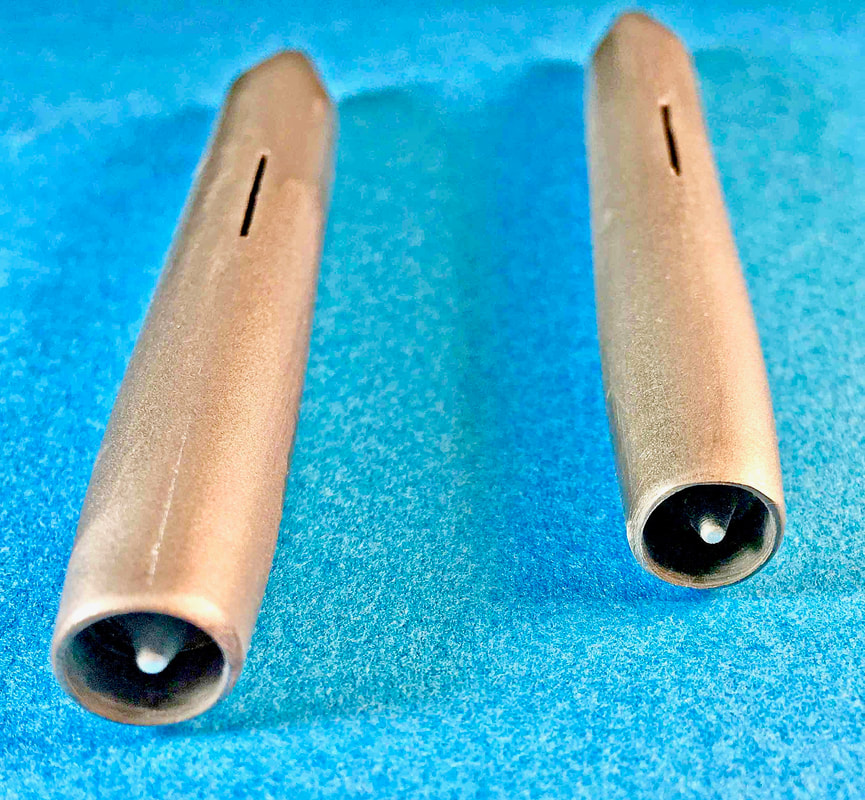
A closeup of an "atomic engine." Dick chose to depict them in a polished aluminum finish.
|
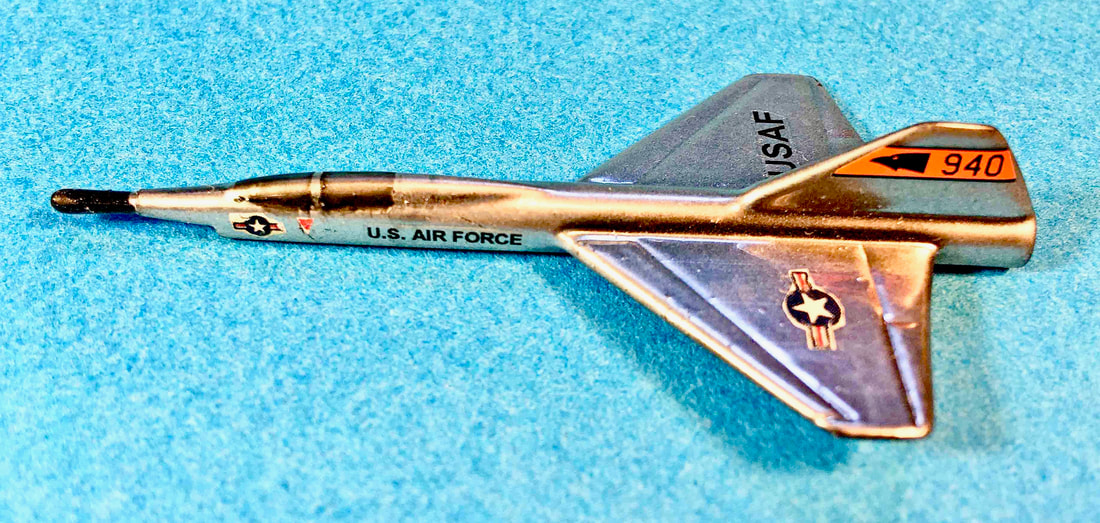
I only had one of the parasite fighters so I decided to modify and fair in the lower cylinder where it used to fit and fix up the upper one for the fighter to fit well. Care had to be used to center the end and make it look decent. Then I had to turn attention to the little fighter that also needed some clean-up work. I decided to paint it in polished aluminum so I smoothed the plastic as best as possible, painted it gloss black and then went with the polished aluminum.
|
|
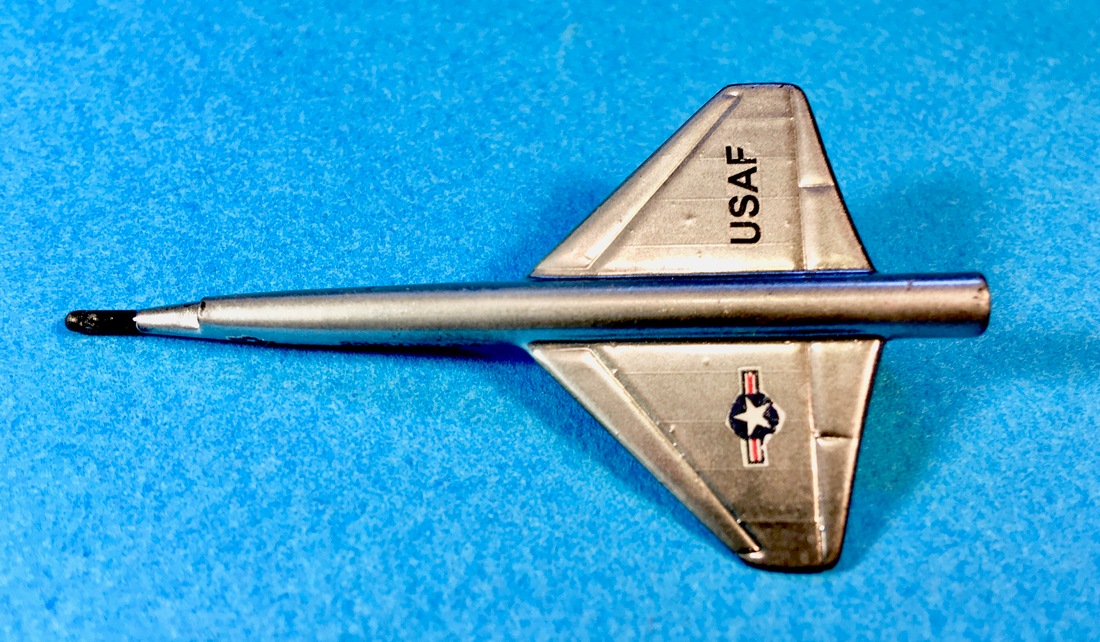
The parasite-fighter got a polished aluminum finish. In 1/188 scale, this aircraft would probably be smaller than an F-104. One wonders if there would be room for a gun or missiles!
Back to the main aircraft – I decided since it was a product of the 1950s I would mimic my B-36 as far as finish. I first painted the bottom of the fuselage and the bottom of the wings and canards flat white. After the paint dried, I masked off the fuselage bottom and wings and canards using a mix of non-tacky Tamiya and drafting tape and then painted part of the fuselage to look like a section was made of magnesium with the rest aluminum. I painted the wings four shades of silver – aluminum, steel, polished steel and dark anodonic gray. Masking had to be done with Parafilm and post-it notes and tape made non-tacky as I foolishly put some white paint over Testors metalizer which is a guarantee for paint peeling off with your tape if you are not careful. I had to be careful not to overspray as each part had to be masked once finished. Patience is key here! I held off on adding the chrome atomic reactor engines until after decals were applied to avoid scratching them, etc. but that plan went awry later as you will soon read.
A near-overhead view of the finished model with the accompanying parasite fighter in place. The little guy looks like a hummingbird, doesn't it!
Once painting was finished and a few problem areas touched up, it was time for decals. I used my Testors clear and white decal paper to make most of the decals using a few star and bar insignias that were the right size that I had on hand. I used my laser printers to make the USAF decals and numbers for both the large mother ship and the parasite fighter. That one really needed small insignias and marks. Remember, this is 1/188 scale. I also used my Photoshop program to recreate the tail decal for the mother ship. I had a small orange tail decal that worked well to jazz up the parasite fighter. The decals went on easily until I added some very fine black lines to the wings. I used some canopy frame lines that seemed to want to break every half-inch so it took a lot of patience to get them on the model but the end result was worth the effort.
The canopy on the mini-fighter is Tamiya smoked clear tint over the natural-metal finish.
It was time to finish the canopies. One mistake I made was not figuring out what to do with the canopy of the parasite fighter until after I put the decals on – oops! But I carefully added the smoke paint and that did the trick. The clear parts on the mother ship had been messed up by my youthful ineptitude in being conservative with tube glue putting them in place. Removing them and polishing did not help so after I put them on I simply smoked them with Tamiya smoke paint in a few coats and then put Future over them which revived them.
Dick's efforts to salvage the canopies eventually resulted in a smoke-tint finish over clear plastic fogged by tube glue over a half-century ago. The actual aircraft would have had heavy glass with a high lead-content anyway for radiation shielding purposes. Dem Brudders What-Does-It-Have-To-Do-With-Modeling Crazy Hotbox Trivia: Did you know that a high-radiation hotbox with remote manipulator-arms must use very high-intensity lighting? There is a lot of light loss through a foot and a half of leaded glass and it's hard to see what you're doing without good lighting since you can't get very close anyway.
I put some red stripes on the atomic engines which unfortunately resulted in a smear on one of them after I slid them and glued them to the wing extensions. Brudder Bill suggested I add a tone of different silver in that area on both sides which worked out great until I broke the port one off. I was left with a butt joint to hold the engine cylinder to the wing which did not look good. So I decided to mask the chrome with parafilm and post-it-notes along with the wings. I then painted the attachment areas to match the wings and after very carefully removing the masking materials the end result looked better than before with no seam.
|
I had been tempted to replace the clear plastic orange flames at the ends of the atomic engines and spent some time cleaning up mold marks on the neon-orange plastic and dipping them in Future. Even though I had them looking pretty good, I decided to leave them off since they detracted from what I thought turned out to be an interesting and even attractive model. With no actual combustion going on, there wouldn't be orange flames coming out of those engines, anyway.
Speaking of clear plastic, the Clear Minicraft Stand worked great as far as providing a stable base for the model. I decided to add some decals to the circular base, so I scanned the box art from the version I built in 1966, the Hawk Model Company logo and the Convair logo to give them credit for at least thinking about building a prototype nuclear powered bomber. I sealed the clear base with Alclad clear gloss and cut the stand to a preferred length. This is a nice benefit Minicraft has allowed for flexibility, especially for modelers like me who want to fit the model into a display case with shelves. I completed the easy assembly of the stand, and put the model on it for the final step! |
(Imagine a great caption you'd like to see here. We're still working on this article.)
|
It was great to resurrect a rare kit like Beta One. I wonder how many of these models still exist. I wanted to build my model to modern assembly standards and hope I passed the audition!
Note Dick's custom-made markings.
As a postscript, Beta 1 did pass the audition with FineScale Modeler magazine. For you subscribers, look on page 8-9 in the “Scale Talk” section. You will see a brief description of how I resurrected Beta 1 along with some small pictures before and after restoration.
|
|
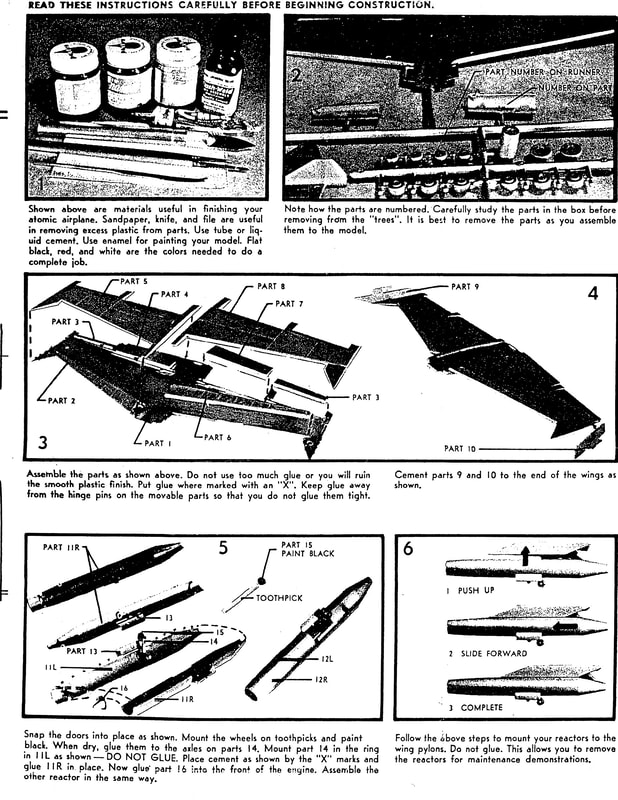
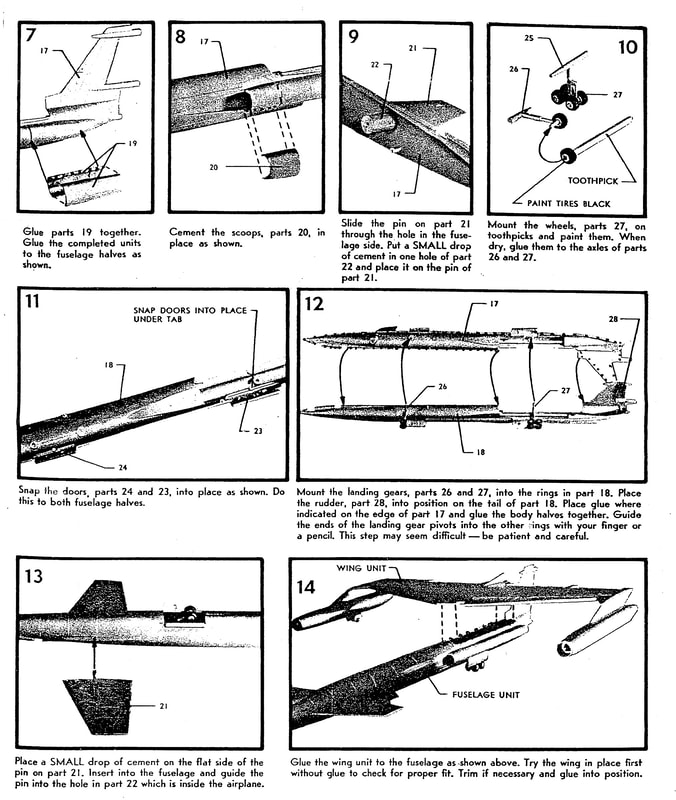
The first page of the instructions provides technical information about the atomic engine. Page 2 builds the wing and engines.
|
|
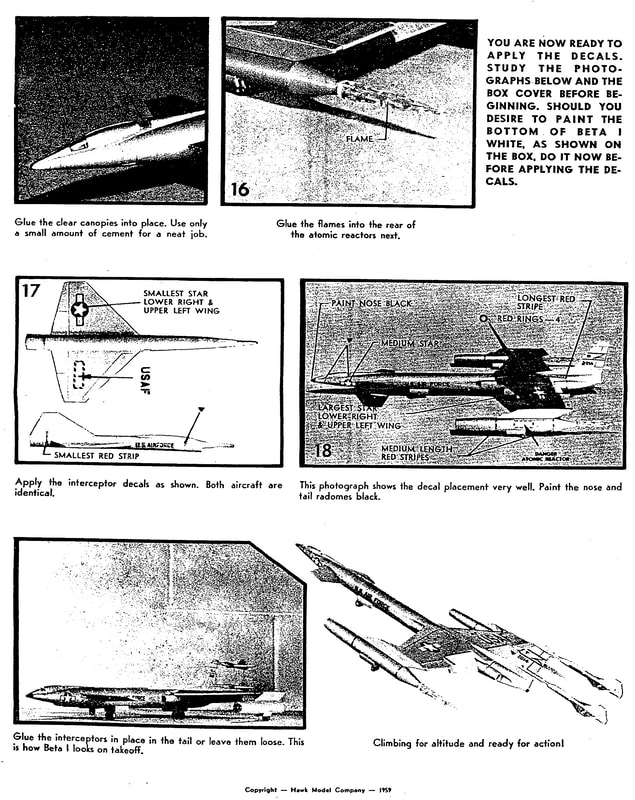
Pages 3 and 4 explain fuselage assembly and decal placement. Hawk's instructions were very nicely done!
|
SPONSOR LINK
|
We wish we had a link for you to shop for a re-release of the Hawk Beta-I Atomic Powered Bomber. Perhaps some day, we'll be able to present you with an Amazon sponsor link to a kit you can buy. For now, here's an Amazon sponsor link with more information about Bill Campbell's very cool A Weird-Oh World: The Art of Bill Campbell. In addition to his famous Weird-Ohs, the book features other Hawk products including mention of the Beta-I Atomic Bomber.
|
FANTASTIC PLASTIC'S BETA-ONE
|
|
|
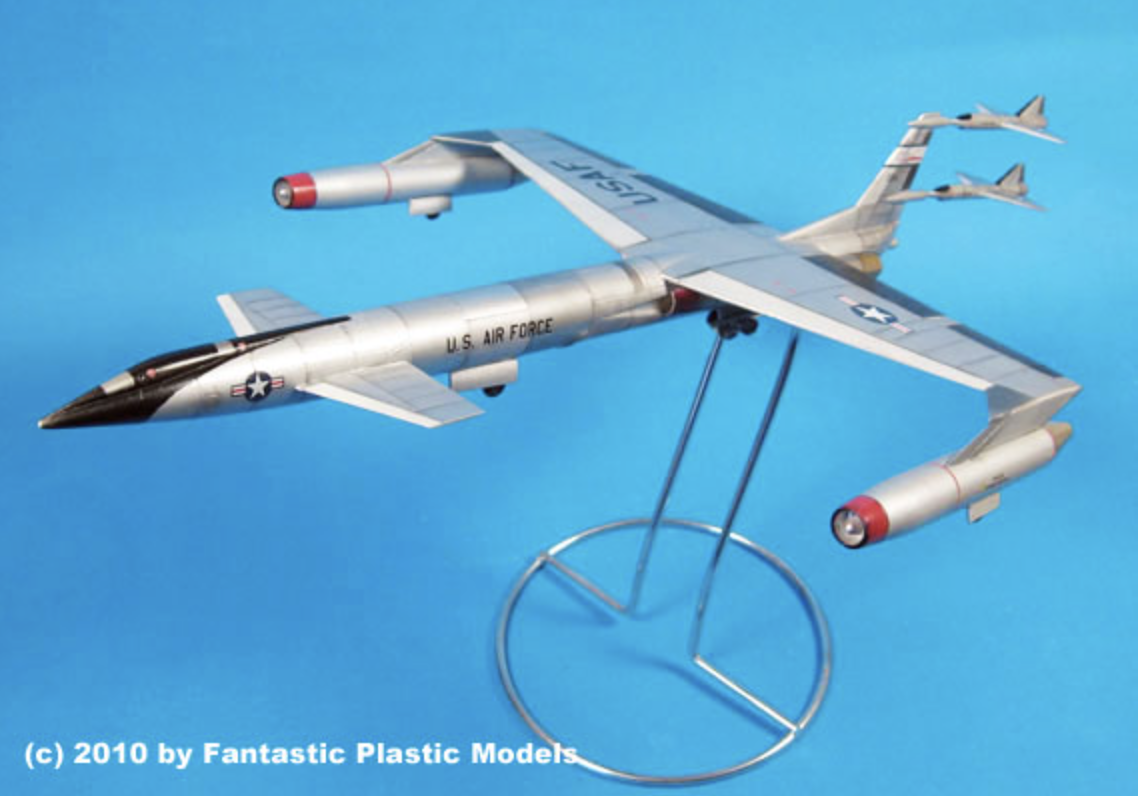
Who knows if we'll ever see Beta-One in styrene again. But Fantastic Plastic created a 1/144 version (17 inches long!) in resin in 2010. Unfortunately, it's sold out.
We love Fantastic Plastic's website and have for years. If you haven't seen Allen Ury's Virtual Museum of Flying Wonders, check it out here. Fantastic Plastic is also a prominent resin kit manufacturer. If you've ever thought to yourself, "I wish they'd make a model of...", chances are, Fantastic Plastic either has it in resin or has done it. Fantastic Plastic released their own Beta-One kit in resin back in 2010. Listed scale was 1/144. This means it was a pretty big model at 17" in length! Unfortunately, for those of you who want a model of Beta-One, it has been discontinued. But you never know when they might want to try a re-release; they'll do so if there is sufficient demand. Allen still has it on his website in the Retired Kits section. Thanks to Ben Ballengee for mentioning this!
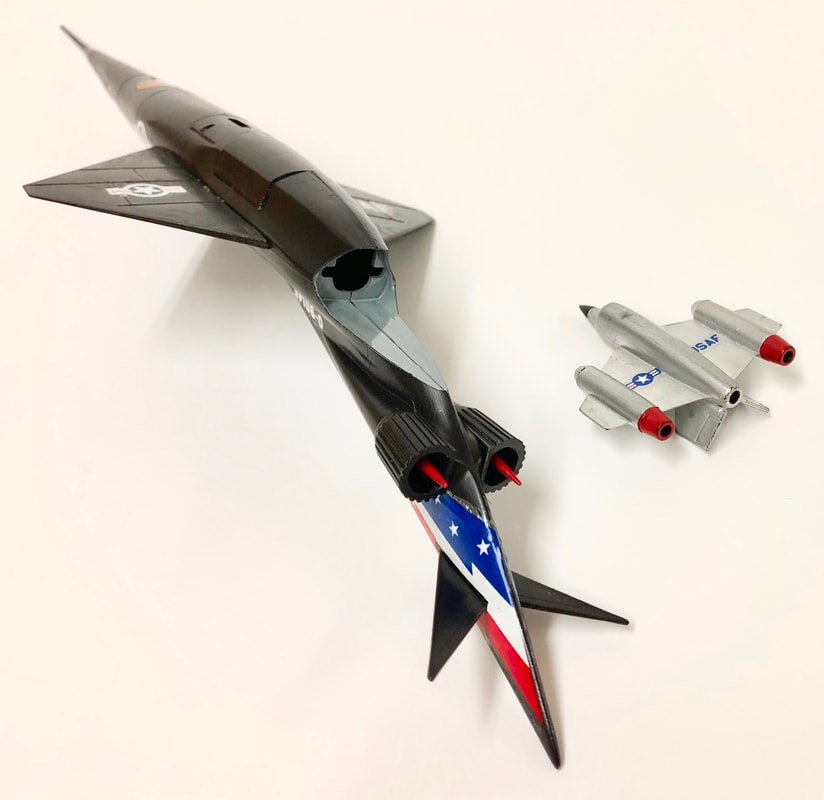
Later on in the article, we have pictures of Mike Turco's Fantastic Plastic NX-2 Atomic Bomber, also built from the Fantastic Plastic kit.
Later on in the article, we have pictures of Mike Turco's Fantastic Plastic NX-2 Atomic Bomber, also built from the Fantastic Plastic kit.
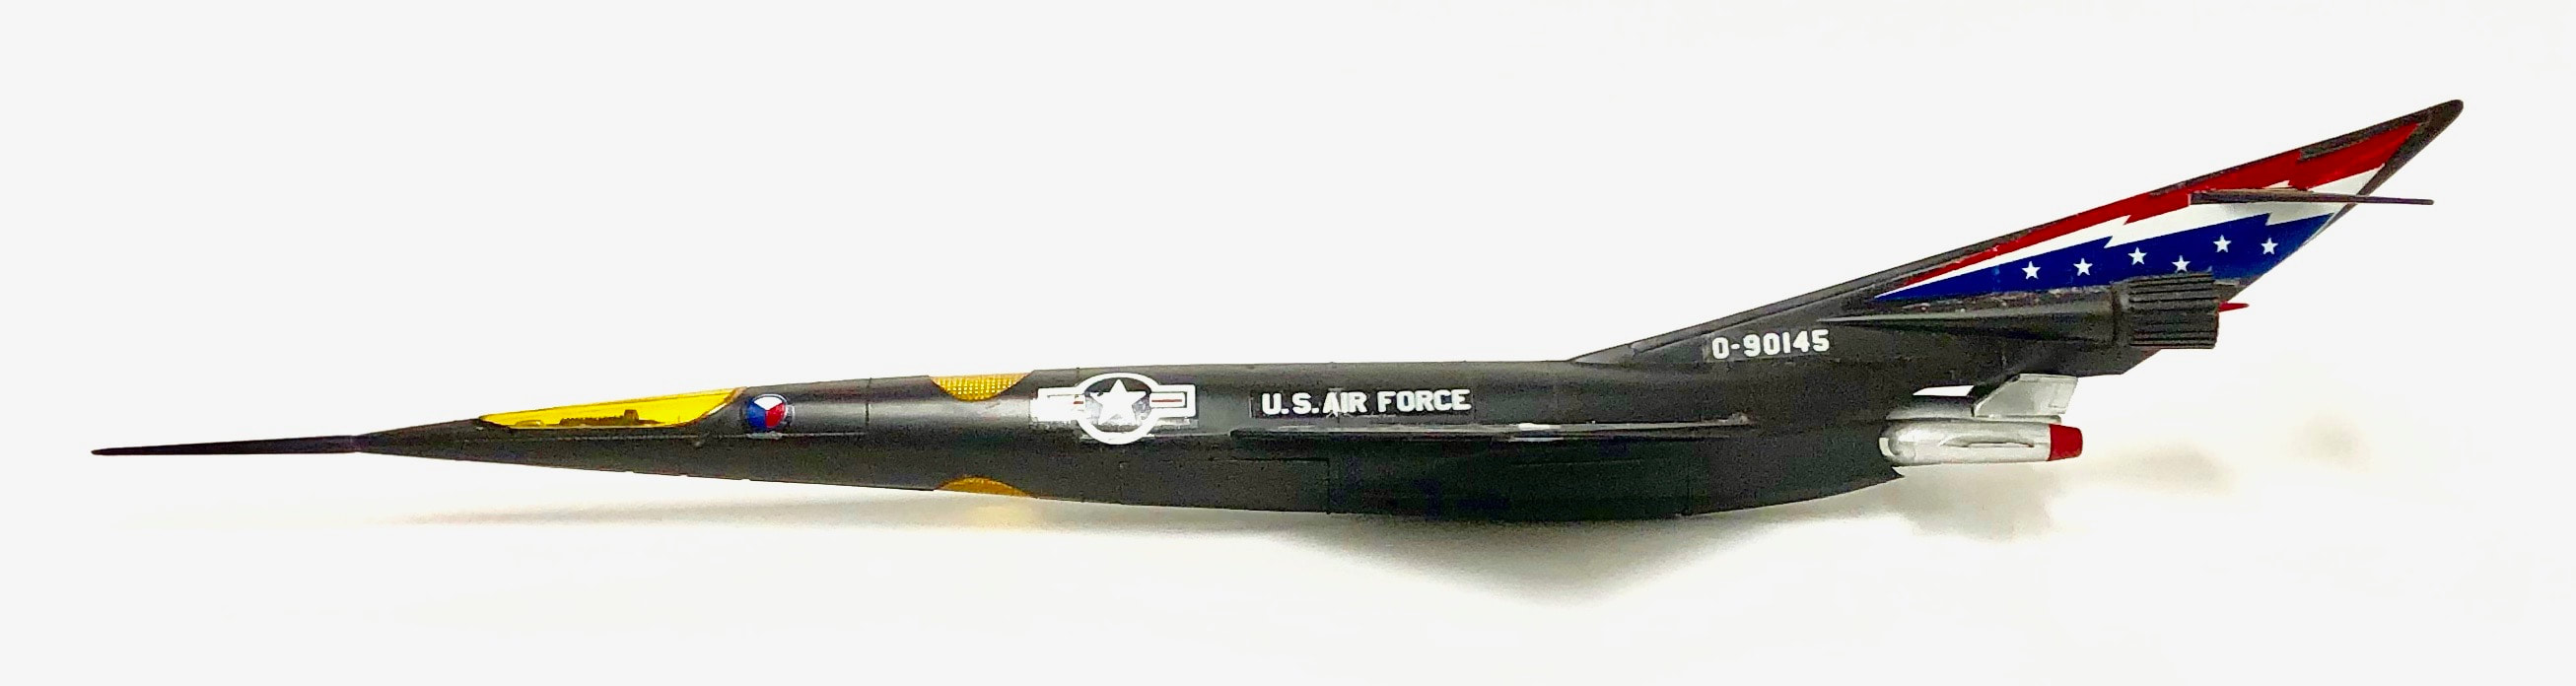
BONUS MATERIAL: Dick's Unrestored Ragnarok Orbital Interceptor
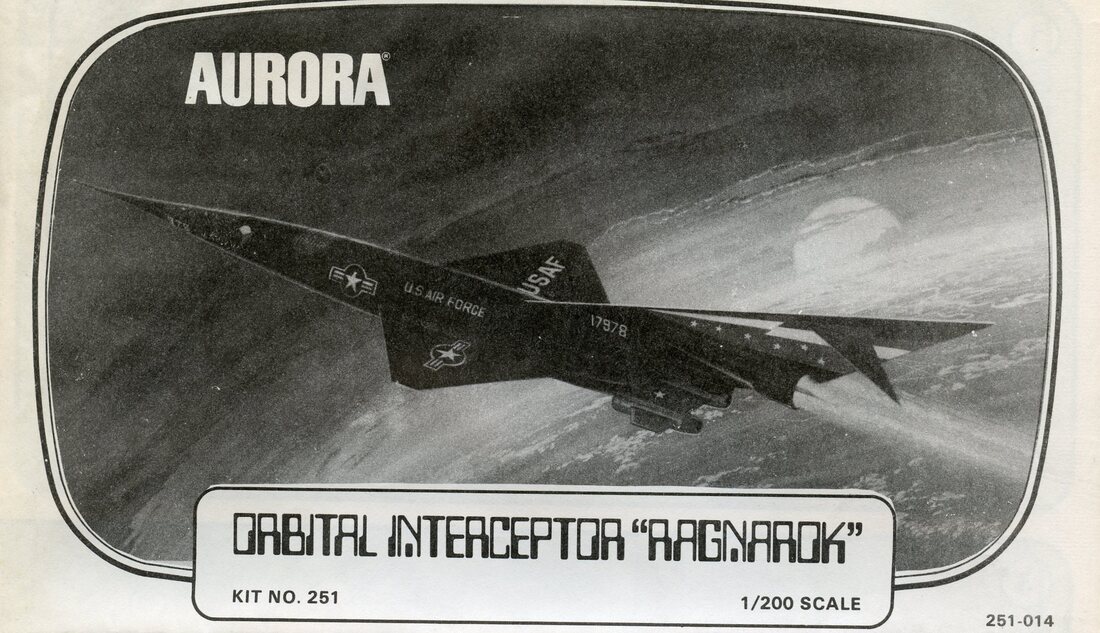
The Ragnarok Orbital Interceptor is another hypothetical aircraft/spacecraft kit, this time from Aurora Models. Unlike the Beta-I, Ragnarok had much more fanciful capabilities.
VALENTINES DAY 1978: THE HOLIDAY OF EXPECTATIONS UNMET
BY DICK ENGAR
In 1978, I experienced my first Valentines Day after getting married the summer before. I got my wife a decent card, but for a present, I bought something practical that we needed--bread pans. While I was at it, I saw the Aurora Ragnarok model in the variety store and thought it would be a fun gag gift with a comment to go with it: “This is like a love arrow to your heart!”
Well, the unromantic bread pans went over like a lead balloon. And the model made things even worse:
“Oh you thought you’d make me happy by buying a model for yourself??” she said.
Oh well; I went ahead and built it out-of-the-box with minimal painting and it is preserved, now in my museum, to this day!
And, we're still married.
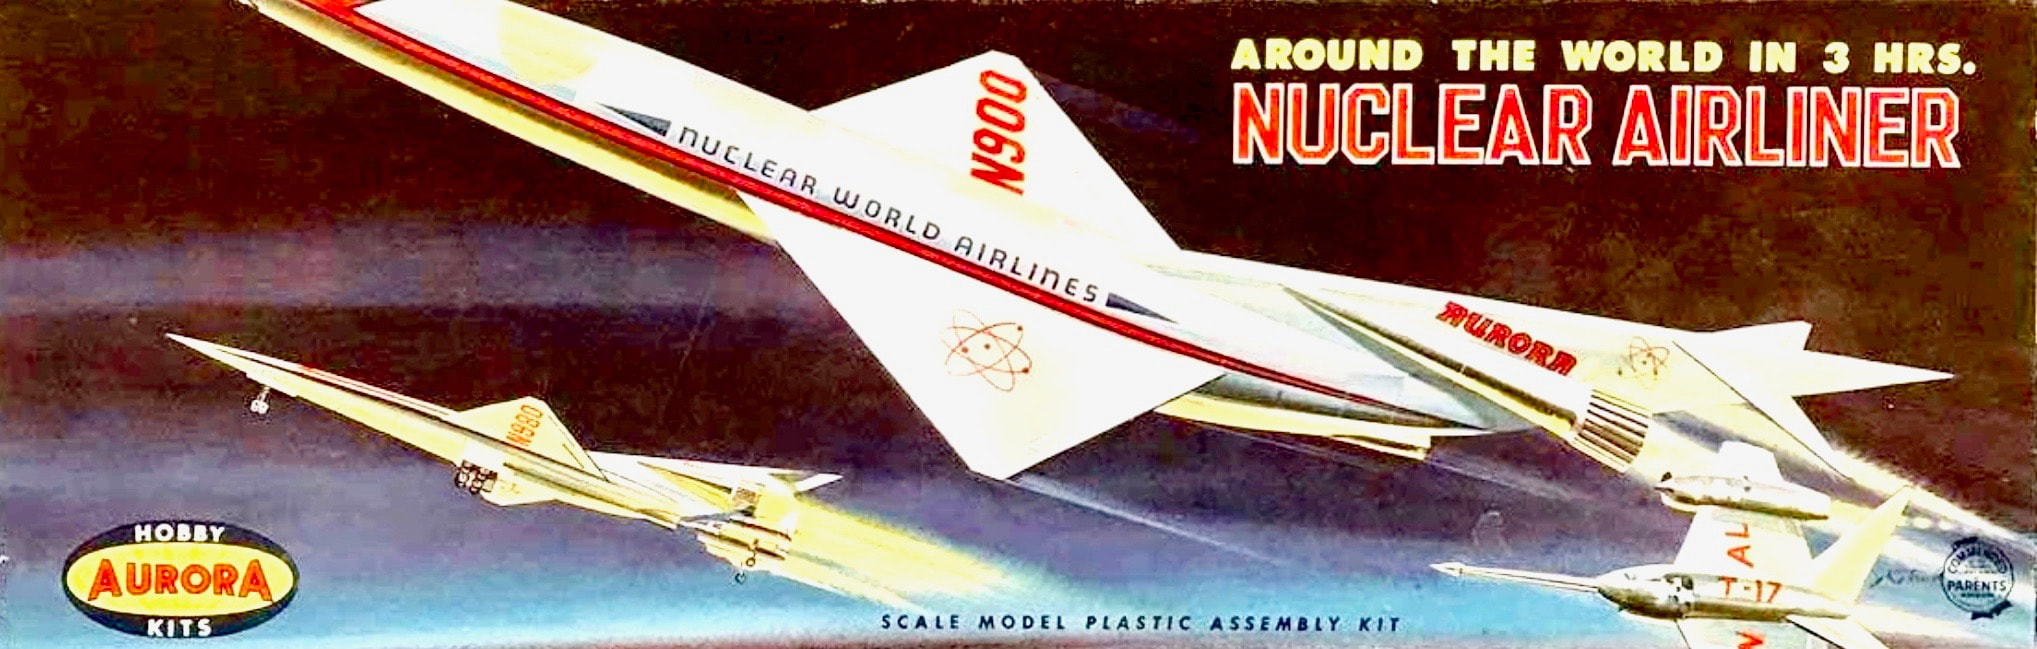
The model appeared as the Nuclear Airliner in 1959. Wouldn't you like to travel around the world in a nuclear airliner?
From the Aurora Ragnarok Instructions (1975 Issue):
"'Ragnarok,' the Scandinavian god of war, is said to be one of the most awesome figures in Scandinavian Folklore.
The orbital interceptor 'Ragnarok' has been developed to protect the earth from any hostile alien invasion. Powered by two atomic engines, the interceptor is 255 feet long and weights over 330 tons. To get this tremendous craft to its cruising altitude of 200,000 feet takes about eight minutes. After entering the stratosphere, the interceptor will level off and cruise at about 8,000 m.p.h. At this pace, it will circle the earth in about three hours.
The interceptor is completely shielded by a special alloy for protection from harmful rays and to withstand the severe cold of space and the tremendous heat generated by re-entry."
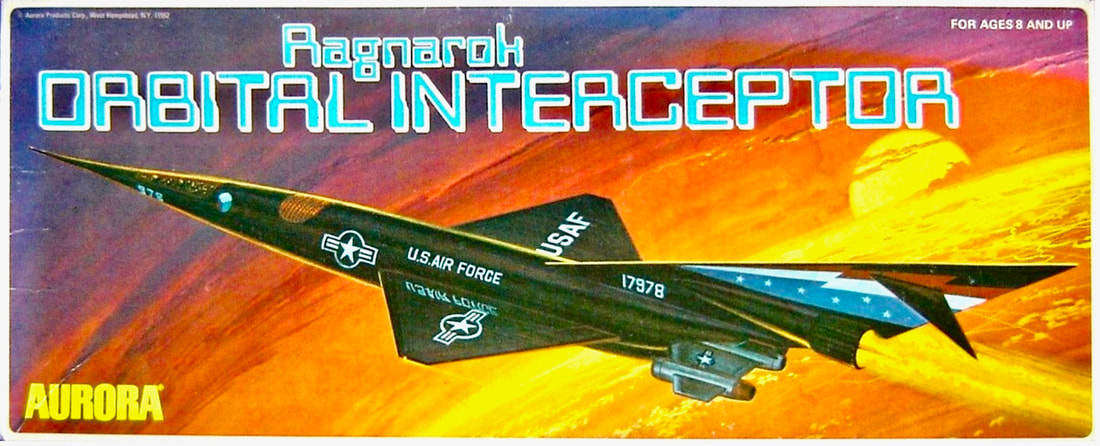
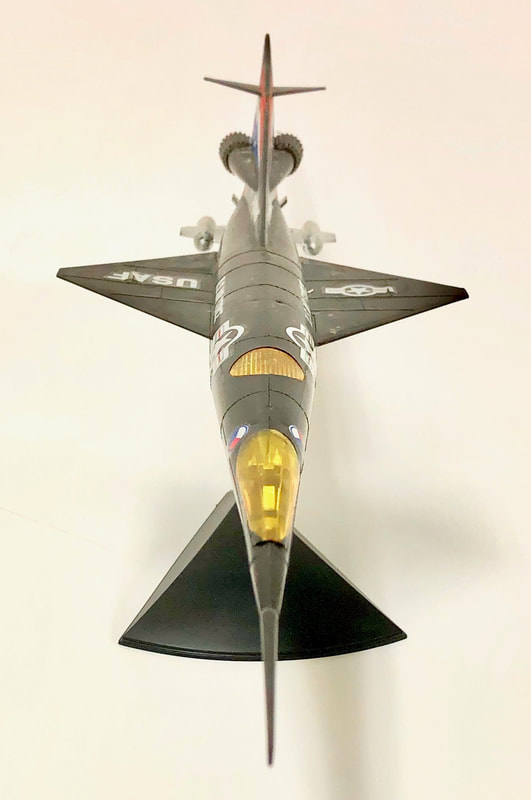
Dick's model was built from this 1975 re-release. Circa 1978, when Dick built it, he was a grad-student and didn't have much time to go anywhere beyond a quick out-of-box build retaining the overall natural plastic finish with a few hand-brushed embellishments.

|
|
That's the original Aurora stand. Note the wing shape - it's quite a bit like the YF-23, a second-generation Stealth Fighter demonstrator that first flew in 1990.
Aurora Ragnarok instructions 1975
"Power for the interceptor comes from two incredible atomic engines that develop 1,000,000 pounds of thrust each and are powered by a nuclear reactor located directly under the trailing edge of the wing, The Uranium-powered reactor superheats a metal alloy which then heats water into super-heated steam and, under controlled release, gives the tremendous thrust. the metal alloy then returns to the reactor for reheating."
|
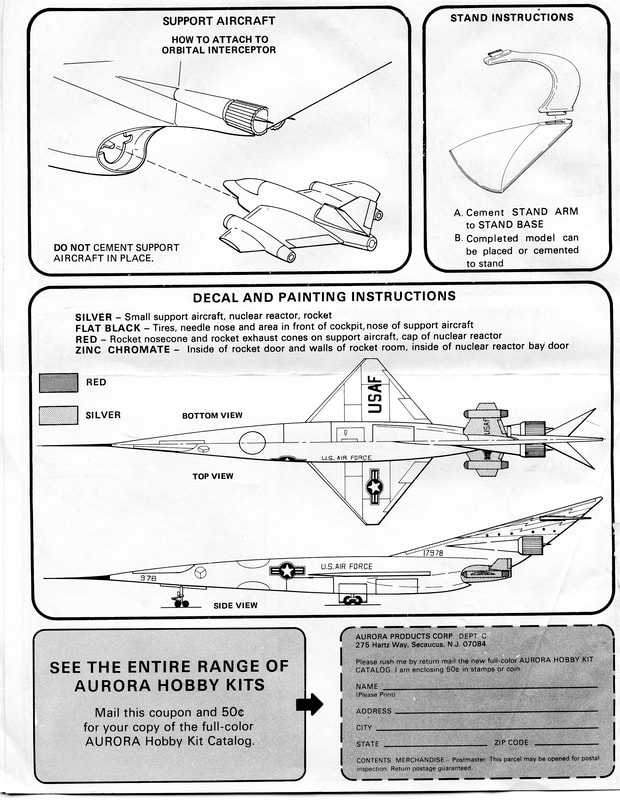
Decal and painting instructions for Ragnarok
|
"The interceptor is manned by a crew of 12 consisting of a piliot, co-pilot, three flight engineers, radio man, navigator, two in-flight technicians, two nuclear weapons experts and a support-craft pilot.
Armament for interception and protection from alien craft consists of five nuclear device rockets. These rockets are stored within the fuselage and are launched by means of opening the rocket-bay door from the sealed chamber."
Armament for interception and protection from alien craft consists of five nuclear device rockets. These rockets are stored within the fuselage and are launched by means of opening the rocket-bay door from the sealed chamber."

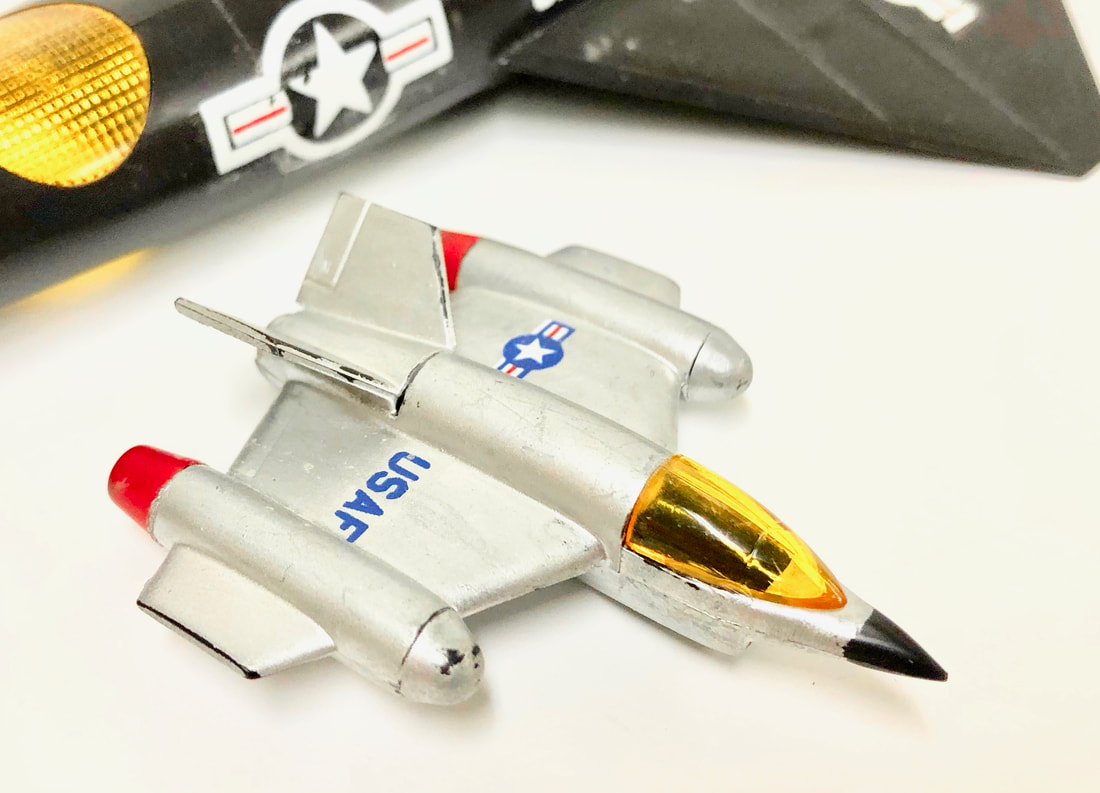
From the side, Aurora's fanciful flyer has lines somewhat similar to the hypersonic X-15. Note that like Beta-I, Ragnarok has a parasite fighter that resides in a semi-recessed rear bay.
Another form of protection is the small support craft housed in the tail of the interceptor. This craft is armed with multiple laser weapons capable of penetrating two feet of solid steel. The support craft can fly attack speeds of up to 30,000 m.p.h for limited time.
The cost for the interceptor has been staggering -- approximately 100-million dollars (many times that in experimental costs) -- but the nuclear interceptor is on patrol in space ready to repel any alien attack."
The cost for the interceptor has been staggering -- approximately 100-million dollars (many times that in experimental costs) -- but the nuclear interceptor is on patrol in space ready to repel any alien attack."
|
|
Here are a couple views of the "support craft" that attaches to the back of the Ragnarok. It flies at 30,000 miles per hour. Exactly how this is accomplished is not explained.

|
|
At right, you can see a "bottoms-up" view of both craft including a nice view of the fighter bay.

|
|
The underside of both aircraft from another angle and a view with the fighter docked with its mothership.
BONUS-BONUS FEATURE: THE ATOMIC BOMBER -- THE PLANE THAT ALMOST WAS
By Bill Engar
Many longtime modelers will remember the 1986 release of Testors’ F-19. Stealth was in the news at that time even if the F-117A was still a deep secret. For modelers, the most memorable part of that era is a very cool hypothetical aircraft kit. Rewinding twenty years, modelers had Hawk’s Beta-I XAB-1. The end of the story for the F-19 was that just over two years after the kit debuted, the real F-117A stealth aircraft was revealed by the U.S. Air Force. Even though the model was fictional, there was an actual aircraft upon which it was based.
Many longtime modelers will remember the 1986 release of Testors’ F-19. Stealth was in the news at that time even if the F-117A was still a deep secret. For modelers, the most memorable part of that era is a very cool hypothetical aircraft kit. Rewinding twenty years, modelers had Hawk’s Beta-I XAB-1. The end of the story for the F-19 was that just over two years after the kit debuted, the real F-117A stealth aircraft was revealed by the U.S. Air Force. Even though the model was fictional, there was an actual aircraft upon which it was based.
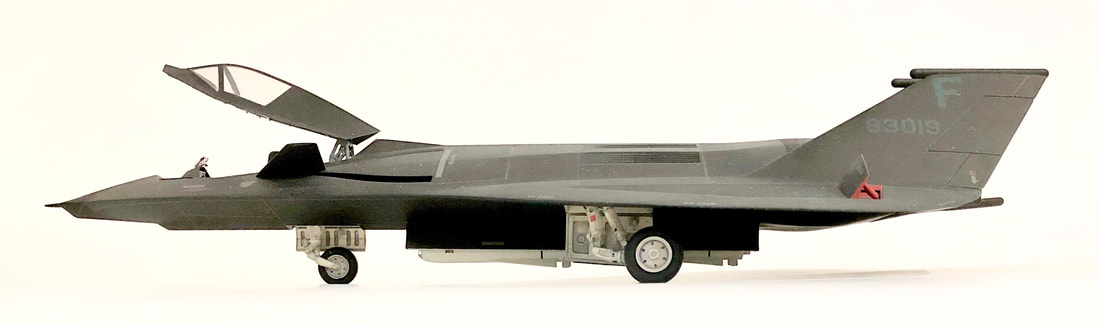
The Testors F-19 was the hottest model kit in the late 1980's. John Andrews, who created this kit and a few other very interesting hypothetical models, also worked for Hawk Models, creator of the Hawk Beta-I.
What about the Beta-I? Was there an actual airplane? Did this design exist in more places than on paper? Unless you can count Convair’s NB-36H, the answer is no. However, there are some interesting artifacts left over from the cancelled “Atomic Bomber” or more correctly, Nuclear Powered Aircraft Project
At the conclusion of WWII, the general public was introduced to atomic fission technology. Of course, it was wartime weapons in the form of atomic bombs where that first association happened, and the expression “peaceful use of nuclear energy” was the next idea promoted by scientists.
At the conclusion of WWII, the general public was introduced to atomic fission technology. Of course, it was wartime weapons in the form of atomic bombs where that first association happened, and the expression “peaceful use of nuclear energy” was the next idea promoted by scientists.
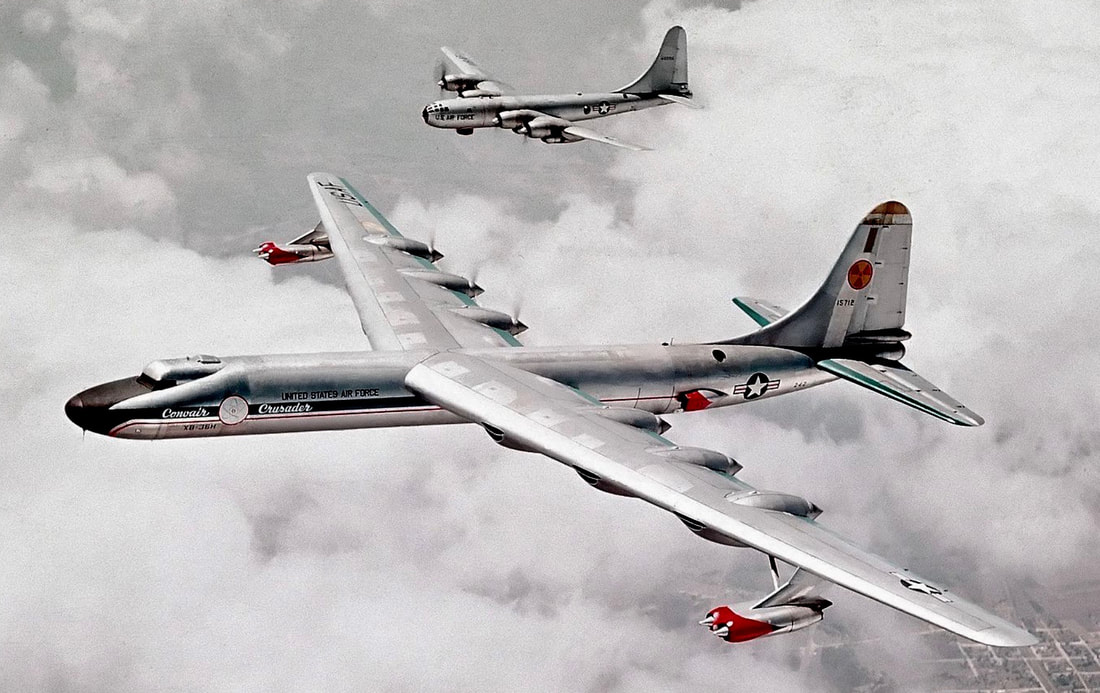
The XB-36H was the closest we got to a flying aircraft powered by a nuclear reactor. An operating 1 MW nuclear reactor was hung in the bomb bay of this aircraft and many flights were made. However, none of the power generated actually propelled the craft. The aircraft for this project was originally damaged by a tornado that ripped across Carswell AFB on September 1, 1952. In minutes, 2/3 of SAC's B-36 fleet was disabled. One aircraft was repurposed for the ANP (Aircraft Nuclear Propulsion) research program. With a new cockpit to protect the crew and many other modifications, this aircraft eventually made 89 flights with the reactor actually running.
Nuclear technology was quickly explored for generating electricity with a power output expected to be “too cheap to meter.” The Nautilus, the world’s first nuclear submarine, first sailed under nuclear power in 1955. Nuclear powered surface ships followed in the 1960’s. Naturally, the advantages of nuclear power in aircraft applications had to be researched and Project NEPA (Nuclear Energy for the Propulsion of Aircraft) began in 1946. The USAAF (U.S. Army Air Force) initiated this program nearly a year and a half (mid-1946) before becoming reorganized as the USAF.
|
Many technological challenges had to be addressed with crew safety and accident mitigation just two major concerns. Once under operation, a fission reactor becomes extremely radioactive and heavy shielding is required to protect anyone in its proximity even after it has been shut down. Taking this dead-weight shielding airborne increases the size of an airframe, which creates the need for more power, and even more shielding. To protect people on the ground, it was reasoned that the aircraft would only overfly sparsely populated areas.
Research facilities such as Los Alamos, Oak Ridge, and Hanford are well known for their early role in atomic fission research and materials processing. INL, the Idaho National Laboratory, is perhaps less known but nonetheless has done significant research work in nuclear science including the first test reactor for generating electricity for commercial and consumer use. The reactor design from the first nuclear powered submarine, the Nautilus (SSN 571) was tested in a large water tank at INL. Check out our article on the Nautilus model kits if you haven't already seen it. |

A mockup propulsion section of the Nautilus "sails" in the middle of the Idaho desert. About 40,000 U.S. Navy submariners trained to operate submarine nuclear reactors in the Naval Reactor Facility (NRF) at INL until 1995.
|
VISIT IT: EBR-1 AND THE ATOMIC ENGINES
The first “atomic” electricity was generated at EBR-1 (Experimental Breeder Reactor 1) at the INL in 1951. This facility is open for seasonal tours and is highly recommended. It's located just south of Highway 20 about 50 miles due-west of Idaho Falls, ID. Also onsite are two of the nuclear engines developed as proof-of-concept for the nuclear powered aircraft project.
The first “atomic” electricity was generated at EBR-1 (Experimental Breeder Reactor 1) at the INL in 1951. This facility is open for seasonal tours and is highly recommended. It's located just south of Highway 20 about 50 miles due-west of Idaho Falls, ID. Also onsite are two of the nuclear engines developed as proof-of-concept for the nuclear powered aircraft project.
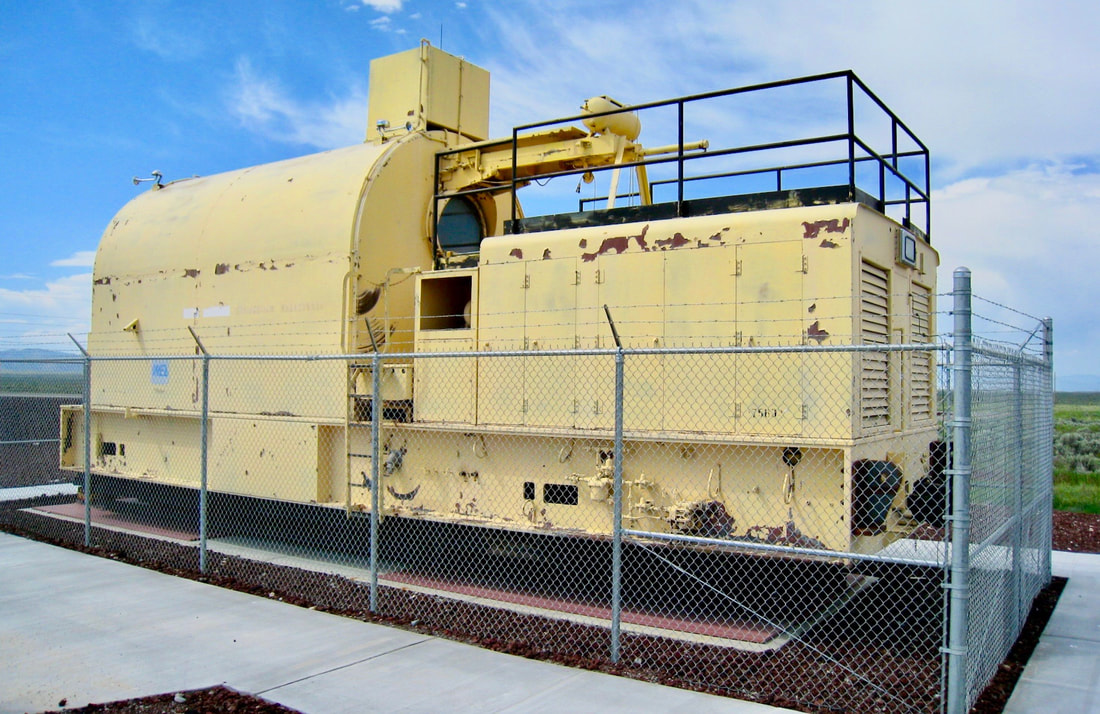
An Atomic Train? This special diesel locomotive was designed to taxi The Atomic Bomber had it been built. It was actually used to move the test engines. The rounded portion at left is the crew cab.
|
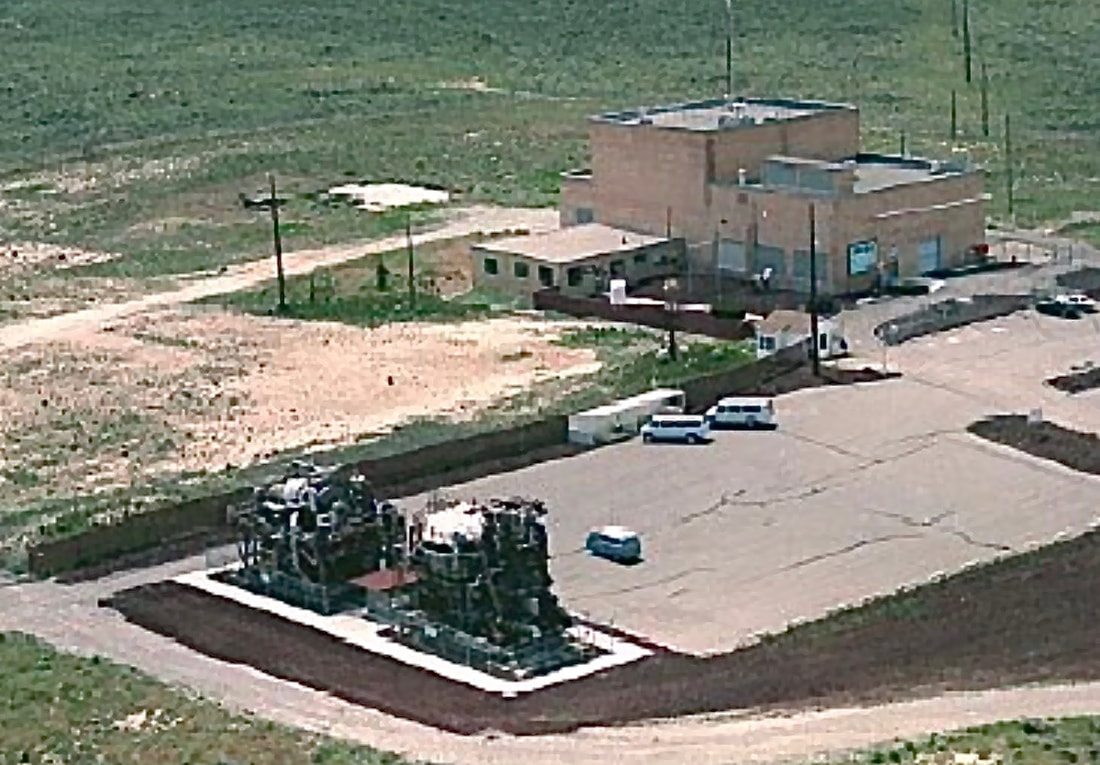
Here's EBR-1 from the air along with the atomic engine prototypes. The locomotive was not in place when this picture was taken. The train was put to the right of the test engines in 2006.
|
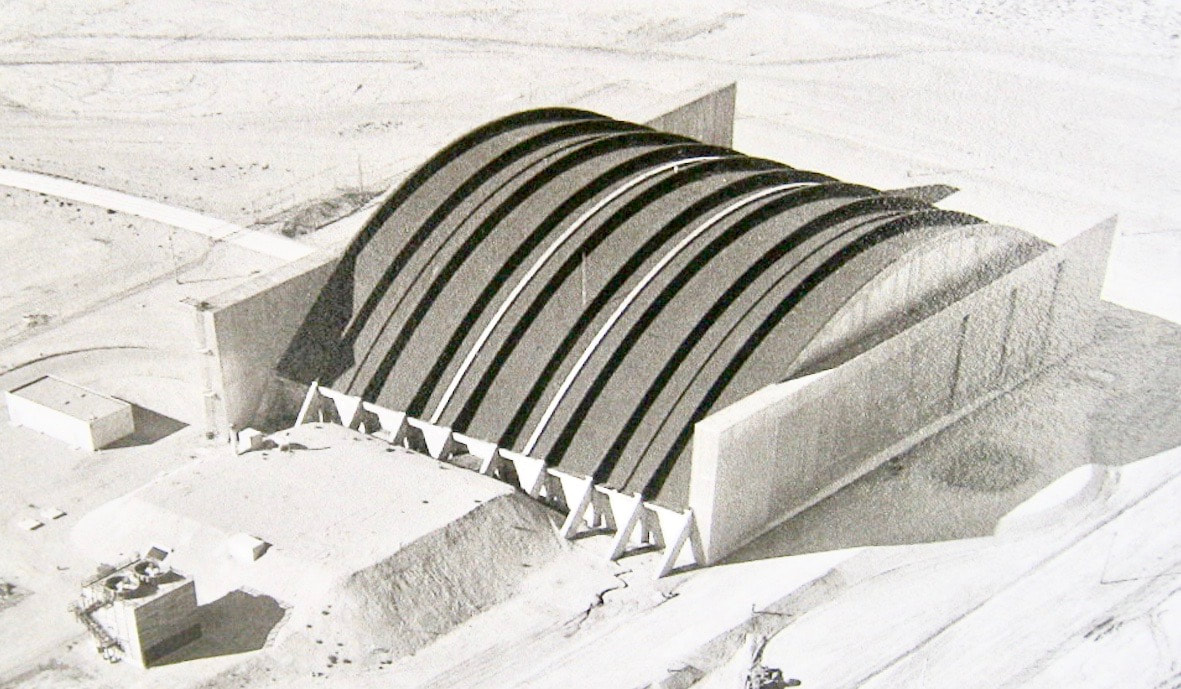
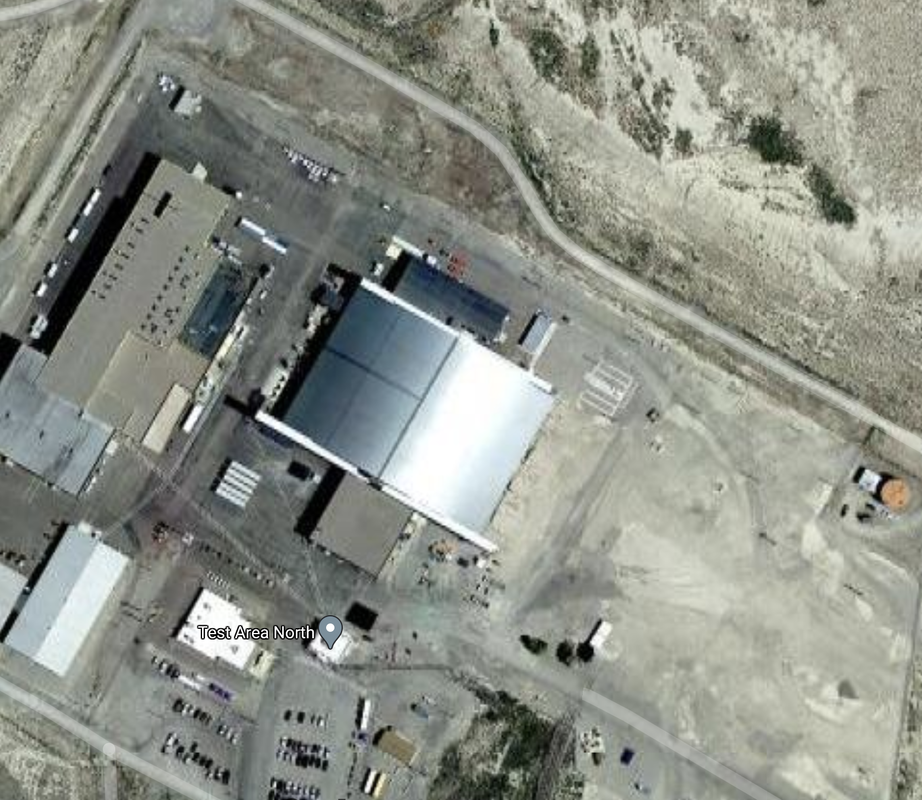
One interesting artifact of the atomic bomber project that you can’t see is Hangar 629 at the Test Area North (TAN) of the Idaho National Laboratory. This huge arch-support structure was finished in 1959. At 320 feet wide and 234 feet long, the width of this aircraft hangar coincides with the wingspan of Howard Hughes' “Spruce Goose” and the length is a few feet more than the classic 747 fuselage. With a maximum height at the top of the arch being 70 feet, this enclosure was designed for a truly massive airplane. While a B-36 would probably have fit inside the hangar, it was not used for the NB-36 project which occurred in New Mexico and Texas.

These "nuclear engines" were known as HTRE (Heat Transfer Reactor Experiments), a mouthful. They were referred to by staff as "Heaters." Heater Two is on the left. Heater Three is on the right. The next step after this program was to have installed a nuclear engine in an actual aircraft. While it might be difficult to imagine Heater Three airborne in any fashion, most of the structure seen was for ground support and a secure mounting to keep the engine firmly secured to the ground during testing.
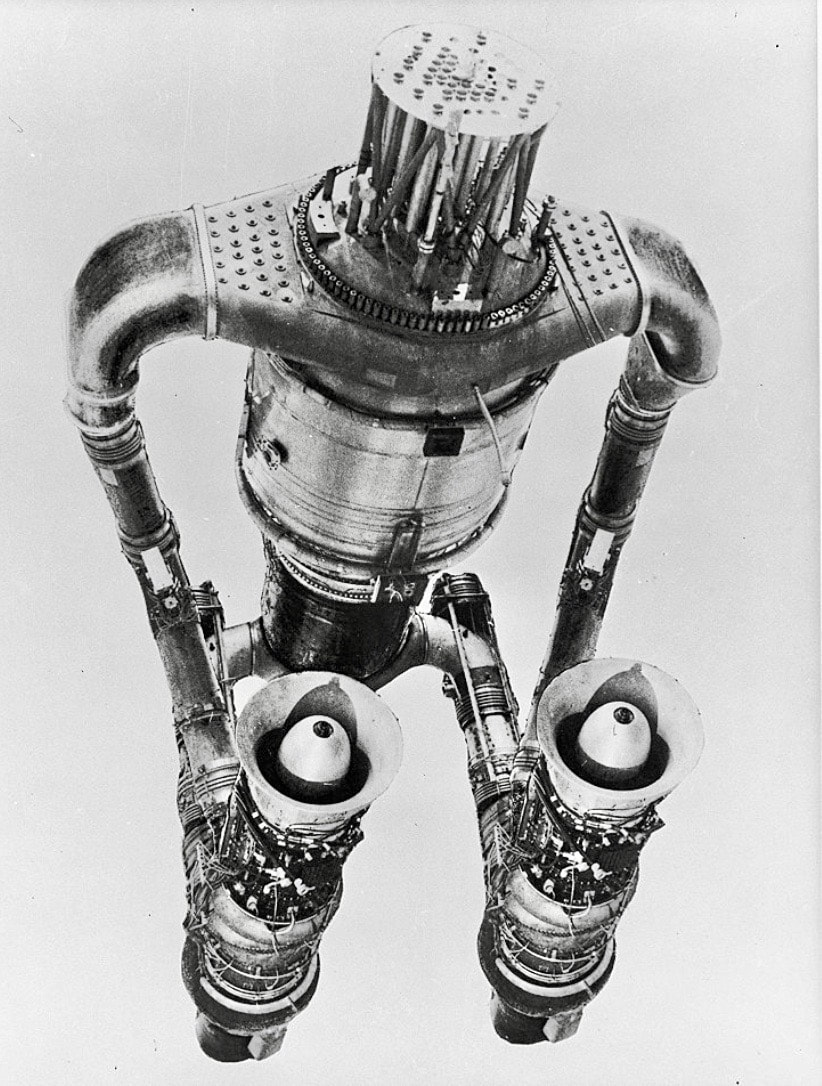
Strip away the support structures of HTRE-3, and this is what you have--an atomic engine ready to install in the aircraft of your choice.
|
An elevator with “extreme reliability” was designed to lower the removable nuclear engine module below floor level in the hangar into a shielded area, and a separate tunnel allowed rapid crew ingress and egress from underground as close to the bomber’s cockpit as possible in order to reduce exposure to powerful ionizing radiation.
The atomic bomber was expected to be moved between runway and hangar on rails using a heavily shielded locomotive, which was also built by GE specifically for the atomic airplane research project. The crew compartment has a circular window at each end giving it a cyclops appearance. A 23,000 foot concrete runway was planned to be built after the hangar was complete. At nearly 4-1/2 miles, this would still be the world's longest fully-paved runway had it been built. Two atomic engines were built and tested, and those can be seen today at the EBR-1 site. |
The NB-36 proved that a nuclear reactor could be operated on board an airplane. A 1-megawatt reactor was suspended on a hook in the bomb bay of a B-36. With enough power to meet the electricity needs of 650 homes, this reactor weighed over 17 tons. However, the ionizing radiation emitted from this reactor required a custom cockpit module to protect the crew that weighed 11 tons. None of the power generated was used for aircraft systems, but the test confirmed that an operating nuclear reactor could really fly!
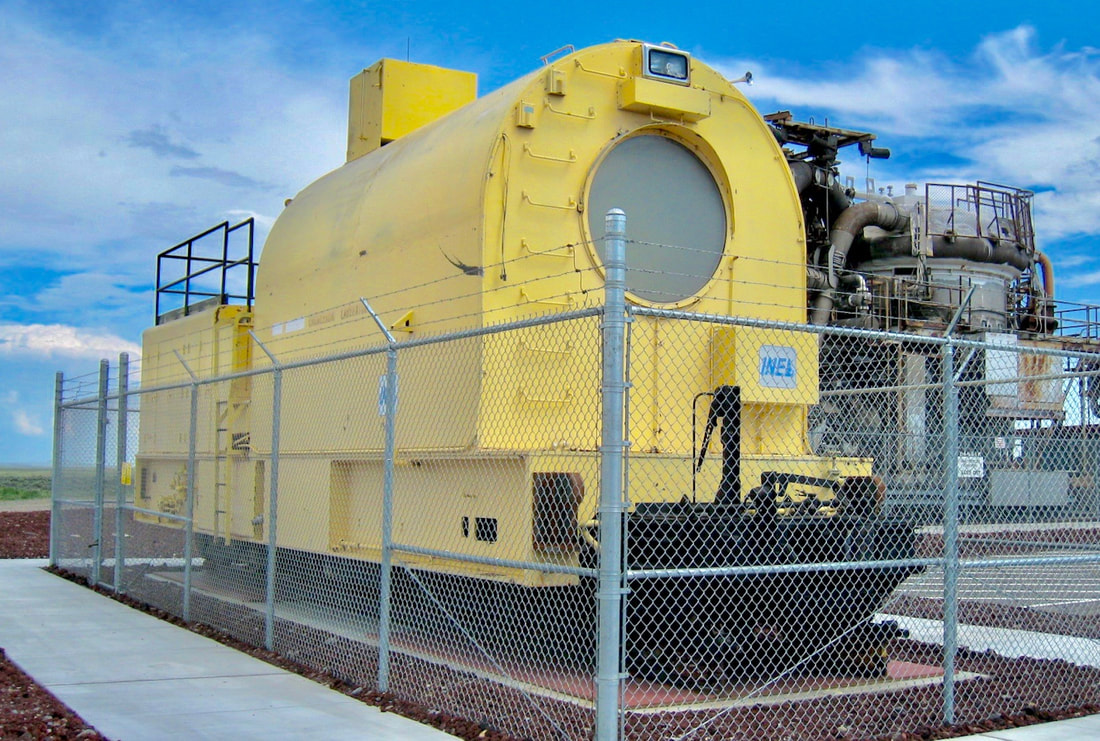
Another view of the GE transfer locomotive with the cyclops-like front viewport for the operator.
|
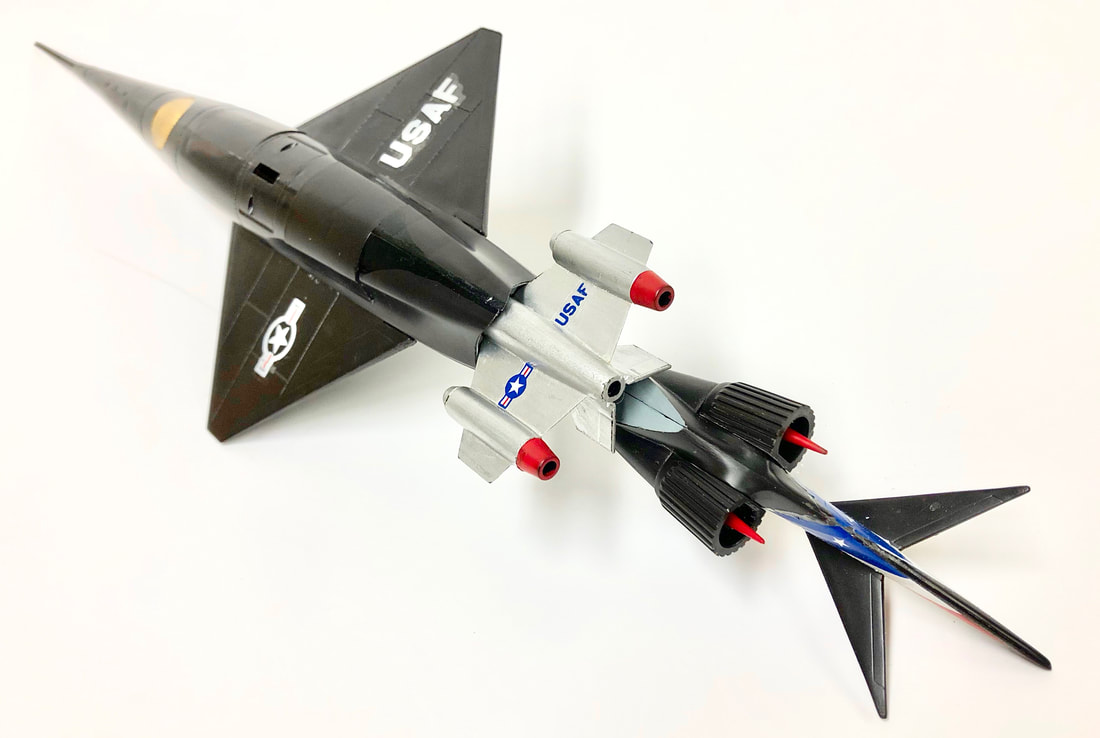
Another atomic-powered Convair concept aircraft, the NX-2. This design would likely have used a single-reactor configuration from HTRE-3 with the reactor buried in the rear fuselage. Conventional engines are in the outrigger pods here.
|
Mike Turco, one of Dem Brudders' pals, built this Convair NX-2. It's a Fantastic Plastic resin kit. Compare it to the drawing above.
In 1961, not long after taking office, President John F. Kennedy terminated the nuclear aircraft program. An incident in 1978 illustrated the problems that would have been encountered if a nuclear aircraft crashed. Kosmos 954, a Soviet spy satellite, malfunctioned in orbit, became uncontrollable, and reentered the atmosphere, crashing in Northern Canada. Over 100 lbs of highly radioactive uranium-235 was spread over a large but thankfully remote area. The Soviet Union only reimbursed the Canadian government about half of the six-million-dollar cleanup cost.
DON'T VISIT IT: HANGAR 629
|
|
Hangar 629 at TAN (Test Area North) under construction (left). The "X-Plane" version of the atomic-powered bomber would be stored here had it not been cancelled on March 28, 1961. Sorry, you can't get up close unless you have official site business. With no airplane to put there, this expensive hangar was used for storage. Note the structures built later that would prevent a large airplane from using this hangar. A leaky roof created headaches for site personnel for decades. Note the contemporary view (right) on Google Maps that shows a recent replacement with new, leak-free aluminum cladding.
Safety concerns and the extreme expenses involved cancelled further development of atomic-powered aircraft after 1961. Advancing ICBM technology as well as in-air refueling technology also contributed to the decision to terminate the program. An atomic bomber just wasn't needed.
While the atomic-powered bomber remains only a paper airplane in reality, it flew in our imaginations and from our bedroom ceilings in the form of the Hawk Beta-I model kit. Hopefully, we’ll see it again on model store shelves.
SCROLL DOWN JUST A BIT TO SEE WHAT ELSE IS NEW HERE AT DEMBRUDDERS.COM! PULL UP A CHAIR AND STAY AWHILE!